
By The Roofing Brief Team | Last reviewed: October 2026
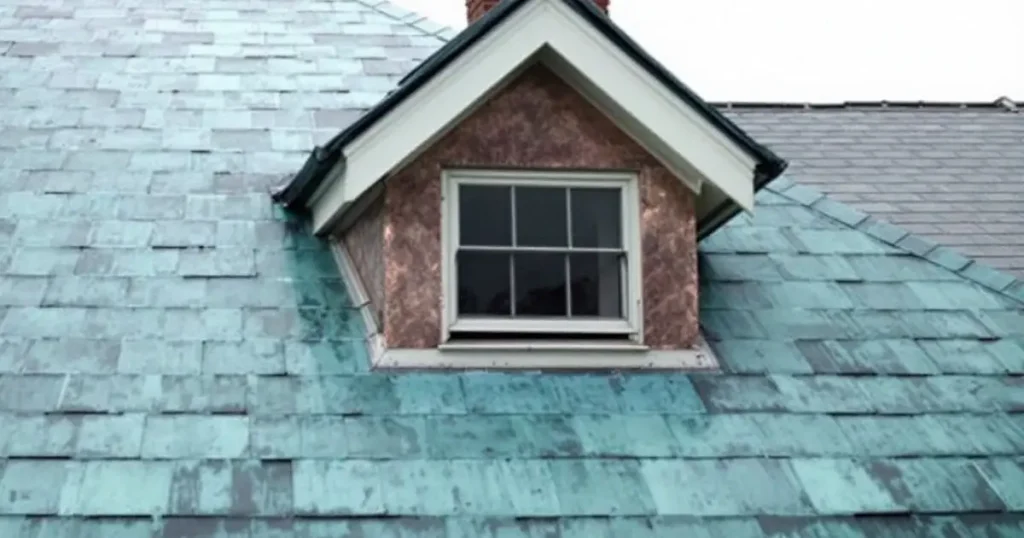
Copper roof repair almost always means soldering, re-cleating or replacing copper, not caulking it. Most leaks on a copper roof trace to a short list of failures: cracked soldered seams, fatigue (“star”) cracks in wide pans, cleats that worked loose, pinholes where acidic runoff lands, and steel or aluminum touching the copper. HomeGuide’s February 2026 guide puts copper roof repair at $13 to $30 per square foot of the area worked, labor and materials included.
This page is about fixing an existing copper roof or copper flashing. For what a new copper roof costs, how long it lasts and how the patina forms, see our copper roofing cost and lifespan guide. Gutter work is covered in our copper gutters guide, and fastener choice in our guide to nails for flashing by metal.
Copper roof repair: key numbers at a glance
These are the figures most people need before they call a contractor or read a repair quote. Each row names its source. Copper is priced as a commodity and labor varies by region, so treat every dollar figure as a dated range, not a bid. The code and handbook figures describe what a correct repair should match.
| Figure | Value | Source |
|---|---|---|
| Copper roof repair cost, labor and materials | $13 to $30 per sq ft of area repaired | HomeGuide, Metal Roof Repair Cost (Feb. 4, 2026) |
| 16 oz copper sheet, retail | About $10.40 per sq ft ($311.99 for a 3 ft x 10 ft sheet) | Gutter Supply product listing, checked Oct. 14, 2026 |
| Minimum copper weight for sheet roofing | 16 oz per sq ft cold-rolled (12 oz high-yield); 12 oz for preformed shingles; ASTM B370 | 2021 and 2024 IRC Table R905.10.3(1) |
| Fasteners on a copper roof | Copper, brass, bronze, copper alloy or 300-series stainless | 2021 and 2024 IRC R905.10.4 |
| Solder | ASTM B32, 50-50 tin-lead or a lead-free alloy of similar or greater strength | CDA Copper in Architecture Design Handbook (A4050-8/24), spec. 14.3 |
| Standing seam cleat spacing | 12 in on center; ridges cleated at 12 in | CDA Handbook, 8.2 and Detail 8.2B |
| Short pan vs long pan | Pans up to 10 ft are short pans; longer pans need expansion cleats; 45 ft limit per pan | CDA Handbook, 8 and 8.8 |
What usually fails on a copper roof
Copper itself rarely wears out. The Copper Development Association (CDA) notes copper roofs that have stayed in place for one or more centuries. What fails is the detailing around the metal: joints that cannot move, cleats that loosen, acidic water concentrated on a small area, and incompatible metals. The National Park Service’s Preservation Brief 4 lists fatigue at joints and galvanic action from steel nails as standard sheet metal failures.
| Failure | What you see | Usual cause | Source |
|---|---|---|---|
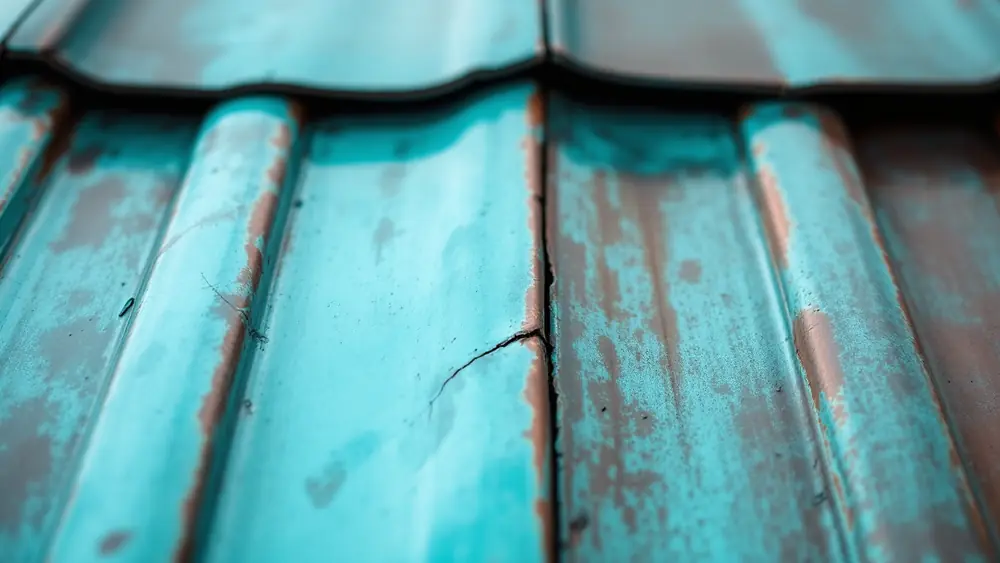
| Cracked or open soldered seam | Hairline crack along a solder bead; leak line on a flat or low-slope seam | Thermal stress concentrated in long, rigid soldered runs | CDA Handbook 1.3 (“continuous, long runs of soldered seams should be avoided to limit stress fractures”); NPS Preservation Brief 4 |
| Star cracks in a pan or bay | Star-shaped cracks where flex lines cross, usually mid-bay | Wind-lift makes wide sheets drum; the copper work-hardens and cracks | Jonathan Goode, “Copper Sheet Roofing,” Building Conservation |
| Loose cleats, lifted seams | Raised or rattling seams, oil-canning, backed-out cleat nails | Cyclical expansion racks fixed cleats and loosens their deck fasteners, especially on pans over 10 ft | CDA Handbook 8.8 |
| Pinholes and thinning in valleys, gutters and flashing | Pitting along a line, thin spots, perforations under a drip edge | Acidic runoff from tile, slate, wood or asphalt roofs (“erosion corrosion”); shingles resting on copper (“line corrosion”); acids from moss, lichen, red cedar or oak | CDA Handbook 1.3; NPS Preservation Brief 4 |
| Corrosion at a fastener or flashing contact | Rust or white corrosion at a nail head, strap or old flashing | Steel, galvanized or aluminum parts in contact with copper or its runoff | CDA Handbook 1.3; IRC R905.10.4; NPS Preservation Brief 4 |
| Buckling and early fatigue across a whole slope | Wavy pans, cracks at pan ends | Copper laid on asphalt felt with no rosin-paper slip sheet, so heat bonds the copper to the deck | CDA Handbook 8, Typical Requirements |
| Punctures and deformed seams | Holes, dents, flattened seams | Falling limbs, ladders, foot traffic | Goode, Building Conservation |
| Old caulk, tar or tape patches | Black mastic or tape over seams that still leak | Earlier stop-gap repairs that hide the real fault | NPS Preservation Brief 4; Goode |
Galvanic damage runs one way. Copper sits near the noble end of the CDA’s nobility table, so a steel nail or aluminum flashing next to copper is the part that corrodes, while the copper survives. That is why a leak from a mismatched fastener usually starts at the fastener. Our guide to nails for flashing has the full metal-by-metal compatibility matrix.
Why copper seams crack and cleats loosen: the movement math
Copper grows about 0.0000098 inch per inch for each degree Fahrenheit, the coefficient the CDA uses. The CDA says a south-facing copper roof in clear, still air can run 75 to 85 degrees above air temperature, and that a roof can swing more than 100 degrees in a single day. A rigid joint has to absorb that movement every day, which is where fatigue starts.
| Pan length between fixed points | Movement at a 100 F swing | Movement at a 150 F swing | What the CDA calls it |
|---|---|---|---|
| 10 ft | 0.12 in | 0.18 in | Short pan; fixed cleats acceptable |
| 20 ft | 0.24 in | 0.35 in | Long pan; expansion cleats |
| 30 ft | 0.35 in | 0.53 in | Long pan; expansion cleats |
| 45 ft | 0.53 in | 0.79 in | CDA limit for an individual pan |
Source: Roofing Brief calculation using the CDA formula (change in length = length in inches x 0.0000098 x temperature change). The CDA says expansion cleats typically allow up to 3/4 inch of total movement. At a 150 degree swing a 45 foot pan already moves about 0.79 inch, which is why the CDA caps pan length there. A repair that solders a long pan solid, or swaps an expansion cleat for a fixed one, rebuilds the original fault. For the same arithmetic across steel, aluminum and zinc, see our metal roof expansion and contraction guide.
How to trace a copper roof leak before anyone repairs it
Find the failed detail before choosing a repair, because the stain inside is often well downslope of the defect. Water can run along a seam or the underlayment before it shows. Goode reports that adhesive repairs on copper church roofs are often applied without understanding the underlying fault, and that they fail early.
- Map the stain from inside. In the attic or ceiling space, find the wet decking and the highest point of the stain. Measure its position from a wall or chimney so you can locate it from outside.
- Check flashing first. Walls, chimneys, dormers, skylights and pipes are where copper meets other materials. NPS Preservation Brief 4 calls flashing failure “usually a major cause of roof deterioration.”
- Look for earlier patches. Black mastic, caulk or tape over a seam marks a known problem area. These usually hide a crack or open lock underneath.
- Inspect seams upslope of the stain. On flat-seam roofs look for cracked solder. On standing seam roofs look for seams that have opened, lifted or lost their cleats.
- Check where other roofs drain onto copper. Valleys, gutters and flashings below tile, slate, wood or asphalt roofs are where the CDA describes erosion and line corrosion. Look for pitting along the drip line.
- Test fasteners and adjacent metal with a magnet. A magnet that sticks reveals a steel or galvanized nail, strap or flashing piece in contact with copper.
- Water-test in sections. Run a hose on one area at a time, starting low and working up, with someone watching inside. Move up only after the lower area stays dry.
Walking on copper can dent pans and flatten seams, and wet copper is slick. If the roof is steep or high, the trace is a job for the repair contractor.
Solder vs sealant: why caulk fails on copper roofs
Solder is the permanent repair for a rigid copper joint. The CDA says soldered seams “should last the life of the copper.” Sealants have a narrow, designed role on copper, and patches glued over patina fail early. The NPS describes caulking and bituminous patching compounds as “potentially harmful,” hard to remove and “at their best, are very temporary.”
| Method | Expected durability | When it is appropriate | Source |
|---|---|---|---|
| Soldered seam or soldered copper patch (ASTM B32 solder) | Permanent; should last the life of the copper | Flat-lock seams, rigid joints, punctures, cracks in sound copper | CDA Handbook 1.3 and spec. 14.3 |
| Copper-compatible sealant in a designed seam (polyurethane, silicone, butyl, polysulfide) | Long-term when built into the seam | Standing and batten seams on slopes under 3 in per ft; joints meant to absorb thermal movement | CDA Handbook 1.3 and 8.1 |
| Acrylic, neoprene or nitrile sealant | Not acceptable | Never; the CDA reports these have been observed to actively corrode copper | CDA Handbook 1.3 |
| Asphalt roof cement, black mastic or self-adhesive tape over patina | Short; the bond breaks down because patina is porous | Emergency only, then removed before a permanent repair | NPS Preservation Brief 4; Goode, Building Conservation |
| Cold-bonded triangular copper patch on cleaned copper, set in acid-curing silicone | Reported to last more than 10 years at one church; not extensively trialled | Historic roofs where hot work is not allowed | Goode, Building Conservation (St Mary’s Church, Boxford) |
The CDA’s flat seam rules show why slope matters. Below 3 inches of rise per foot, flat seams are fully soldered. From 3 to 6 inches, they may be sealed. Above 6 inches, neither solder nor sealant is required in the seam. A sealant “fix” on a low-slope flat seam roof is working against the design.
If you need a stop-gap before the copper crew arrives
A tarp, or a bead of a copper-compatible sealant such as silicone, polyurethane or butyl, can buy time on an active leak. Skip asphalt roof cement and any acrylic, neoprene or nitrile product. Tell the contractor exactly what you applied, because every trace has to be removed down to bright metal before solder will bond.
How copper roof repair works, failure by failure
Match the repair to the failure. A soldered patch fixes a puncture in sound copper, but it will not hold on a pan that cracks because it flexes or because it is bonded to the deck. Use this table as the “if you see X, the right repair is Y” check against any quote.
| If you see | The right repair | Avoid | Source |
|---|---|---|---|
| Cracked or open flat-lock seam on a low slope | Open or clean the seam to bright metal, flux, pre-tin, dress the lock down and sweat it full of solder; neutralize the flux | Caulk or tape over the crack | CDA Handbook 8.5 and spec. 14.3 |
| Small puncture in otherwise sound copper | Soldered patch of the same copper weight, cut larger than the hole on all sides | Adhesive patches over patina | CDA spec. 14.3; Goode |
| Star cracks in a wide bay | Replace the bay; consider narrower sheets so the copper flexes less under wind | Patching the crack and leaving the bay width unchanged | Goode, Building Conservation; CDA Table 8.2A |
| Lifted standing seam or loose cleats | Open the seam, anneal hardened copper if needed, add 16 oz copper cleats at 12 in on center with two compatible nails or screws, re-lock | Steel screws through the pan | CDA Handbook 7.1A and 8.2; Goode |
| Loose cleats on pans longer than 10 ft | Replace fixed cleats with expansion cleats; keep fixed cleats at pan midpoints only | Adding more fixed cleats | CDA Handbook 8.8 |
| Pinholes in a valley or gutter below a shingle, tile or slate roof | Replace the thinned copper; raise the shingle edge with a cant strip or add a replaceable reinforcing strip | Patching pinholes and leaving the drip line as is | CDA Handbook 1.3 |
| Steel, galvanized or aluminum nails, straps or flashing touching copper | Replace with copper, brass, bronze or 300-series stainless; isolate any contact that cannot be removed | Coating over the corroding part | IRC R905.10.4; CDA Handbook 1.3 and 7.1 |
| Buckled, fatigued pans bonded to the felt | Re-lay the area over 30 lb felt with a rosin-sized building paper slip sheet | Re-soldering cracks in pans that cannot move | CDA Handbook 8, Typical Requirements |
| Wind-lifted ridge | Re-secure the ridge cap with cleats at 12 in on center | Face-nailing through the cap | CDA Detail 8.2B; CDA 1.4 (avoid puncturing the copper) |
Built-in copper gutter linings fail the same way as roof pans, at cracked solder joints and pinholes. Our box gutter guide covers relining options when the lining is too far gone to solder.
Step by step: how a soldered seam or patch repair is done
A soldered copper repair is clean metal, flux, pre-tinning, heat and neutralizing, in that order. The steps below follow the CDA specification and handbook, the published repair write-up of DM Crookshanks Construction (a Cleveland-area copper and slate contractor), and Goode’s notes on annealing. It is hot work on a roof, so it belongs with an experienced crew.
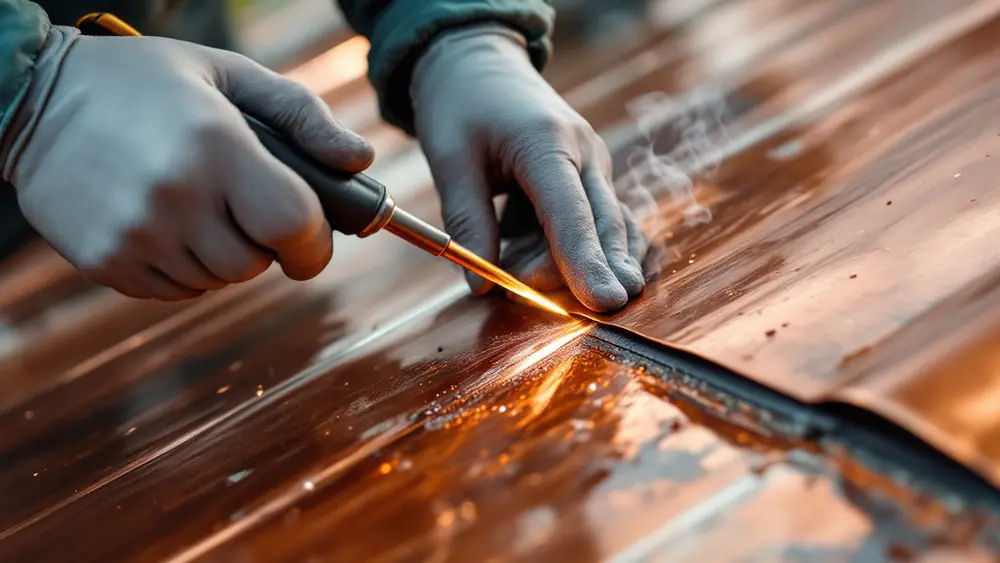
- Remove old caulk, tar and loose solder. Scrape off mastic and melt out failed solder with the iron. DM Crookshanks describes opening flat-lock seams with hand seamers after removing caulk, tar and old solder.
- Clean to bright copper. Wire brush or abrasive pad until the metal is shiny. Solder will not bond to patina, dirt or sealant residue.
- Anneal hardened copper before re-bending it. Goode notes that hammered and wind-flexed copper work-hardens and can fracture when seams are opened or re-formed. Heat softens it again.
- Cut new copper to match. Use the same weight as the roof, and never less than the 16 oz per square foot the IRC requires for cold-rolled copper sheet roofing. The CDA specifies 20 oz sheets for flat seam roofing.
- Flux and pre-tin. For flat seam work the CDA calls for edges cleaned, wire brushed, fluxed and pre-tinned 1-1/2 inches wide before folding.
- Engage and dress the seam. Lock the pieces together and mallet the seam down before soldering.
- Sweat the seam full of solder. Use ASTM B32 solder. The CDA says a pair of furnace-heated soldering coppers should weigh at least 5 pounds, and a torch-heated copper head at least 3 pounds, because heavier coppers hold heat.
- Neutralize the flux. The CDA specification says to wash acid flux off with a baking soda solution, then flush with clean water, taking special care in crevices.
- Check for heat damage. NPS Preservation Brief 4 warns that soldering can start an undetected smoldering fire in the wood below. Check the deck side of the work before the crew leaves.
- Water-test. Run water over the repair with someone watching inside.
Will a copper roof repair match the old patina?
Not at first. New copper starts bright and weathers through brown before turning green, so a patch stands out for years. Goode notes that new copper may never match historic copper exactly, because patina depends on climate and air quality that have changed. The CDA gives three ways to narrow the gap, each with limits.
| Option | Best for | Caveat | Source |
|---|---|---|---|
| Let the patch weather naturally | Most roofs; any patch out of direct view | The contrast can last years; timing depends on climate | CDA Handbook 3 |
| Factory pre-patinated copper sheet | Replacing a full bay, pan or flashing run | Color may not exactly match the existing roof | CDA Handbook 3.2; Goode |
| Chemical patina applied in the field | Small areas: flashings, chimney caps and similar | The CDA says chemical weathering of large areas such as roofs is impractical and should be avoided | CDA Handbook 3.2 |
| Acid-clean the existing roof around new work so both repatinate together | Larger replacements or additions next to patinated copper | Uses phosphoric and nitric acids and two neutralizers; contractor-only work | CDA Handbook 4, Rehabilitation of Copper |
Do not scrub or pressure-wash patina off to “even out” a roof. The CDA’s procedure for encrusted deposits uses walnut shell dust blown at 30 psi, and the handbook names permanent damage to the copper as the major concern with any cleaning.
Copper roof repair cost in 2026
Copper roof repair costs $13 to $30 per square foot of the area repaired, labor and materials included, according to HomeGuide’s February 2026 metal roof repair guide. Small jobs are usually priced by the visit rather than the foot. HomeGuide puts minor metal roof repairs at $150 to $600, and This Old House puts the average roof repair at $379 to $1,755.
| Item | Cost range | Source |
|---|---|---|
| Copper roof repair, per sq ft of area worked | $13 to $30 | HomeGuide, Metal Roof Repair Cost (Feb. 2026) |
| Minor metal roof repair (small hole, panel gap) | $150 to $600 | HomeGuide (Feb. 2026) |
| Metal roof leak repair | $200 to $1,000 | HomeGuide (Feb. 2026) |
| Moderate to major metal roof repair | $600 to $3,500 | HomeGuide (Feb. 2026) |
| Average roof repair, all materials | $379 to $1,755 | This Old House, Copper Roof Cost (updated June 2026) |
| Copper chimney cap, installed | $200 to $1,000 | HomeGuide, Copper Roof Cost |
| Copper bay window roof, installed | $1,500 to $7,500 | HomeGuide, Copper Roof Cost |
| New copper roof, installed | $11 to $35 per sq ft | This Old House (updated June 2026) |
Leak, minor and major repair figures in HomeGuide’s guide cover all metal roofs, so copper jobs tend to sit toward the upper end. The chimney cap and bay window figures are new-installation prices, useful when replacing a small copper feature is simpler than repairing it.
What the copper alone costs: a worked example
At Gutter Supply’s October 2026 retail price, 16 oz copper sheet costs about $10.40 per square foot. A standing seam pan uses more copper than the roof area it covers, because the seams consume metal. Per CDA Table 8.2A, an 18 inch sheet finishes at a 14-3/4 inch seam spacing with 1 inch seams, so each square foot of finished roof takes about 1.22 square feet of sheet.
| Repair scope | Finished roof area | Copper sheet needed (x 1.22) | Copper at $10.40 per sq ft | HomeGuide repair range ($13 to $30 per sq ft) |
|---|---|---|---|---|
| One standing seam bay, 14-3/4 in wide x 10 ft | 12.3 sq ft | 15 sq ft (one 18 in x 10 ft pan) | $156 | $160 to $369, though small jobs often hit a visit minimum |
| Bay window or porch roof | 100 sq ft | 122 sq ft | $1,269 | $1,300 to $3,000 |
| One slope of a dormer or addition | 400 sq ft | 488 sq ft | $5,075 | $5,200 to $12,000 |
Roofing Brief estimate using single-sheet retail prices, before cleats, solder, underlayment, waste, shipping and labor. The result is a useful check on quotes: copper sheet alone works out to about $12.69 per square foot of finished standing seam roof at retail, close to the bottom of HomeGuide’s all-in repair range. Contractors buying coil may pay less, but a low quote should still name the copper weight, the seam type and whether seams will be soldered.
How much does it cost to replace a roof on a 4,000 square foot house?
It depends on how many stories the house has, because roof area tracks the footprint and pitch, not the floor area. A two-story 4,000 square foot house has roughly a 2,000 square foot footprint. A one-story house has the full 4,000. At a 6/12 pitch, roof area is about 1.118 times the footprint before overhangs.
| House | Footprint | Roof area at 6/12 (x 1.118) | Copper at $13 to $30 per sq ft (HomeGuide) | Architectural asphalt at $5 to $8 per sq ft |
|---|---|---|---|---|
| 4,000 sq ft, two stories | 2,000 sq ft | 2,236 sq ft | $29,068 to $67,080 | $11,180 to $17,888 |
| 4,000 sq ft, one story | 4,000 sq ft | 4,472 sq ft | $58,136 to $134,160 | $22,360 to $35,776 |
Roofing Brief arithmetic. The 1.118 multiplier is the slope factor for a 6/12 roof (the square root of 12 squared plus 6 squared, divided by 12); overhangs, dormers and valleys add area. Copper rates are HomeGuide’s copper roof cost range; the asphalt rate is the baseline from our 2026 Roofing Cost Report.
Repair or replace a copper roof?
Repair when the copper is sound and the failure is local. Re-lay or replace when the fault comes from how the roof was laid: bays too wide, pans too long for fixed cleats, copper bonded to the felt, or a seam type the slope cannot support. Goode notes that if a defect stems from the laying or specification, “the problem will worsen unless it is addressed.”
| Situation | Likely answer | Why | Source |
|---|---|---|---|
| One puncture, one cracked seam, one loose cleat | Repair | Local damage in sound copper solders or re-cleats permanently | CDA Handbook 1.3 |
| Star cracks recurring across many bays | Re-lay those areas with narrower sheets | The bay width is the cause, so patches crack again | Goode, Building Conservation |
| Long pans with fixed cleats, seams opening along the run | Re-lay with expansion cleats | Racking cleats keep loosening | CDA Handbook 8.8 |
| Standing seam below the CDA’s minimum slope, leaking at seams | Rebuild with low-slope details or flat seam soldered roofing | The CDA recommends at least 3 in per ft for standard standing seam details (4 in where ice, snow or heavy rain occur); flat seams under 3 in per ft are fully soldered | CDA Tables 8.1A, 8.1B and 8.1C |
| Thinning and pinholes across a valley or gutter | Replace that copper and fix the drip line | The metal is consumed; patches only move the leak | CDA Handbook 1.3 |
| Rotted deck or failed underlayment under much of the roof | Remove and re-lay, reusing sound copper where possible | The substrate has to be smooth, dry and stable under copper | CDA Handbook 1.3 and 8 |
| Years of repeated mastic patches | Strip and assess before deciding | The NPS notes repeated repairs could soon equal the cost of a new roof | NPS Preservation Brief 4 |
Code still applies to the repair. The 2021 and 2024 IRC (R905.10.3 and R905.10.4) set the copper weight and fastener metals for copper roofs, and some cities amend or add historic district rules. Check with the local building department before a large section is re-laid.
Who should repair a copper roof, and what to ask
Hire a sheet metal or roofing contractor that solders copper routinely, not a crew that “reseals” metal roofs with caulk. HomeGuide’s generic metal roof guide notes that most roofers reseal metal seams with silicone or tape, which is the wrong default for a soldered copper roof. Ask these questions before signing:
- Will you solder or seal? On flat seams and rigid joints, the answer should be solder to ASTM B32.
- What copper weight will you use? Same as the roof, and at least 16 oz per square foot for sheet roofing under the IRC.
- What fasteners and cleats? Copper, brass, bronze or 300-series stainless only, and expansion cleats on pans over 10 feet.
- What caused the failure? A good contractor names the cause (bay width, cleats, runoff, bonded felt) and says how the repair addresses it.
- How will you handle flux and fire risk? Expect flux neutralized with baking soda solution and a check of the deck after soldering.
- Lead or lead-free solder? The CDA notes tin-based lead-free solders are available if you prefer them.
- What is the patina plan? Natural weathering, pre-patinated sheet, or a chemical patina on small pieces.
Licensing rules for roofing and sheet metal work vary by state and city, so confirm the contractor holds whatever license and insurance your jurisdiction requires.
Frequently asked questions
How much does copper roof repair cost?
Copper roof repair costs about $13 to $30 per square foot of the area repaired, labor and materials included, according to HomeGuide’s February 2026 metal roof repair guide. Small jobs are usually priced per visit: HomeGuide puts minor metal roof repairs at $150 to $600. Replacing whole bays, valleys or flashing runs costs more because 16 oz copper sheet alone retailed near $10.40 per square foot in October 2026.
Can you caulk or seal a leaking copper roof?
Only as a stop-gap. The Copper Development Association treats solder as the permanent joint for copper and reports that acrylic, neoprene and nitrile sealants have been observed to corrode copper. The National Park Service calls caulking and bituminous patching potentially harmful and very temporary. A silicone, polyurethane or butyl bead can slow an active leak until a copper crew solders the seam.
Can you solder old, patinated copper or solder over existing solder?
Yes, once the metal is clean. The patina, old sealant and failed solder have to come off down to bright copper, then the joint is fluxed, pre-tinned and sweated full of ASTM B32 solder. Old solder can be melted out with the iron first. Copper that has work-hardened may need annealing with heat before seams are reopened, or it can crack.
How long does a copper roof typically last?
A well-laid copper roof commonly lasts a century or more. The Copper Development Association points to copper roofs that have stood for one or more centuries, and conservation architect Jonathan Goode writes that well-laid, well-supported copper should reasonably last 80 years or more. Seams, cleats, flashing and underlayment usually need repair long before the copper sheet wears out.
What are the downsides of a copper roof?
The main downsides are cost, a small pool of crews who solder copper well, and sensitivity to its surroundings. Copper corrodes aluminum, zinc and steel it touches, its runoff stains light stone, and acidic water from tile, slate, wood or asphalt roofs above can pit copper valleys and gutters. Repairs also stand out until the new copper weathers to match.
Will a copper patch turn green to match the roof?
Eventually, but not soon. New copper starts bright, turns brown, and takes years to turn green, depending on climate. The Copper Development Association says chemical patinas work on small areas such as flashings and chimney caps, but are impractical on large roof areas, where factory pre-patinated sheet gives better results. An exact match with old copper may never happen.
Does homeowners insurance cover copper roof repair?
It depends on the cause and your policy. Standard homeowners forms such as ISO’s HO 00 03 exclude wear and tear and deterioration, so seam fatigue, loose cleats and runoff corrosion are often not covered. Sudden damage, such as a falling limb puncturing the copper, may be covered subject to the deductible. Read your policy and ask your insurer before work starts.
Sources
- Copper Development Association, Copper in Architecture Design Handbook, publication A4050-8/24: sections 1.3, 3.2, 4, 7.1, 8, 8.1, 8.2, 8.5, 8.8 and specification 14.3.
- National Park Service, Sarah M. Sweetser, Preservation Brief 4: Roofing for Historic Buildings.
- Jonathan Goode, Copper Sheet Roofing, Building Conservation.
- International Code Council, 2021 and 2024 International Residential Code, Table R905.10.3(1) and Sections R905.10.2 and R905.10.4.
- HomeGuide, Metal Roof Repair Cost (Feb. 4, 2026) and Copper Roof Cost.
- This Old House, Copper Roof Cost (updated June 5, 2026).
- Gutter Supply, Copper Sheets, 16 oz sheet prices checked October 14, 2026.
- DM Crookshanks Construction, How to Repair a Copper Roof.