
By The Roofing Brief Team. Last reviewed: October 2026.
Standing seam metal roof details are the drawings that show how the panel ends, edges and holes are finished: eave, rake, ridge, hip, valley, sidewall, headwall, transitions, cross joints and penetrations. Every one of them answers the same two questions. Which end of the panel is fixed, and how does water get past the joint without a fastener pinning the panel in place?
Maker detail libraries run from about 17 drawing pages to more than 90, and they show the parts without explaining them. This page decodes each detail, maps where it sits in three published libraries, and shows how slope, seam type and metal change the drawing you should be using. The install sequence, clip spacing and thermal gaps live in our standing seam metal roof installation guide, so they are not repeated here.
Standing seam metal roof details: key numbers at a glance
These are the figures that decide which standing seam detail applies to a roof. Each is taken from a named code section or maker document, and each can change with the specific panel, deck, wind design and local code amendments, so the documents for the exact panel on your roof override anything listed here.
| Item | Published figure | Source |
|---|---|---|
| Code minimum slope for standing seam systems | 1/4 in 12 (2 percent) | IRC R905.10.2; IBC 1507.4.2 |
| Lowest maker slope, mechanically seamed examples | 1/2:12 (Petersen Tite-Loc, Tite-Loc Plus, PAC-150 180 degree); 5/8:12 (RHEINZINK double lock) | ICC-ES ESR-4173 Table 3; RHEINZINK Standing Seam binder (09-2024) |
| Snap lock example minimum | 2:12 (Petersen Snap-Clad) | ICC-ES ESR-4173 Table 3 |
| Seam heights in the examples reviewed | 1 in (Snap-On) to 2 5/8 in nominal (PAC T-250) | PAC-CLAD product pages |
| Minimum flashing lap, general and valley | 6 in general; 12 in in valleys, two rows of sealant | Spectrum SS150 Standing Seam Roofing Details |
| Detail drawings in one published library | 17 pages (Spectrum SS150) to 94 drawings (Metal-Tech 2015) | Roofing Brief count of each library’s index |
What are the construction details of a standing seam metal roof?
A standing seam roof is a layered assembly: structural deck, underlayment, sometimes a drainage or separation mat, concealed clips, the panel with its raised seam, and trim at every edge. The construction details are the drawings that show how those layers finish at each edge and opening while letting the panel expand and contract along its length.
The table reads the assembly from the deck up, using the requirements published in ICC-ES ESR-4173 for Petersen (PAC-CLAD) panels and the RHEINZINK standing seam binder. Other systems publish their own versions, and a steel panel over plywood and a zinc panel over a vented deck can differ at almost every layer.
| Layer (bottom to top) | What the documents call for | Source |
|---|---|---|
| Deck | Solid or closely fitted deck, minimum 15/32 in plywood or 7/16 in APA rated OSB, or minimum No. 22 gauge steel deck | ESR-4173 Section 3.2 |
| Underlayment | Per IRC R905.10.5 or IBC 1507.4.5; RHEINZINK requires high-temperature self-adhered membrane over the whole roof below 3:12 and recommends it at eaves, rakes, hips, ridges, valleys and penetrations on steeper roofs | ESR-4173 Section 3.3; RHEINZINK low and mid slope pages |
| Drainage or separation mat | RHEINZINK requires Air-Z or Enkamat (7008 or 7010) under all its standing seam roofs; Metal-Tech drawings show Enkamat under the panel | RHEINZINK binder; Metal-Tech MT_SSRP_1305 |
| Clips or bearing plates | Petersen clips in G90 galvanized or 300 series stainless steel; bearing plates of No. 20 or No. 16 gauge where clips sit over rigid insulation | ESR-4173 Sections 3.5.1 to 3.5.5 |
| Panel | Examples: minimum No. 24 gauge Galvalume (ASTM A792 AZ50) or 16 oz copper for the Petersen panels; 0.7 mm or 0.8 mm titanium zinc for RHEINZINK | ESR-4173 Section 3.1; RHEINZINK binder |
| Seam | Snap lock, 90 degree single lock or 180 degree double lock; RHEINZINK seals low slope seams continuously with butyl or closed cell urethane foam on the male leg | ESR-4173 Section 3.1; RHEINZINK low slope page |
| Trim and closures | Eave, rake, ridge, valley, wall and penetration flashings detailed by the panel maker; flashing per IRC R903.2 or IBC 1503.2 | ESR-4173 Section 4.1 |
The rule every standing seam detail follows: one fixed end, one free end
Every standing seam detail is drawn around a single fixed point per panel run. Spectrum’s SS150 detail manual puts it plainly: never fix both ends of the panel, always use a sliding ridge with a fixed eave, and always use a fixed ridge with a sliding eave. Read any detail by first finding which end it fixes.
The free end is held flat by a hem that hooks a cleat fastened to the deck, so the panel can slide while staying down. Spectrum adds that the hem must not sit tight against the cleat unless the panels go on at the coldest temperature they will see, and that the lower edge of the hem must not touch any flashing when the panel contracts. The arithmetic for how far a panel moves is in our guide to metal roof thermal movement.
| If the detail set fixes the panel at | Then the opposite end must | What to look for in the drawing | Source |
|---|---|---|---|
| The eave (eave bend down detail) | Slide at the ridge | A sliding ridge closure or cap that does not screw through the panel into the deck | Spectrum SS150 introduction |
| The ridge | Slide at the eave | Panel hem hooked over a continuous cleat with a starting gap | Spectrum SS150 hem lengths page |
| Both ends | Not allowed | Screws through the panel at eave and ridge on the same run | Spectrum SS150 introduction |
| Any point, with a long run | Use a detail drawn for movement, or avoid the cross joint | An expansion joint or cross joint detail, or a single site-formed length | Spectrum SS150 expansion joint detail; McElroy Metal |
Detail by detail: what each standing seam detail does
The matrix below lists the details found in the RHEINZINK, Metal-Tech and Spectrum libraries, what each one is built from, and how it typically fails. Drawing numbers let you find the matching sheet in each published PDF. Petersen and McElroy publish equivalent CAD and PDF sets on their own sites.
| Detail | Main parts | How the panel ends | Typical failure | RHEINZINK (2024) | Metal-Tech (2015) | Spectrum SS150 |
|---|---|---|---|---|---|---|
| Eave, no gutter | Starter or eave flashing, continuous support angle or cleat, underlayment lapped over the flashing | Hemmed over the cleat (free end) or bent down (fixed end) | Hem closed tight on the cleat, so the panel buckles in heat | SSR-1c | 1201 to 1205 | Page 7 |
| Eave with gutter or built-in gutter | Starter flashing into the gutter; built-in gutter with membrane liner sloped to drain | Hemmed over the starter | Built-in gutter liner without slope, so water ponds against the eave | SSR-1a, 1b, 2a, 2b | 1206 to 1211 | Page 8 |
| Rake or gable | Rake trim over a closure, support angle or cleat | Edge turned up beside the last seam | Trim screwed through the panel field, pinning a free panel | SSR-8a, 8b, 8c | 1401 to 1408 | Page 15 |
| Ridge and hip | Folded panel end or Z closure, ridge or hip flashing | Turned up (bread pan end) under the cap | Open rib ends letting wind-driven rain past the cap | SSR-3a, 3b, 3c | 1108 to 1114 | Page 10 |
| Vented ridge | Vent product or vented closure under a raised cap | Turned up below the vent | Vent opening with no weather baffle | Not shown | 1115 | Not shown |
| Mono pitch (high side) ridge | Panel end folded over the top edge, fascia flashing | Folded over the high edge | Cap fastened so it pins a panel already fixed at the eave | SSR-4a, 4b, 4c | 1101 to 1106 | Page 11 |
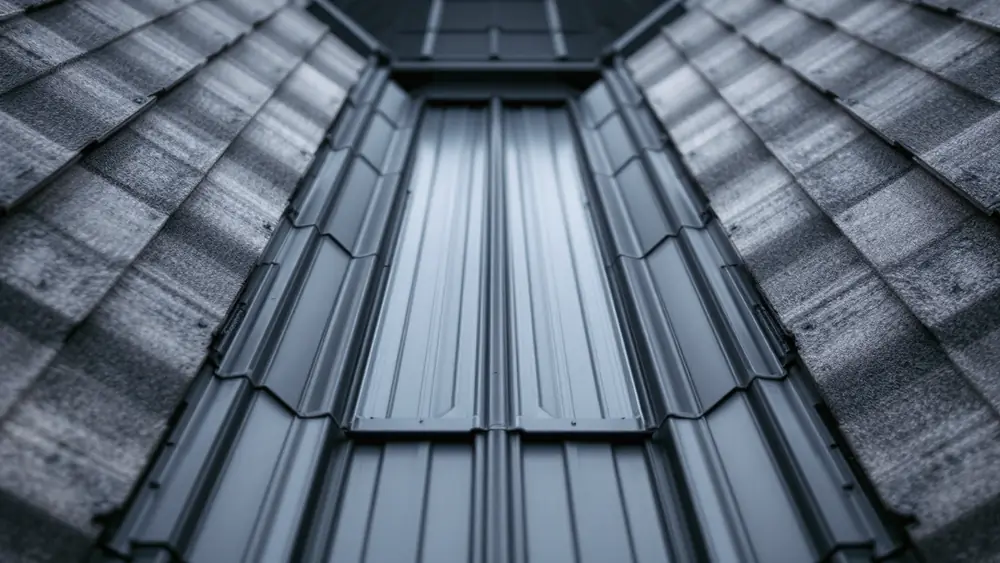
| Valley | Valley flashing, cleat on each side, sealant in laps | Hemmed onto the cleat, not fastened through the flashing | Valley slope lower than the system allows; debris damming | SSR-5 to 7 (steep, mid, low) | 1301 to 1306 | Pages 12, 13 |
| Sidewall | Panel edge turned up, Z channel, wall flashing, counterflashing | Edge up the wall, free to slide lengthwise | Counterflashing missing, so water runs behind the wall flashing | SSR-13a, 13b | 1501, 1502, 1513, 1514 | Page 9 |
| Headwall and roof to wall | Panel end turned up, head flashing, counterflashing or facade panel | Turned up at the wall | No closure at the rib ends behind the flashing | SSR-12a, 12b | 1503 to 1507, 1515, 1516 | Page 14 |
| Endwall cricket and endwall gutter | Cricket or gutter behind a chimney or wall that blocks the panel run | Panels end on the cricket | Water dammed above the obstruction | Not shown | 1510 to 1512 | Not shown |
| Slope transition (roof to fascia, roof to roof, offset ridge) | Transition flashing at the change in pitch | Panel bent or broken at the transition | A bend that blocks movement or splits the finish | SSR-12 (roof to facade) | 1107, 1508, 1509 | Pages 16, 17 |
| Cross joint or expansion joint | Hook seam, or water check with a soldered cleat; expansion joint flashing | Upper panel hooks the lower | Cross seam on a slope too low for that joint type | SSR-9, 10, 11 | 1012, 1013 (transverse welts) | Page 19 |
| Pipe penetration | Pipe cover or boot sitting in the flat of the pan | Panel cut around the pipe | Boot fastened across seams; no gap for panel movement | SSR-17a, 17b | 1901 to 1903 | Page 18 |
| Skylight or curb | Sill, jamb and head flashings, apron pan | Upper panels end at the curb head | Water trapped at the curb head with no diverter | SSR-14, 15, 16 | 1801 to 1805 | Not shown |
| Soffit and parapet | Soffit trim; parapet cap and wall flashing | Panel ends below the parapet flashing | Cap or flashing laps not shingled with the water flow | Not shown | 1601 to 1604, 1701 to 1703 | Not shown |
Source note: RHEINZINK America, Standing Seam System Technology for Roofing, Division 7 binder Volume 10 Chapter 3 (09-2024); Metal-Tech Global, Standing Seam Roof Details, index MT_SSRP_0000 (dated 6/17/2015); Spectrum, SS150 Standing Seam Roofing Details table of contents. “Typical failure” summarizes the risks the drawings and notes guard against; it is not a measured failure rate.
Eave and gutter details
The eave detail decides whether the panel’s low end is free or fixed. Most residential sets hem the panel over a continuous cleat or starter flashing so it can slide. RHEINZINK adds that the eave hook’s underside stays horizontal so any leakage or condensation drains out, and its built-in gutter drawings run a membrane liner sloped to drain under a box gutter.
Rake and gable details
A rake detail has to hold the last panel edge down without stopping it from sliding up and down the slope. That is why Metal-Tech publishes eight rake options and RHEINZINK three: the trim catches a turned up panel edge or a cleat instead of screwing through the panel field. Rake trim profiles and fastening are compared in our metal roof rake trim guide.
Ridge, hip and vented ridge details
At the ridge the panel end is turned up, either as a folded bread pan end (RHEINZINK) or with a Z closure, so water cannot run over the end of the pan. The ridge flashing then covers both sides. RHEINZINK’s ridge and hip option 2 drawing notes a 4 in maximum for a non-supported ridge cap. Cap profiles, closures and costs are in our metal roof ridge cap guide.
Valley details
Valley details hook each panel onto a cleat beside the valley flashing so nothing fastens through the channel that carries the most water. Spectrum calls for 12 in minimum laps in valley flashing with two rows of sealant between laps. RHEINZINK draws separate steep, mid and low slope valleys, and below 3:12 adds a water check with a soldered cleat 10 in from it. Shingle valley methods are a different system, covered in our valley flashing details guide.
Wall, transition and endwall details
Where the roof meets a wall, the panel edge or end turns up, a closure blocks the rib openings, a wall flashing laps over it, and a counterflashing or facade panel covers the top of the wall flashing. Metal-Tech gives wall conditions 16 drawings, more than its ridges or eaves get, including masonry sidewalls, masonry headwalls, a cricket option at endwalls and wall to sill transitions.
Penetration, skylight and curb details
Penetrations should land in the flat of the pan, never across a seam. RHEINZINK’s vent pipe drawings note that a gap must be left between the pipe cover and the vent so the panel can expand and contract around the pipe. Skylights and curbs get separate sill, jamb and head drawings in both the RHEINZINK and Metal-Tech sets, plus a flat pattern for the apron pan in Metal-Tech’s.
Snow guard and solar attachment details
On standing seam, rooftop equipment usually clamps to the seam rather than screwing through the panel. McElroy Metal notes that solar mounting hardware attaches to the raised seam without penetrating the panel face. Clamp holding values and row layout belong to the clamp maker’s tested data; our snow guards for metal roofs guide walks through the load math.
How the major standing seam detail libraries compare
The three free detail libraries that rank for this search differ widely in scope. Metal-Tech’s index lists 94 drawings, RHEINZINK’s 2024 binder lists 34 standard and option drawings, and Spectrum’s SS150 manual has 17 detail pages. More drawings means more options per condition, not a better roof. The right set is the one published for your exact panel.
| Detail group | Metal-Tech (MT_SSRP, 2015) | RHEINZINK (SSR, 09-2024) | Spectrum SS150 |
|---|---|---|---|
| Panel, seam and clip general details | 17 | 1 | 4 |
| Ridge, hip and mono pitch ridge | 15 | 6 | 2 |
| Eave, gutter and built-in gutter | 11 | 5 | 2 |
| Valley | 6 | 6 | 2 |
| Rake or gable | 8 | 3 | 1 |
| Walls, transitions and crickets | 16 | 4 | 4 |
| Cross joints and expansion joints | 2 | 3 | 1 |
| Skylights | 6 | 4 | 0 |
| Penetrations and roof steps | 6 | 2 | 1 |
| Soffit and parapet | 7 | 0 | 0 |
| Total | 94 | 34 | 17 |
Method: Roofing Brief count of each document’s own index or table of contents, October 2026. Spectrum’s general count is its hem length, panel profile, panel end and plywood deck pages. Metal-Tech’s two transverse welt sheets (1012 and 1013) are counted as cross joints. RHEINZINK’s count covers the SSR sheets listed in the 09-2024 binder. Metal-Tech lists its skylight panel layout as two sheets under one number.
Seam types and what they change in the details
The seam type sets the minimum slope, the wind rating route and which details are allowed. Snap lock panels close by hand and are listed for steeper slopes; mechanically seamed panels are folded to 90 degrees (single lock) or 180 degrees (double lock) with a seamer and reach the lowest slopes. The comparison below uses published maker figures only.
| Seam type | Example and seam height | Published minimum slope | What changes in the details | Source |
|---|---|---|---|---|
| Snap lock (one-piece interlock) | Petersen Snap-Clad, 1 3/4 in, 10 to 18 in wide | 2:12 | Optional factory sealant bead; no seamer needed | ESR-4173; PAC-CLAD Snap-Clad page |
| Snap-on cap or batten (two-piece) | Petersen Snap-On, 1 in | 3:12 over a waterproofed solid substrate | Curves to a 9 ft minimum radius; suited to mansards and fascias | PAC-CLAD Snap-On page |
| Mechanical, 90 degree single lock | Petersen Tite-Loc, 2 in | 1/2:12 | Two-piece sliding clip; curves to a 20 ft minimum radius | ESR-4173; PAC-CLAD Tite-Loc page |
| Mechanical, 180 degree double lock | Petersen Tite-Loc Plus, 2 in; PAC-150, 1 1/2 in | 1/2:12 | Required by RHEINZINK on every slope below 6:12 | ESR-4173; RHEINZINK binder |
| Angled seam | RHEINZINK and Metal-Tech angled standing seam | Above 25 degrees (6:12); above 35 degrees (9:12) in high snow areas | Not recommended by RHEINZINK on low or mid slopes | Metal-Tech MT_SSRP_1001; RHEINZINK binder |
| Structural trapezoidal or tall seam | McElroy trapezoidal panels; Petersen PAC T-250, 2 5/8 in nominal | As low as 1/4:12 (McElroy trapezoidal) | Commercial details over purlins or steel deck; site forming avoids endlaps | McElroy Metal standing seam page; PAC-CLAD |
The full trade-off between hand-snapped and machine-seamed panels, including seamer rental and cost, is in our snap lock vs mechanical seam comparison.
How roof slope changes standing seam details
Low slope metal roofing needs different details, not just a different panel. RHEINZINK’s binder splits its standing seam guidance into low slope (under 3:12), mid slope (3:12 to 6:12) and steep slope (6:12 and up), and the underlayment, seam lock, cross joint and valley details change at each line.
| RHEINZINK requirement | Low slope, under 3:12 | Mid slope, 3:12 to 6:12 | Steep slope, 6:12 and up |
|---|---|---|---|
| Seam lock | Double lock only; minimum 5/8:12 | Double lock only | Single or double lock |
| Angle lock seam | Not recommended | Not recommended | Allowed |
| Underlayment | High-temperature self-adhered membrane; breathable membranes not appropriate | Breathable membrane, plus self-adhered at eaves, rakes, hips, ridges, valleys and penetrations | Same as mid slope |
| Cross seams | Should not have any; panels run the full plane | Water check plus a soldered cleat 6 in from it | Single hook seam allowed |
| Valleys | Water check plus a soldered cleat 10 in from it; valley at least 5/8:12 | Per mid slope valley drawing SSR-6 | Per steep slope valley drawing SSR-5 |
| Seam sealing | Continuous butyl or closed cell foam on the male leg | May be sealed the same way | May be sealed the same way |
| Clips and fasteners | Stainless steel | Stainless steel | May be stainless steel |
| Seam height in high snow areas | 1 1/2 in instead of the standard 1 in | 1 1/2 in | 1 1/2 in |
Source: RHEINZINK America, Standing Seam binder (09-2024), low, mid and steep slope pages. These rules are written for titanium zinc; steel and aluminum makers publish their own slope rules, such as the 1/2:12 to 2:12 minimums in ESR-4173. Our flat and low slope metal roofing guide compares systems for near-flat roofs.
The valley slope trap, worked out
A valley is always flatter than the roof planes that form it. RHEINZINK warns that two 5/8:12 planes meeting at a right angle produce a valley under 1/2:12. The general rule, for two equal pitches meeting at a 90 degree corner in plan, is valley pitch equals roof pitch divided by the square root of 2, or about 0.707 times the roof pitch.
| Roof pitch (both planes) | Valley pitch (roof pitch x 0.707) | What it means for the valley detail |
|---|---|---|
| 5/8:12 | 0.44:12 | Below RHEINZINK’s 5/8:12 valley minimum, as its binder warns |
| 1:12 | 0.71:12 | Above 5/8:12 but in low slope valley detail territory |
| 2:12 | 1.41:12 | A 2:12 snap lock roof drains its valley at about 1.4:12 |
| 3:12 | 2.12:12 | Valley sits in the low slope band even though the roof is mid slope |
| 4:12 | 2.83:12 | Still under 3:12 in the valley |
| 6:12 | 4.24:12 | Mid slope valley |
| 8:12 | 5.66:12 | The pitch where Metal-Tech splits its valley drawings (MT_SSRP_1305 and 1306) |
| 12:12 | 8.49:12 | Steep valley |
Roofing Brief arithmetic. Unequal pitches or corners other than 90 degrees change the result, so check the actual valley slope on the framing plan before choosing the valley detail.
Clip and cleat types in standing seam details
Clips hold the seam down, and cleats hold panel ends and edges down. Details call out which kind sits where, because a fixed clip in the wrong place creates a second fixed point. The parts below are the ones named in the documents reviewed for this page.
| Part | What it does in the details | Published example | Source |
|---|---|---|---|
| One-piece clip | Hooks the seam leg and screws to the deck | Snap-Clad clip, minimum No. 18 gauge G90 galvanized or 300 series stainless | ESR-4173 Section 3.5.1 |
| Two-piece sliding clip | Tab slides in a base so the panel moves while the base stays put | Tite-Loc Sliding AR clip and Tite-Loc Plus AR clip, stainless tab for aluminum, G90 tab for steel, No. 18 gauge base | ESR-4173 Sections 3.5.2, 3.5.3 |
| Bearing plate | Spreads clip load where panels sit over rigid insulation | No. 20 or No. 16 gauge G90 or stainless | ESR-4173 Section 3.5.5 |
| Clipless panel with fastening flange | Fastened through its own flange, which the next panel covers | McElroy’s clipless snap-together panel for solid decking | McElroy Metal standing seam page |
| Continuous cleat or starter | Holds the hemmed free end at eaves and valleys | Spectrum hem and cleat; RHEINZINK starter flashing on a support angle | Spectrum SS150; RHEINZINK SSR-1 |
| Soldered cleat and water check | Holds panel ends at cross joints and low valleys on soldered metals | RHEINZINK cleat soldered at 6 in on center | RHEINZINK SSR-6, 7, 10, 11 |
What goes under standing seam metal roofing?
Under standing seam metal roofing sits a solid deck, an underlayment that meets the code and the panel maker’s list, and, for some systems, a drainage or separation mat. The details add a self-adhered high-temperature membrane at eaves, valleys, ridges and penetrations, and some makers require it over the whole roof on low slopes.
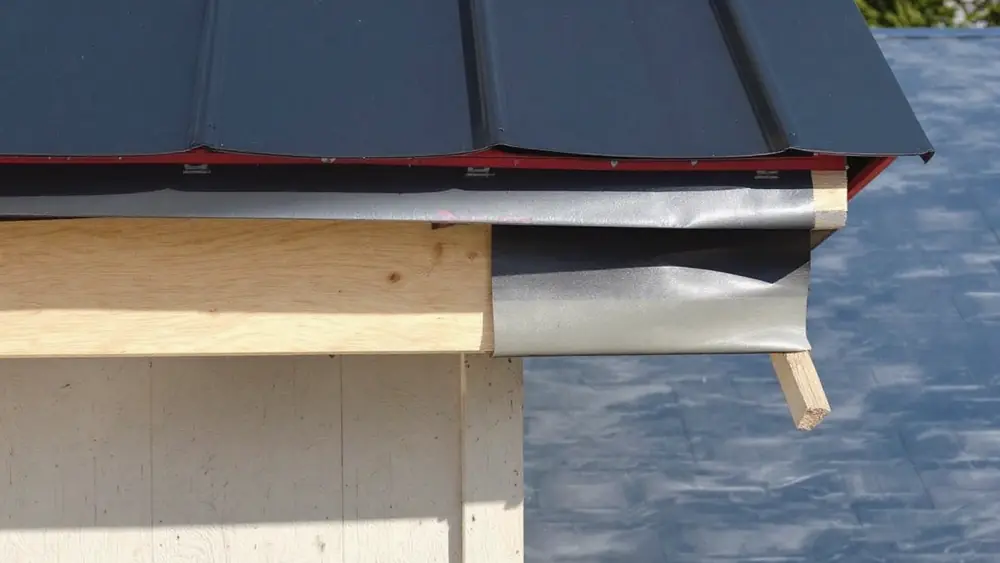
The IRC sends metal panel underlayment to R905.10.5, which points back to the general underlayment rules. The ice barrier section, R905.1.2, lists asphalt shingles, metal roof shingles, roll roofing, slate and wood shingles and shakes, but not metal roof panels, so an eave membrane under standing seam usually comes from the maker’s instructions or a local amendment. Product choices are compared in our metal roofing underlayment guide.
| If your roof is | Then the details usually call for | Source |
|---|---|---|
| 3:12 or steeper, steel panels on a wood deck | Code underlayment over the field, high-temperature self-adhered membrane at the details listed by the maker | IRC R905.10.5; ESR-4173 Section 3.3; RHEINZINK mid and steep slope pages |
| Under 3:12 | High-temperature self-adhered membrane over the whole roof (RHEINZINK); note it is non-breathable, so drying of the assembly must come from elsewhere | RHEINZINK low slope page |
| Titanium zinc or soldered metals | A drainage or separation mat such as Air-Z or Enkamat under the panels | RHEINZINK binder; Metal-Tech drawings |
| Over rigid insulation | Bearing plates under clips, and only the insulation types listed for that assembly | ESR-4173 Sections 3.4, 3.5.5 |
| In an ice dam area | Self-adhered membrane at eaves if the maker or local amendment requires it; the IRC ice barrier list does not name metal panels | IRC R905.1.2 |
How far apart are the seams on a standing seam metal roof?
The seams on a standing seam metal roof sit one panel width apart, usually 12 to 24 in on center. The Petersen panels in ESR-4173 run 10 to 20 in wide depending on profile, Tite-Loc Plus is sold at 12, 16 or 18 in on center, and RHEINZINK forms zinc panels 12 to 24 in wide.
Width and metal thickness are linked. RHEINZINK specifies 0.7 mm zinc for panels 12 to 17 in wide and 0.8 mm for 17 to 24 in, and recommends extra profiling above 18 in to keep the pan flat. Wider pans also show more oil canning, which Spectrum’s manual says is common to the industry and not a cause for rejection. Our installation guide shows how width interacts with tested clip spacing.
Which standing seam panel fits your roof?
The best type of standing seam panel is the one whose published minimum slope, wind test and details cover your roof. Slope rules out options first, then wind and snow exposure, then roof shape and run length. The decision table maps common conditions to the seam type the maker documents point to.
| If your roof has | Look at | Why | Source |
|---|---|---|---|
| Slopes of 3:12 and up, ordinary wind exposure | Snap lock | Listed down to 2:12 in the example reviewed; no seamer | ESR-4173 Table 3 |
| Slopes between 1/2:12 and 2:12 | Mechanically seamed double lock | Tite-Loc Plus and PAC-150 180 degree are listed at 1/2:12 | ESR-4173 Table 3 |
| High wind design pressures | A panel with a published test at your clip spacing | Tite-Loc Plus lists UL 580 Class 90 up to 18 in on center, plus UL 1897 and ASTM E1592 testing | PAC-CLAD Tite-Loc Plus data sheet |
| Heavy snow | A taller seam; avoid angled seams below 9:12 | RHEINZINK moves to a 1 1/2 in seam; Metal-Tech limits angled seams to above 35 degrees in high snow | RHEINZINK binder; Metal-Tech MT_SSRP_1001 |
| Curved or barrel roof | A panel rated for your radius | Snap-On curves to 9 ft; Tite-Loc and PAC-150 to 20 ft | PAC-CLAD product pages |
| Runs longer than about 40 to 50 ft | Site-formed panels | McElroy site-forms Maxima 2 and Maxima ADV up to 250 ft to remove endlaps | McElroy Metal standing seam page |
| Historic or soldered zinc or copper work | Custom double lock standing seam sheet metal | Soldered cleats, water checks and cross joints are drawn for it | RHEINZINK binder |
Installed prices differ sharply between these systems; our standing seam metal roof cost guide covers the ranges.
Spec sections and test standards that go with the details
Standing seam work is usually specified in CSI MasterFormat 07 41 13 (Metal Roof Panels) for factory or roll-formed panel systems, as on ESR-4173, or 07 61 13 for custom standing seam sheet metal roofing, the number RHEINZINK uses for its standing seam zinc roofing guide specification. The tests named in the spec tell you which wind and water data the details were proven against.
| Item | What it covers | Where it shows up |
|---|---|---|
| CSI 07 41 13 | Metal roof panels | ICC-ES ESR-4173 cover page |
| CSI 07 61 13 | Standing seam sheet metal roofing | RHEINZINK guide specification |
| ICC-ES evaluation report | Code compliance, deck, clip, slope and uplift tables for listed assemblies | ESR-4173 (reissued September 2025, revised June 2026) |
| ASTM E1592 or FM 4474 | Uplift tests named for structural standing seam roof systems | IBC Section 1504.3.2 (text reproduced from the 2018 edition; check your adopted edition) |
| UL 580 | Uplift class rating; Class 90 is the top class | PAC-CLAD Tite-Loc Plus data sheet |
| UL 1897 | Uplift test for roof covering systems | PAC-CLAD Tite-Loc Plus data sheet |
| ASTM E1646 and E331; ASTM E1680 and E283 | Water penetration; air leakage | PAC-CLAD Tite-Loc Plus data sheet |
| UL 790 or ASTM E108 | Fire classification, Class A for listed assemblies | ESR-4173 Section 4.2 |
One example of how ratings depend on the assembly: ESR-4173 lists 24 gauge steel Snap-Clad, up to 18 in wide, with clips at 36 in on center over 19/32 in plywood, at an allowable uplift of 45 psf (assembly W-6). Change the deck, gauge, width or clip spacing and the listed figure changes.
How to check a standing seam detail set before work starts
A detail set can be checked in about the same order a reader’s questions arise: does it match the panel, does it fix each run once, and does every edge and hole on this roof have a drawing? The checklist below is a review aid built from the maker documents cited on this page, not an installation procedure.
- Match the drawings to the panel. Confirm the detail set, evaluation report and warranty all name the same panel, seam type, gauge and width.
- Find the fixed point on every run. Each panel should be fixed at one end or one zone only, with the opposite end on a hem and cleat or sliding closure (Spectrum SS150).
- Check every plane and valley slope. Compare each against the panel’s published minimum, and compute valley pitch at about 0.707 times the roof pitch for equal planes at a right angle.
- List every condition on the roof. Eaves, rakes, ridges, hips, valleys, walls, transitions, crickets, pipes, curbs and skylights each need a drawing; a missing one means a field decision.
- Read the underlayment callouts at each detail. Look for high-temperature self-adhered membrane where the maker requires it, and full coverage on low slopes where specified.
- Confirm penetrations land in the pan. Pipes and boots should sit in the flat between seams, with room for panel movement (RHEINZINK SSR-17).
- Check sealant type by joint. Spectrum calls for non-curing butyl or tape sealant where parts move and polyurethane only to fill voids where nothing moves.
- Check laps. Spectrum’s flashings lap at least 6 in, shingle style, with two rows of sealant tape and stitch screws at 4 in on center maximum; valley laps are 12 in.
- Check run length. If a run needs an endlap, confirm the set includes a cross joint or expansion joint detail rated for that slope, or ask about site forming.
Where to download standing seam metal roof details (PDF and DWG)
Most panel makers publish standing seam details free as PDF, and several offer CAD (DWG) files. Use the set for the panel you are buying, because the warranty is written against that maker’s details. The libraries below were checked in October 2026.
- PAC-CLAD (Petersen): CAD / PDF Drawings / Testing / BIM library for Snap-Clad, Tite-Loc, Tite-Loc Plus and PAC-150.
- McElroy Metal: CAD or PDF drawings for its standing seam families.
- RHEINZINK: Standing Seam binder, 09-2024, with SSR details and a guide specification.
- Metal-Tech Global: Standing Seam Roof Details, a 95 page PDF with its index of drawings.
- Spectrum: SS150 Standing Seam Roofing Details, including hem length and expansion joint pages.
Frequently asked questions
What are the construction details of a standing seam metal roof?
The construction details are drawings showing how a standing seam roof finishes at each edge and opening: eave, rake, ridge, hip, valley, sidewall, headwall, transitions, cross joints and penetrations. Each shows the deck, underlayment, clips, panel end, closure and flashing, and which end of the panel is fixed. Published libraries range from 17 detail pages (Spectrum SS150) to 94 drawings (Metal-Tech).
What goes under standing seam metal roofing?
A solid deck, at least 15/32 in plywood or 7/16 in OSB for the Petersen panels in ICC-ES ESR-4173, then an underlayment meeting IRC R905.10.5 and the maker’s list. Makers add high-temperature self-adhered membrane at eaves, valleys and penetrations, and RHEINZINK requires it over the whole roof below 3:12, plus a drainage mat under zinc.
How far apart are the seams on a standing seam metal roof?
Seams sit one panel width apart, usually 12 to 24 in on center. Petersen panels in ESR-4173 are formed 10 to 20 in wide depending on profile, Tite-Loc Plus is sold at 12, 16 or 18 in, and RHEINZINK zinc runs 12 to 24 in. Wider panels may need thicker metal or striations to limit oil canning.
What is the best type of standing seam panel for a metal roof?
It depends on slope, wind and snow. In the examples reviewed, snap lock suits roofs of 2:12 and up, while mechanically seamed double lock panels are listed down to 1/2:12 and carry the higher published wind tests. Pick the panel whose minimum slope, test report and detail set cover your actual roof.
What spec section is standing seam metal roof?
Factory or roll-formed standing seam panels are usually specified under CSI MasterFormat 07 41 13, Metal Roof Panels, the section shown on ICC-ES ESR-4173 for Petersen panels. Custom-fabricated standing seam sheet metal, such as soldered zinc or copper, falls under 07 61 13, as in RHEINZINK’s guide specification.
How thick is standing seam metal roofing?
Steel standing seam is commonly 24 or 22 gauge; ESR-4173 sets a 24 gauge Galvalume minimum for the Petersen panels, and Tite-Loc Plus is also offered in 0.032 and 0.040 in aluminum. RHEINZINK specifies 0.7 mm zinc for 12 to 17 in panels and 0.8 mm for 17 to 24 in panels.
Sources
- ICC-ES ESR-4173, Petersen Standing Seam Metal Roof Panels (reissued September 2025, revised June 2026).
- RHEINZINK America, Standing Seam: System Technology for Roofing, Division 7 binder Volume 10 Chapter 3 (09-2024).
- Metal-Tech Global, Standing Seam Roof Details, index MT_SSRP_0000 and sheets MT_SSRP_1001, 1305, 1901 (2015).
- Spectrum, SS150 Standing Seam Roofing Details manual.
- PAC-CLAD (Petersen, owned by Carlisle Construction Materials per PAC-CLAD), metal roofing product pages and Tite-Loc Plus data sheet.
- McElroy Metal, Standing Seam Metal Roofing Systems page.
- International Residential Code sections R905.10.2, R905.10.5 and R905.1.2; International Building Code sections 1504.3.2 and 1507.4.2.