Good downspout placement follows three simple rules: one downspout per 35 linear feet of gutter run, one square inch of downspout cross-section per 100 square feet of roof drainage area, and outlets located at the low end of every gutter slope (never in the middle of a long run). Most homes are undersized because the original builder used a single 2×3 inch downspout for the whole back of the house, and the gutter overflows every storm even though it looks perfectly clean. This guide covers sizing math, spacing math, elbow types, splash block versus extension, and how to actually decide where the outlets go on a real roof.
The short version
- Sizing rule: 1 square inch of downspout per 100 square feet of roof drainage area. A 2×3 inch downspout (6 sq in) handles 600 sq ft. A 3×4 inch downspout (12 sq in) handles 1,200 sq ft.
- Spacing rule: maximum 35 feet of gutter run between downspouts. Closer is better. A 50 foot gutter wall needs two downspouts, not one.
- Always put the outlet at the low end of the slope. Gutters pitch about 1/4 inch per 10 feet toward the outlet, so a 40 foot run drops 1 inch from high end to drain.
- Elbow types: A elbow turns side to side (around a wall corner), B elbow turns front to back (away from the house). 75 degree elbows for normal jogs, 90 degree for tight returns.
- Discharge: splash block 18 to 24 inches long handles light rain. Add a 4 foot flex extension or buried PVC for any roof over 800 sq ft drainage area.
- Most undersized homes can be fixed by adding one downspout and upsizing existing outlets to 3×4, no full gutter replacement needed.
The 100 square foot rule and what it actually means
The plumbing code rule that drives every downspout sizing decision in the country is simple: you need 1 square inch of downspout cross-section for every 100 square feet of roof area draining to that downspout. The math is from the International Plumbing Code Table 1106.6 and it assumes a 4 inch per hour rainfall rate, which is roughly the 100-year storm in most of the eastern half of the United States.
Run the numbers on the two standard residential downspout sizes:
| Downspout size | Cross-section | Max roof area drained | Where it belongs |
|---|---|---|---|
| 2 in x 3 in rectangular | 6 sq in | 600 sq ft | Small ranches, sheds, porches, secondary runs |
| 3 in x 4 in rectangular | 12 sq in | 1,200 sq ft | Standard 2,000 sq ft homes with 4 outlets |
| 4 in round | 12.6 sq in | 1,260 sq ft | Half-round gutter systems, copper, commercial |
| 5 in round | 19.6 sq in | 1,960 sq ft | Large hip roofs, commercial, heavy-rain zones |
A 2,400 square foot two-story home with a hip roof has roughly 1,600 square feet of roof drainage projected footprint. Split four ways (one outlet per corner), each downspout handles 400 square feet, so 2×3 inch is technically fine. Split two ways (one front, one back), each handles 800 square feet, and 2×3 inch is undersized by 33 percent. That is exactly why so many builder-grade two-story houses overflow at the gutters every time it rains over an inch per hour.
For the upstream sizing logic on what gutter cross-section to pair with which downspout, see our /gutter-sizes-and-capacity/ calculator. A 6 inch K-style gutter feeding a 2×3 inch downspout is a bottleneck. The gutter holds the water; the outlet cannot pass it fast enough.
The 35 foot spacing rule
The second rule is even simpler: never run more than 35 feet of gutter to a single outlet. Pick any longer wall on a typical home (a 50 foot ranch, a 60 foot Colonial side elevation) and you need two downspouts, one at each end, with the gutter pitched in opposite directions away from a high point in the middle.
Why 35 feet? Two reasons. First, gutter pitch is typically 1/4 inch per 10 feet of run toward the outlet. A 35 foot run drops 0.875 inches. A 50 foot run drops 1.25 inches, which becomes visually obvious from the ground and looks like the gutter is sagging. Second, even a 6 inch gutter at standard pitch has a flow capacity of roughly 5,500 square feet of roof drainage. Push more area than that into a single outlet and the gutter fills faster than the downspout can drain it.
The fix for a long wall is to install a high point in the middle (sometimes called a saddle or back-to-back miter) and pitch the gutter in two directions to two outlets. This is standard practice on any wall over 40 feet and is one of the items a competent installer will flag during a /rain-gutter-install-guide/ walkthrough.
Where to put the outlets on a real house
Sizing tells you how many outlets you need. Placement tells you where. The decision tree is short:
- Corners first. Every gutter outlet should be at an outside corner of the house if possible. Corners give you the easiest downspout run to the ground (a single 75 degree elbow at the top, straight drop, 75 degree elbow at the base) and they discharge to a part of the yard usually outside the flowerbed line.
- Away from doors, windows, and walkways. Never drop a downspout next to an entry door. It splashes onto the porch in heavy rain, freezes into a hazard in winter, and ruins the threshold over time. Move at least 24 inches from any opening.
- Away from foundation cracks. If the basement has a known seepage point, do not put a downspout above it. The foundation is already compromised; adding a concentrated discharge point above the crack is the fastest way to make the basement leak worse.
- Toward natural grade. The ideal outlet location is one where the yard slopes away from the house naturally. Drop the downspout there, add a splash block, and gravity does the rest. Force a downspout to discharge uphill and you are guaranteed a wet foundation.
- Avoid the AC condenser and the gas meter. Obvious, but skipped on roughly half the new construction jobs we audit.
The most common placement mistake we see on builder-grade construction is a single downspout located in the middle of a long back wall, draining into a window well or directly onto an HVAC pad. That installation violates spacing, sizing, and discharge rules simultaneously, and it usually shows up as fascia rot inside three years. See /fascia-rot-from-gutters/ for the diagnostic.
Elbow types: A versus B, 75 versus 90 degrees
Once you know where the top of the downspout connects to the outlet and where the bottom needs to land, you usually need elbows to jog around eave trim, fascia, or wall offsets. Two elbow shapes cover 95 percent of residential work:
- A elbow (side-throw). Turns left or right. Used at the very top of the downspout where the outlet drops out of the gutter and the downspout needs to come back to the wall. Also used at the bottom to redirect along the side of a porch or around an obstacle.
- B elbow (front-throw). Turns away from the wall. Used at the bottom to kick the discharge into the yard, or at the top if the gutter overhangs the wall and the downspout needs to come in toward the siding.
Bend angle: 75 degrees is the residential default. It is gentle enough that water does not pool in the bend and it allows the downspout to run flush against the wall with about a 2 inch standoff. 90 degree elbows exist (they are sometimes used on commercial buildings or when fitting around a deep return) but they are noisier in heavy rain and more prone to ice plugs in winter. Avoid 90s unless geometry forces them.
A typical 8 foot downspout drop from a one-story eave to the splash block uses three pieces: A elbow at the top out of the outlet, a single straight section of downspout, and an A or B elbow at the bottom. Two-story houses use four to five pieces with a long center section. Make sure every joint overlaps at least 1 inch and is secured with two pop rivets and a bead of gutter seal, not just zip screws.
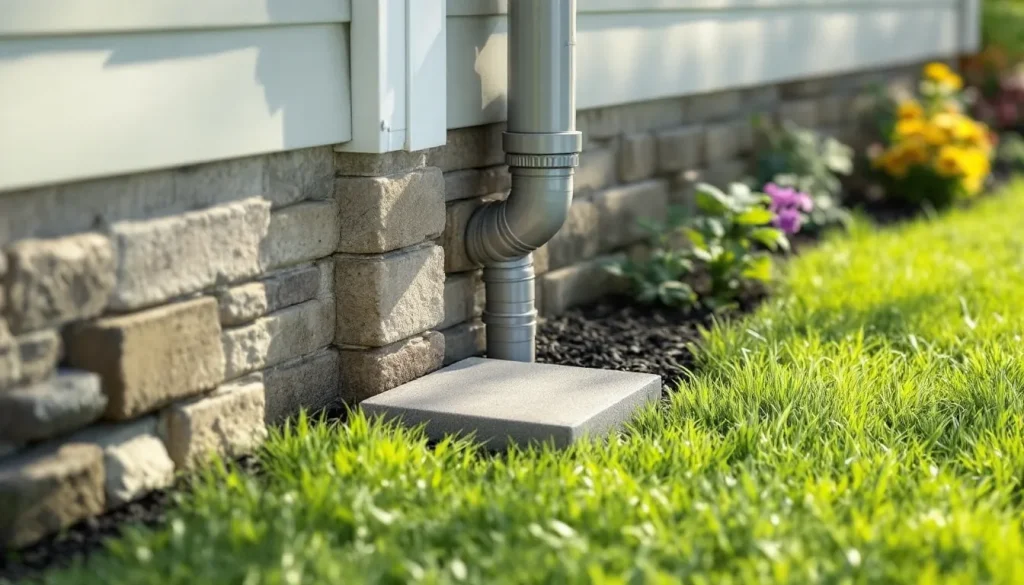
Splash block versus flex extension versus buried PVC
The downspout itself is only half the job. Where the water lands at the bottom decides whether you stay dry. Three discharge options cover almost every situation:
| Discharge | Cost | Distance from foundation | Best for |
|---|---|---|---|
| Concrete splash block (18 to 24 in) | $8 to $18 | 2 feet | Sheds, porches, secondary downspouts, yards with good slope |
| Plastic flex extension (4 to 8 ft) | $10 to $25 | 4 to 8 feet | Most residential primary downspouts |
| Buried 4 in PVC to daylight | $25 to $40 per ft installed | 10 to 30 feet | Wet basements, foundation problems, flat lots, French drain integration |
The plastic flex extension (the accordion-style hose that snaps onto the bottom elbow) is the cheap fix that solves 80 percent of the foundation moisture problems we see. It costs $15, takes 5 minutes to install, and gets the discharge point 4 to 8 feet from the wall. The trade-off is that the flex pipe needs to be lifted and emptied of leaves twice a year or it clogs.
Buried PVC to daylight is the permanent answer for homes with chronic foundation moisture or where downspouts have to discharge to an area where a flex pipe is unsightly (a front yard, a manicured side yard). The PVC ties into the bottom of a 75 degree elbow at the downspout base, runs under the lawn at 12 to 18 inches deep, and pops up at an open grate 15 to 30 feet from the house. Total cost is usually $400 to $900 per discharge line installed. We cover the deeper integration option in /french-drain-gutter-integration/.
For a head-to-head comparison of the cheap discharge options, see /splash-blocks-vs-extensions/.
How to retrofit an undersized system without replacing the gutters
The good news for homeowners stuck with builder-grade 2×3 inch downspouts: you usually do not need to replace the gutters themselves. The fix is to add outlets and upsize the downspouts only.
The retrofit process looks like this:
- Measure each gutter run and identify any wall over 35 feet served by a single downspout. Mark a new outlet location at the opposite corner.
- Cut a 3 inch hole in the bottom of the gutter at the new outlet location using a holesaw or a dedicated downspout-outlet punch tool ($25 at any home center).
- Drop in a 3×4 inch outlet flange, seal with butyl gutter sealant, and pop-rivet through the gutter bottom.
- Re-pitch the affected gutter run so both outlets drain (you may need to move two or three hangers up by 1/4 inch each).
- Hang a 3×4 inch downspout from the new outlet to a splash block or extension.
Materials cost for one new downspout run is roughly $80 to $140 ($35 for the outlet flange, sealant, and pop rivets; $45 to $95 for 10 to 16 feet of 3×4 downspout, two elbows, and band straps; $15 for the splash block). Labor for a roofing or gutter contractor adds another $200 to $400. Total fix per added downspout: $300 to $550. Compare that to ripping and replacing the entire gutter system for $1,800 to $3,500 and the math is obvious.
One caution: if your existing gutter is 5 inch K-style, the largest outlet that will fit cleanly in the bottom is 3×4 inch. If you are running 6 inch gutter you have a bit more room. See /k-style-vs-half-round-gutters/ for the cross-section limits.
Cold climate adjustments
Three things change in snow country. First, downspout count should be increased by roughly 25 percent because ice in the gutter reduces effective cross-section. A house that would take four 3×4 inch outlets in Atlanta should run five 3×4 inch (or four 3×4 plus heat cable) in Minneapolis.
Second, never run a downspout into a buried PVC line that does not slope continuously down to daylight. The buried section will fill with freezing meltwater, back up into the downspout, split the downspout at the band straps, and refreeze. We see this failure every spring in the Upper Midwest.
Third, consider heat cable on the downspouts themselves, not just in the gutters. A frozen downspout is the most common cause of mid-winter ice dams: water sheets over the top of the gutter, hits the cold roof edge, and freezes into a wedge of ice that backs up under the shingles. For the install pattern see /heated-gutter-cable/ and the parallel ice-dam approach in /heat-cable-for-ice-dams/.
When to call a pro versus DIY
Adding one downspout to an existing system is a competent homeowner DIY job, usually a Saturday-morning project with a stepladder, a drill, a holesaw, a pop-rivet gun, and tin snips. Materials run $60 to $140. The skills required are no more than installing a kitchen shelf.
Pay a contractor when: the new downspout requires re-pitching more than 20 feet of gutter (which involves moving most of the hangers), the second-story eaves are over 18 feet off the ground, or the discharge point requires buried PVC and trenching across landscaping. Whole-house downspout audit and retrofit by a gutter contractor runs $400 to $1,200 depending on how many runs need work. For full-system replacement pricing baseline see /gutter-installation-cost/.
The signal that you need a pro fast: standing water in the gutter visible the day after a storm, paint blistering on the fascia, or a wet streak down the siding directly below the gutter outlet. Those are the early stages of fascia rot, and waiting another rainy season turns a $400 downspout fix into a $2,500 fascia and soffit repair. The full diagnostic playbook lives at /fascia-rot-from-gutters/.
Quick reference card
If you only remember three numbers from this guide, make them these:
- 100. One square inch of downspout per 100 square feet of roof draining to it.
- 35. Maximum gutter run between downspouts in feet.
- 4. Minimum discharge distance from the foundation in feet (with extension or splash to a slope).
Get those right and you have solved 90 percent of residential drainage problems before they start. Get them wrong and the symptoms (overflow, foundation seepage, fascia rot, ice dams) keep coming back no matter how clean you keep the gutters. The full /gutter-installation/ walkthrough covers how outlets and downspouts integrate with the rest of the install sequence.