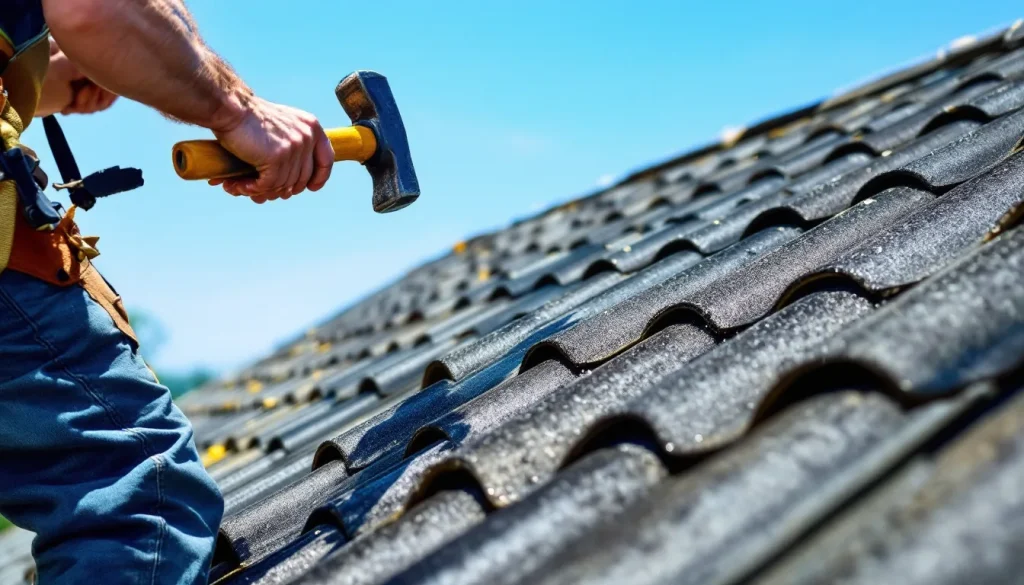
How to install ridge cap shingles, in order: snap a chalk line 6 inches off the ridge on both sides, start at the downwind end of the ridge, nail the first cap with two 1.75-inch roofing nails set 5.5 to 6 inches up from the leading edge and 1 inch in from each side, overlap each cap by 6 inches to leave a 5 to 6 inch exposure, cover all exposed nails on the final cap with roof cement, and stop short of any ridge vent (see our ridge vent installation guide) slot by the manufacturer’s specified setback. The whole job is about wind direction, exposure consistency, and nail placement. The rest is muscle memory.
The short version
- Start the run on the downwind end. Caps overlap toward the prevailing wind so seams shed water and resist uplift.
- Standard exposure is 5 to 6 inches. Off-brand caps and 3-tab field shingles vary. Always check the wrapper.
- Two nails per cap, 5.5 to 6 inches up from the leading edge, 1 inch in from each side. Six-nail field shingle patterns do not apply to ridge.
- Use 1.75-inch nails on standard sheathing. Bump to 2-inch on plank deck or over a ridge vent.
- The last cap on the run is hand-sealed with roof cement over exposed nails. This is the most common leak point on the roof.
- Pre-formed ridge caps (GAF Seal-A-Ridge, Owens Corning ProEdge, CertainTeed Cedar Crest, IKO Hip & Ridge) are mandatory under most architectural shingle warranties. Cut-up 3-tabs void the warranty.
The short answer: what ridge cap is doing
Ridge cap is the line of bent shingles running along the peak of the roof. It seals the gap where the two roof planes meet and protects the top course of field shingles from wind uplift and water intrusion. On hip roofs, the same product runs down each hip. On gable roofs, it only runs the main ridge. The cap is the most visible course on the roof, and it’s also the most exposed to wind, UV, and freeze-thaw. Skip the manufacturer cap product, install the wrong nail pattern, or run the caps the wrong direction, and the ridge is the first thing on the roof to fail.
Tools and materials
| Item | Spec | Why it matters |
|---|---|---|
| Ridge cap shingles | Manufacturer-matched (GAF Seal-A-Ridge, OC ProEdge, CertainTeed Cedar Crest, IKO Hip & Ridge) | Pre-formed, color-matched, warranty-compliant |
| Roofing nails | 1.75-inch galvanized or stainless, 11 or 12 gauge | Long enough to penetrate sheathing by 0.75 inch minimum |
| Chalk line | Blue or red chalk | Black chalk is permanent and shows through translucent shingles in time |
| Utility knife | Hook blade preferred | Cleaner cuts on the starter cap and end pieces |
| Roof cement | ASTM D4586, plastic tube | Hand-seal the final cap and any exposed nails |
| Caulk gun | Standard | Roof cement application |
| Hammer or coil nailer | 21-degree coil nailer with depth control | Hand-nailing preferred on ridge for nail placement accuracy |
| Tape measure, pencil | Standard | Marking exposure on the first few caps to set the rhythm |
One bundle (see our bundle math guide) of pre-formed ridge cap covers roughly 20 to 25 linear feet of ridge depending on brand. Add 10% for waste and overlaps.
Determine wind direction first
The single rule that homeowners and weekend installers get wrong: ridge cap is directional. Each cap overlaps the next by 6 inches, and the overlapping edge must face into the prevailing wind. If you install the caps the other direction, every wind gust lifts the leading edge of each cap and drives water under it.
Check a wind rose for your zip code or pull a year of wind data from a nearby airport METAR. In most of the continental U.S., prevailing wind is from the southwest or west. That means you start the ridge at the east or northeast end and work toward the southwest. On hip roofs, do each hip individually based on which way that hip faces.
This is the same logic as field shingles: the next course covers the nails of the course below it. Get the direction wrong on the ridge and every nail is exposed to the next wind event.
Step 1: snap chalk lines for alignment
Measure 6 inches down from the ridge on each side and snap a chalk line the full length of the ridge. The caps will straddle the ridge with their bottom edges falling on these lines. A 12-inch wide pre-formed cap centered on the ridge gives 6 inches on each side, which lands exactly on the chalk.
The chalk line matters because the human eye reads ridge cap as a perfect line from the ground. A cap that drifts a half inch off across the run reads as crooked even though it would never be noticed on a field course. Snap the line.
Step 2: starter cap at the downwind end
The first cap is special. Cut a single cap shingle so that only the exposed portion (the 5 to 6 inch piece that will show) remains. Place this trimmed piece at the very start of the ridge with the cut edge flush with the rake or hip corner. Nail it with four nails: two on each side, set 1 inch in from the edge and 1 inch up from the chalk line.
The full-length first cap then goes directly on top of the starter, fully covering it. This double layer at the start prevents wind from getting under the first cap edge. Without it, every storm tries to peel the run from the front.
Step 3: nailing the field caps
Each cap after the starter gets two nails. The nails go 5.5 to 6 inches up from the leading edge (the edge that will be covered by the next cap) and 1 inch in from each side. This places the nails inside the area that the next cap will cover, hiding them from weather.
Critical: read the wrapper. Some brands (GAF Seal-A-Ridge, IKO Hip & Ridge) print nail placement marks directly on the cap. Use those if present. The 5.5 to 6 inch standard is the default when no marks are printed.
The 5/8 rule for nail height
Pros memorize the rule as “5/8 from the top” because most pre-formed caps are 12 to 13 inches long with a 5 to 6 inch exposure. Nailing 5.5 to 6 inches from the leading edge puts the nail 5/8 of the way up the cap. The next cap covers that 5/8, and only the bottom 5 to 6 inches is exposed.
What goes wrong if you nail too low
If the nails go below the 5.5 inch line, they end up in the exposed portion of the cap. Every nail head becomes a potential leak point. UV degrades the gasket seal, the head rusts, and water tracks down the shank into the deck. This is the single most common ridge cap failure mode an inspector flags.
What goes wrong if you nail too high
If the nails go above the 6.5 inch line, they end up too close to the bend. On a cold day the cap can crack at the bend during nailing, especially with the firmer asphalt mat on premium caps. On hot days the cap may seat fine but the bend is weakened and lifts in the first wind event.
Step 4: exposure and overlap rhythm
Standard exposure for pre-formed ridge caps is 5 to 6 inches. Measure from the leading edge of one cap to the leading edge of the next. The covered portion (overlap) is whatever the cap length minus the exposure works out to: typically 6 to 7 inches.
Mark the exposure on the first three caps with a pencil tick. By cap four the rhythm sets in. Pros eyeball it after the first run; for everyone else, the pencil tick prevents creep.
If you’re installing pre-formed caps on top of an active ridge vent (a slot cut in the sheathing for attic ventilation), check the vent product spec. Some require a specific cap pattern. Most ridge vents (GAF Cobra, OC VentSure, CertainTeed Ridge Vent) ship with their own integrated installation instructions for cap nailing through the vent product. See our attic ventilation guide for ridge vent context.
Step 5: the final cap and sealing
The last cap on the run cannot be overlapped, so its nails are exposed to weather. Two options to handle this:
- Hand-seal the nails. Drive two nails as normal, then cover each nail head with a quarter-sized dollop of roof cement (ASTM D4586). This is the standard method.
- Pre-cement the cap underside. Apply a bead of roof cement to the underside of the cap before placing it, nail it down, then cover the heads with cement. Belt and suspenders. This is what we’d specify in a windy coastal install.
Either way, the final cap is the last line of defense and the most likely future leak point. Don’t rush it.
Hip ridges vs main ridges
The technique is identical on hip ridges, with two adjustments. First, hips meet at the peak in a three-way intersection. The last cap on each hip is trimmed at an angle to meet the others, and the intersection itself is sealed with roof cement under each trimmed end. Second, hip ridges are usually shorter than main ridges, so you can often run a single hip with full caps and a custom-trimmed last piece.
The peak intersection where three or four hips meet is a leak-prone detail. The conservative pro method is to install a manufacturer-specified hip-peak cap or a custom-cut 12 by 12 inch shingle patch over the intersection, bedded in roof cement, with nails covered.
Cut-up 3-tab caps: when (and why not) to use them
Before pre-formed caps existed, roofers cut 3-tab field shingles into three pieces and bent each piece over the ridge as a cap. The technique still works mechanically, but it has three problems in 2026:
- Warranty void. GAF, Owens Corning, CertainTeed, and IKO all require their pre-formed hip and ridge product on architectural shingle installs to maintain the full warranty. Cut-up 3-tabs void the cap warranty and often the full system warranty.
- Color mismatch. Architectural field shingles do not have a 3-tab option in the same color. Cutting up a 3-tab in the closest color is visible from the ground.
- Cold weather cracking. Bending a field shingle over the ridge below 50 degrees F cracks the asphalt mat. Pre-formed caps are scored at the bend to prevent this.
Cut-up 3-tabs still appear on budget reroofs and storage sheds. For any owner-occupied home, the pre-formed product is the right call. See our ridge cap shingles guide for the product comparison.
Common ridge cap mistakes
1. Running caps the wrong direction
Wind lifts the leading edge of every cap, water tracks under the overlap, ridge fails in the first big storm. This is the #1 install error and the easiest to spot from the ground (the laps face the wrong way).
2. Nails in the exposed area
Nail head visible in the bottom 5 to 6 inches of any cap is a leak waiting to happen. Cover with roof cement immediately if you spot it on an existing roof.
3. Mixing 3-tab field with architectural caps (or vice versa)
The exposure math is different. A 3-tab cap on an architectural ridge looks short and reads as cheap. Architectural caps on a 3-tab field look heavy and read as mismatched.
4. Skipping the starter cap
Without the doubled-up starter at the downwind end, the first cap has exposed nails on its leading edge and lifts in the first wind event. The starter cap is non-negotiable.
5. No sealant on the final cap
Exposed nails at the end of the run rust within 3 to 5 years and become the source of the ridge leak that shows up in the attic ten years later. Always seal.
6. Wrong nail length on plank decks
1.75-inch nails are fine on standard 7/16 to 1/2 inch OSB or plywood. On older homes with 1-inch plank decks, you need 2-inch nails to penetrate by the required 0.75 inch beyond the deck. Shorter nails back out under thermal cycling.
7. Cap installed over an unflashed ridge vent slot
If a ridge vent is being installed, the vent product goes down first, then the caps go over the vent per the vent manufacturer’s spec. Caps installed directly over a raw vent slot leak immediately. See our attic ventilation guide for ridge vent install sequencing.
Pre-formed ridge cap product comparison
| Product | Length | Exposure | Wind warranty | Typical pairing |
|---|---|---|---|---|
| GAF Seal-A-Ridge | 13.25 inches | 5.625 inches | 110 mph (LayerLock cert) or 130 mph (system) | GAF Timberline HDZ |
| Owens Corning ProEdge | 12 inches | 6 inches | 110 mph standard, 130 mph SureNail system | OC Duration, Oakridge |
| CertainTeed Cedar Crest | 12 inches | 5 inches | 110 mph (with 4-nail cap pattern) | CT Landmark, Presidential |
| IKO Hip & Ridge 12 | 12 inches | 5.625 inches | 110 mph | IKO Dynasty, Cambridge |
Buy the cap that matches the field shingle manufacturer. The warranty is a system warranty, not a piece-by-piece warranty. Mixing GAF caps on an Owens Corning field shingle voids both warranties.
Cost to install ridge cap
For a typical 2,200 square foot single-story home with 40 to 60 linear feet of ridge:
- Material cost: $80 to $180 (2 to 3 bundles of pre-formed cap, depending on brand)
- DIY install time: 2 to 4 hours of actual install on top of the field roof
- Contractor markup if added to a reroof: $150 to $400 for the ridge work, often baked into the per-square reroof price
- Contractor cost for ridge-only repair: $400 to $900 minimum service call
On a reroof, ridge cap is rarely priced as a line item. Verify the contract specifies “pre-formed manufacturer ridge cap” by product name, not just “ridge cap.” Cut-up 3-tab disguised as ridge cap is a contractor cost-cutting trick worth watching for.
When to call a pro
Ridge cap is one of the more accessible DIY roofing tasks because the work is all on the safest part of the roof (the peak). The reasons to bring in a pro anyway:
- Steep slopes above 8:12. The peak is high, the fall distance is long, and harness setup is mandatory. See our roof safety guide.
- Ridge vent retrofit. Cutting the slot is structural and the integrated install is best handled by a roofer.
- Active leak diagnosis. If you’re installing ridge cap to fix an existing leak, the leak might be coming from somewhere else entirely. See how to fix a roof leak.
- Architectural or designer shingle warranty work. Most warranty programs require certified installers for the cap install to be covered.
FAQ
What direction do I run the ridge caps?
Start at the downwind end and run toward the prevailing wind. Each cap’s overlap should face into the wind so wind cannot get under the leading edge. In most of the continental U.S., prevailing wind is from the southwest, so you start at the east or northeast end of the ridge.
Can I use my leftover field shingles as ridge caps?
Only on 3-tab field shingle installs (and even then it’s becoming uncommon). On architectural shingle installs, manufacturers require their pre-formed hip and ridge product (GAF Seal-A-Ridge, OC ProEdge, CertainTeed Cedar Crest, IKO Hip & Ridge) to maintain the warranty. Cut-up architectural shingles do not bend correctly and crack at the fold line.
How many nails per ridge cap?
Two nails per cap, placed 5.5 to 6 inches up from the leading edge and 1 inch in from each side. The next cap covers those nails. The very first cap (the doubled-up starter) gets four nails. The very last cap gets two nails plus hand-sealed roof cement over each head.
What’s the exposure for ridge cap shingles?
Standard pre-formed caps have a 5 to 6 inch exposure. Read the wrapper to confirm. GAF Seal-A-Ridge is 5.625, Owens Corning ProEdge is 6, CertainTeed Cedar Crest is 5, IKO Hip & Ridge is 5.625. Mark the first three caps with a pencil to set the rhythm.
Do I need ice and water shield under the ridge cap?
Not typically required, but recommended in heavy snow climates and on any ridge that has had a leak history. A 12-inch wide strip of ice and water shield centered on the ridge, installed before the caps, adds a second water barrier where the field shingles meet. Ridge vent installs handle this differently per the vent manufacturer.
Bottom line
Ridge cap is one of those details where the difference between a good install and a bad install does not show up for ten years, then it shows up all at once as a ridge-line leak that wrecks the attic and rots the top course of decking. The work itself is straightforward: pre-formed caps, downwind-to-upwind direction, 5.5 to 6 inch nail placement, hand-sealed final cap. The discipline is in not skipping any of those four things.
If you’re DIY, the ridge is the part of the roof most worth doing right because it’s the most visible from the ground and the most exposed to weather. If you’re hiring out, write “pre-formed manufacturer hip and ridge cap” by product name into the contract and check that the laps face the wind on completion day.