A proper ridge vent installation requires three things contractors routinely get wrong: a slot cut of 1.5 to 2 inches on each side of the ridge board (NOT a single 3-inch wide gash), the cut stopped 6 inches short of every gable end and every chimney or skylight obstruction, and matching soffit intake Net Free Area (NFA) so the vent has something to pull air from. Without balanced intake, a ridge vent does almost nothing. With balanced intake, it is the single most effective passive ventilation method on a residential roof. Top products in 2026 are GAF Cobra 3, Air Vent ShingleVent II, Owens Corning VentSure 4-foot strips, and Lomanco OR-4, all rated at 18 in² of NFA per linear foot. The install detail below covers the slot cut, the membrane choice, the ridge cap shingles, and the eight failure modes that show up on inspection.
The short version
- Slot cut: 1.5 to 2 in on each side of the ridge board, stopping 6 in short of gable ends and obstructions.
- NFA balance rule: ridge NFA should equal soffit/eave NFA (1:1), or eave NFA 50 percent greater than ridge in cold climates (3:2 intake to exhaust).
- Top products by NFA: GAF Cobra 3 (18 in²/ft), Air Vent ShingleVent II (18 in²/ft), OC VentSure 4-foot (18 in²/ft), Lomanco OR-4 (18 in²/ft).
- Two product styles: rigid plastic with baffles (Cobra 3, ShingleVent II), rolled mesh/foam (Cobra Snow Country, Cor-A-Vent).
- Ridge cap shingles must match the field shingle brand or warranty voids. The ridge cap shingles guide covers product matching.
- Cost: $2.50 to $5 per linear foot installed, plus $40 to $80 per ridge cap shingle bundle.
How a ridge vent works
A ridge vent is a continuous opening along the peak of the roof that lets hot, moisture-laden attic air escape by natural buoyancy. As air leaves through the ridge, fresh cool air is drawn in through soffit or eave intake vents. The full path, soffit to ridge, washes the underside of the roof deck and keeps the deck temperature close to the outdoor ambient. That matters in summer (cooler attic, longer shingle life, lower cooling load) and in winter (cold deck, no snowmelt, no ice dams).
The ridge vent itself is a low-profile baffle that sits over a slot cut in the roof deck and runs the length of the ridge. It is covered by ridge cap shingles so it looks like a normal ridge from the ground. The baffle design prevents wind-driven rain and snow from entering while still allowing air to exit. Without ridge cap shingles, the vent will leak in any side wind over 25 mph.
The system only works if intake matches exhaust. A ridge vent without soffit vents pulls air from the path of least resistance, which is often through can-light fixtures, attic hatches, and gable louvers, short-circuiting the deck-cooling function. The 2026 IRC R806 requires a minimum 1:300 net free area to attic floor area ratio when balanced ridge-and-soffit ventilation is used. The attic ventilation guide covers the full system math.
The product lineup
| Product | Style | NFA per linear foot | Profile height | Typical cost |
|---|---|---|---|---|
| GAF Cobra 3 | Rigid plastic with baffle | 18 in²/ft | 0.75 in | $5 to $8 per 4-ft section |
| GAF Cobra Snow Country | Roll mesh | 18 in²/ft | 0.5 in | $1.50 to $2.50 per linear foot |
| Air Vent ShingleVent II | Rigid plastic with baffle | 18 in²/ft | 0.75 in | $6 to $9 per 4-ft section |
| Owens Corning VentSure 4-foot | Rigid plastic with baffle | 18 in²/ft | 0.75 in | $5 to $8 per 4-ft section |
| Lomanco OR-4 | Rigid plastic with baffle | 18 in²/ft | 0.75 in | $5 to $8 per 4-ft section |
| Cor-A-Vent V-600 | Mesh strip | 9 in²/ft | 0.75 in | $3 to $5 per linear foot |
The rigid plastic baffle products (Cobra 3, ShingleVent II, VentSure, OR-4) are the residential standard. They install in 4-foot sections that interlock end to end, have molded-in baffles to deflect wind-driven rain, and accept standard ridge cap nailing. The roll mesh products (Cobra Snow Country, Cor-A-Vent) are lower profile and faster to install but offer less weather protection. In snow country, the rigid baffle products perform substantially better.
The NFA balance rule (the rule everyone breaks)
Net Free Area is the actual unobstructed open area of a vent, in square inches. A continuous soffit vent rated 9 in²/ft delivers 9 square inches of free area per linear foot of soffit length. A ridge vent rated 18 in²/ft delivers 18 square inches per linear foot of ridge length. The rule for balanced ventilation:
- 1:1 ratio (standard): Total ridge NFA should equal total soffit NFA
- 3:2 intake to exhaust (cold climates): Soffit NFA 50 percent greater than ridge NFA, which prevents the ridge from pulling warm humid attic air against cold sheathing where it would condense
Worked example. House with 40 feet of ridge and 80 feet of eave (two 40-foot eaves). Ridge vent at 18 in²/ft delivers 720 in² total NFA. To match in a 1:1 ratio, the soffit needs 720 in² across 80 linear feet of eave, or 9 in²/ft. That happens to be the exact rating of a standard 8-inch continuous strip soffit vent. Perfectly balanced.
Now flip it. Same house but soffit is only the small round 4-inch vents at 2 in² each, spaced every 8 feet. Total intake is 20 in². The ridge vent delivers 720 in² of potential exhaust against 20 in² of intake. Result: the ridge pulls air from anywhere it can, conditioned air gets sucked up through the ceiling, and the deck cooling function fails. This is the most common ridge vent install failure: lots of exhaust, no intake.
Install sequence (8 steps)
- Measure and plan. Total ridge length minus 12 inches (6 inches per gable end). Plan the cut to stop 6 inches before any chimney, skylight, or perpendicular ridge. Calculate the NFA balance against existing soffit vents and confirm intake is adequate before cutting.
- Snap chalk lines for the slot cut. Snap a chalk line 1.5 to 2 inches from the ridge centerline on each side. The exact width depends on the product (Cobra 3 calls for 1 to 1.5 inches per side, ShingleVent II calls for 1.5 to 1.75 inches per side). Read the product instructions, then chalk to match.
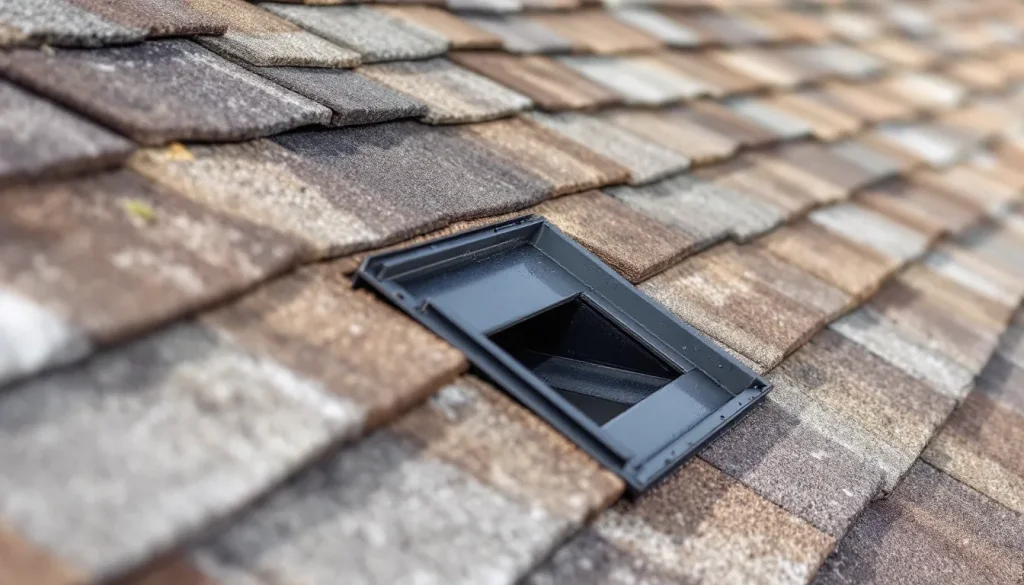
- Cut the slot. Set a circular saw to cut just through the sheathing (typically 5/8 inch on a roof with OSB or plywood). Cut along both chalk lines, stopping 6 inches from each gable end and 6 inches from any obstruction. Do NOT cut through the ridge board or rafters. The cut leaves the ridge board intact between the two slots.
- Remove the cut sheathing strips. Pry up and remove the two narrow strips of sheathing. You should now have two parallel slots flanking the ridge board, each 1.5 to 2 inches wide, with the ridge board still in place between them.
- Run underlayment OVER the slot. Cover the slots with ice and water shield or synthetic underlayment, then CUT THE UNDERLAYMENT BACK to expose the slots. The underlayment under the ridge vent prevents capillary water entry but cannot block the slot or the vent will not breathe.
- Install ridge vent sections. Center the rigid plastic vent over the slot. The baffle ends face down toward the roof field. Nail through the pre-marked nailing zones (typically every 8 inches along each edge) with 2-inch roofing nails. Interlock successive 4-foot sections end-to-end. At gable ends, install the end-cap pieces that come in the kit.
- Install ridge cap shingles over the vent. Use ridge cap shingles from the same manufacturer as the field shingles, or warranty voids. Run a starter ridge cap at one gable end, then lap successive caps with 5 to 6 inches of exposure. Nail each cap with 2.5-inch roofing nails through the vent and into the sheathing on both sides of the slot.
- Seal both gable ends. The end caps need a bead of polyurethane sealant where they meet the ridge cap shingles, especially in wind-driven rain zones. Inspect the sealed ends after the first heavy rain and add more sealant if water tracks past.
Common mistakes
Ridge vent install errors are usually invisible from the ground but they cripple the ventilation system that the install was supposed to provide.
- Slot cut too narrow (under 1 in per side). A 0.5-inch slot per side gives the air a tiny pinch point that throttles the system to a fraction of the vent’s rated NFA. Cut to the product spec, no skinnier.
- Slot cut too wide (over 2 in per side). A 3-inch slot per side exceeds the vent baffle width and lets wind drive rain right past the baffles into the attic. The slot must fit under the vent’s baffle protection.
- Cut continued through to the gable ends. A cut that runs to the gable creates an open hole at the gable end that wind and pests enter through. Stop the cut 6 inches short of every gable end.
- No intake / inadequate soffit ventilation. The biggest mistake of all. Ridge vent without matching intake does almost nothing useful and may pull conditioned air from the house through ceiling penetrations.
- Mixed exhaust types (ridge vent + gable louvers). A ridge vent paired with active gable louvers short-circuits the airflow. The ridge pulls from the closest opening, which is the gable louvers, not the soffits. The deck never gets cooled. Block off the gable louvers when installing ridge vent.
- Underlayment blocking the slot. Underlayment that crosses the slot without being cut back to the slot edge throttles airflow to zero. Cut it back.
- Wrong ridge cap shingles. Field shingle from one brand with ridge cap shingle from another brand voids the warranty and often does not seal properly. Use the matched ridge cap install approach with the matched product.
- Nailing through the vent baffle. Hitting the baffle with a nail crushes it and creates a permanent leak path. Nail only in the marked nailing zones at the edges of the vent.
- End caps loose at the gables. The end cap is the weakest link in any ridge vent system. Loose, missing, or unsealed end caps let wind-driven rain enter at the gable corners. Seal them with polyurethane.
- Ridge vent installed without checking attic air sealing. Air leakage from the conditioned space (recessed lights, plumbing chases, attic hatch) carries moisture into the attic and the ridge vent has to exhaust it. Seal the ceiling plane first, then the ridge vent has only outdoor humidity to deal with.
Cost
Material cost for a typical 40-foot ridge run: rigid plastic ridge vent in 10 sections at $6 each is $60. End cap pieces add $10. Ridge cap shingles for 40 feet of ridge (with 5-inch exposure that is about 96 caps, or roughly 4 to 5 bundles) at $50 per bundle is $200 to $250. Sealant and fasteners add $20. Material total $290 to $340.
Installed cost on a reroof, when the slot is being cut and the ridge cap is going on as part of the larger job, runs $2.50 to $5 per linear foot of ridge. On a retrofit install where the existing ridge is being torn open to add ventilation, cost climbs to $6 to $12 per linear foot because of the additional shingle replacement at the ridge cap line.
Ridge vent in metal roof applications
Metal roofing uses a different ridge vent product. Standing seam panels need a metal ridge cap that incorporates the vent under it. Products like Air Vent FilterVent metal ridge or DCI Metal ProfileVent are designed to integrate with the panel ribs. The slot cut is the same (1.5 to 2 inches per side) but the membrane and the cap differ. Snow infiltration risk is higher on metal because the panels conduct heat better, so cold-climate metal roof ridge vents need integral snow filters. The snow guard guide covers the related metal-roof detailing.
When NOT to use a ridge vent
Three situations argue against a ridge vent:
- Hip roofs with very short ridge runs. A hip roof with 8 feet of ridge cannot deliver enough exhaust NFA to match the soffit intake. Use multiple roof vents or a powered fan instead.
- Cathedral ceilings without an air space behind the deck. A vaulted ceiling with no attic space and no air channel between insulation and deck has no path for soffit-to-ridge airflow. The ridge vent will have nothing to vent.
- Hot-roof / unvented attic assemblies. A spray-foam-insulated unvented attic does not need or want a ridge vent. Adding one disrupts the conditioned-attic assembly.
For everything else (gable roofs, gambrel roofs, hip roofs with adequate ridge length, vented attics), ridge vent is the right exhaust choice when paired with adequate soffit intake.
FAQ
Will a ridge vent leak in heavy rain? Properly installed, no. The internal baffles deflect wind-driven rain before it reaches the slot. The most common cause of ridge vent leaks is a cut that exceeds the baffle width, end caps that are loose, or wrong ridge cap shingles.
Do I need to remove my gable louvers when installing a ridge vent? Yes. Active gable vents short-circuit the soffit-to-ridge airflow. Block them off or remove them when adding a ridge vent.
How much soffit ventilation do I need? Match the ridge NFA in a 1:1 ratio, or exceed it by 50 percent in cold climates. For a 720 in² ridge run, you need at least 720 in² of soffit, ideally 1,080 in² in cold climates.
Can I install a ridge vent on a retrofit without tearing off shingles? Partially. You can pull back the top three to four courses on each side of the ridge, cut the slot, install the vent, replace the ridge cap, and re-seal the shingles. It is fiddly and worth doing only on a roof with 8+ years of life remaining.
What is the NFA of a ridge vent? Standard rigid-plastic baffle products (GAF Cobra 3, Air Vent ShingleVent II, OC VentSure 4-foot, Lomanco OR-4) deliver 18 in² of NFA per linear foot. Lower-profile mesh products deliver 9 to 12 in²/ft.
Bottom line
Ridge vent is the most effective passive exhaust on a residential roof, provided the slot cut is correct (1.5 to 2 inches per side, stopped 6 inches short of gables and obstructions), the soffit intake matches the exhaust NFA, and the ridge cap shingles match the field shingle brand. Skip any of those three and the install ranges from useless to actively harmful. Pick one of the four major rigid-plastic baffle products (Cobra 3, ShingleVent II, VentSure, OR-4), cut to spec, balance intake to exhaust at 1:1 or 3:2 in cold climates, and cap with matched ridge shingles. Done right, the system runs maintenance-free for the life of the roof.