To fix (see our roof repair cost guide) a roof leak in 2026, work this sequence: trace the actual entry point (which is rarely directly above the wet ceiling), install temporary mitigation, identify the leak type, then execute the permanent repair by category. The single most common DIY mistake is patching where water shows up instead of where it enters the roof. Water can travel six to twenty feet along a rafter before dripping, so the wet ceiling spot is almost never under the breach. Here is the right process, with material specs and the tests pros use to verify a fix actually worked.
The short version
- The five-step process: trace the source, mitigate temporarily, identify the leak type, execute the permanent repair, verify with a garden hose test.
- Water travels along rafters and decking. The wet spot below rarely matches the entry point. Look uphill from the wet spot on the roof, not directly above it.
- Vent pipe boot replacement and single shingle replacement are the two DIY-safe repairs on low-slope roofs. Step flashing, valley work, and chimney flashing should go to a pro.
- The right materials matter: polyurethane sealant (Geocel 2300, NPC Solar Seal 900), not silicone. Karnak 19 or Henry 587 for permanent flashing repair, not big-box wet patch.
- OSHA 1926.501 requires fall protection above six feet. A harness and roof anchor cost $150 to $300 and pay for themselves the first time you slip.
- Document everything for insurance: dated photos before and after, the storm date if applicable, materials used, and the contractor’s scope of work.
The Short Answer: 5-Step Process to Fix a Roof Leak
- Trace the source. The interior wet spot is downstream of the actual breach. Map the rafter direction, look uphill on the roof, and inspect the suspected entry zone from inside the attic during daylight.
- Mitigate temporarily. Inside, catch water and protect possessions. Outside, install a properly secured tarp if the leak is active and weather is bad.
- Identify the leak type. Flashing, shingle, valley, vent boot, ice dam, or skylight. The repair is completely different for each.
- Execute the permanent repair. Use the correct material, replace the failed component rather than sealing over it, and respect the roof’s pitch and your skill level.
- Verify the fix. Garden hose test the repaired area, watch from inside for 15 minutes, document the result.
Each step has its own pitfalls. The next sections walk through them in order.
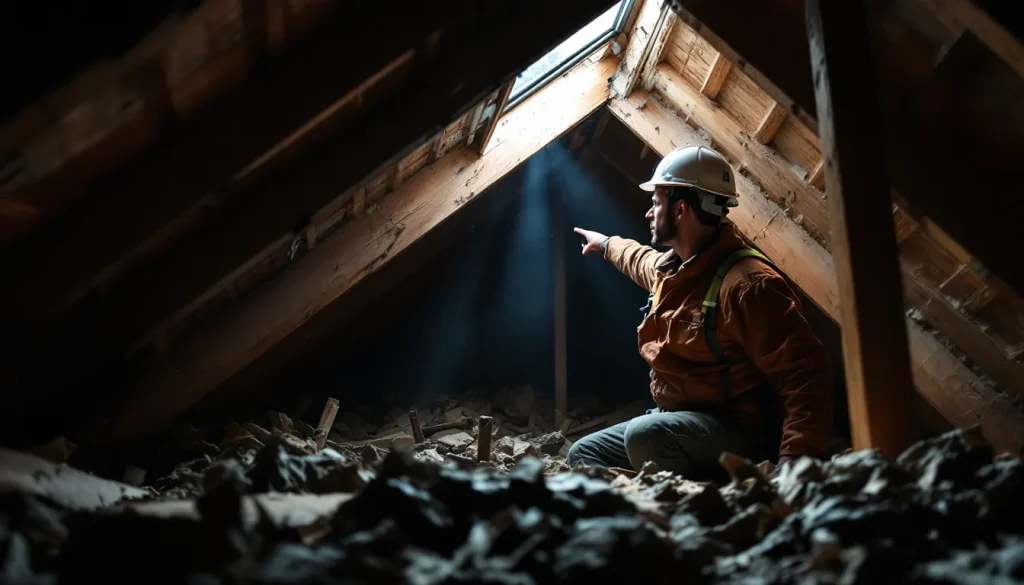
Step 1: Trace the Leak Source
Water (see our water stain on the ceiling) on roof framing follows the slope and the wood grain. A leak that enters the deck at the chimney can drip through the ceiling six to twelve feet away in either direction. Roofers who chase the symptom instead of the source create the perpetual-leak problem that haunts so many homes.
The right tracing method, in order:
- Map the rafter direction. Rafters run from the eave up to the ridge. Water enters the deck at some point, then runs down the rafter or along the underside of the decking until it finds a low point or a knot hole.
- Get into the attic in daylight. Look for water staining on the rafters and underside of decking. The highest stain on a rafter is closest to the entry point. Follow the stain upward and toward any penetration (chimney, vent, valley) above it.
- Check during or right after rain. Wet rafters and dripping nails tell you exactly where water is moving. Mark with a Sharpie. Dry markings can lie.
- Use the hose test on a dry day. Have a helper inside the attic. Start at the lowest suspected zone of the roof and work upward, hosing each area for 10 minutes. The moment the helper sees water, you have the source.
What not to do: cut into the ceiling first. The drywall hole tells you where the water came out of the ceiling cavity, not where it entered the roof. Find the entry first, then deal with interior damage.
Step 2: Temporary Tarp and Indoor Mitigation
If the leak is active and the roof is too wet or too unsafe for repair (see our itemized roof repair costs), you need a temporary solution for the next 24 to 72 hours.
Inside:
- Move furniture and valuables out of the impact zone.
- Put a bucket under the drip. If the ceiling is bulging with trapped water, poke a small hole at the lowest bulge point to release pressure into the bucket. A controlled drain prevents a chunk-of-ceiling collapse onto your floor.
- Photograph everything with timestamps. Insurance carriers want pre-mitigation photos.
Outside (if conditions allow):
- Use an 8 mil or thicker poly tarp, 4 to 6 feet larger than the leak area on every side.
- Roll the upslope edge of the tarp around a 2×4 furring strip. Slip the wrapped edge under the shingle course above the leak area. This is the critical detail. If water runs over the upslope edge, the tarp does nothing.
- Stretch the tarp downslope and secure the bottom and sides with additional furring strips screwed into the decking.
- Do not drive roofing nails directly through the tarp into the decking without sealant. Every penetration is a future leak.
An emergency tarp installed correctly buys 30 to 45 days. UV degrades poly faster than people expect. Schedule the permanent repair (see our how much to repair a roof) within that window or replace the tarp.
Step 3: Identify the Leak Type
Once you have located the entry point, identify what kind of failure created it. The five categories that account for almost all residential roof leaks:
| Leak Type | Typical Location | Identifying Sign | DIY-Friendly? |
|---|---|---|---|
| Shingle damage | Field of roof | Missing, cracked, or curled tab | Yes (low slope) |
| Vent boot failure | Plumbing stack penetration | Cracked rubber collar | Yes (low slope) |
| Step flashing | Wall-roof intersection | Caulk smeared along wall, no metal visible | No |
| Chimney flashing | Around masonry chimney | Rust, gaps, or daylight visible from attic | No |
| Valley | Where two roof planes meet | Worn metal, lifted shingles, debris pileup | No |
If your leak does not match any of these patterns, it might be condensation (especially in attics with poor ventilation), an HVAC condensate line leak (look near AC closets and air handlers), or a wind-driven rain event through soffit vents. The fix for each is different from a “roof leak.”
For a deeper map of roof leak sources and which ones are most common, see our roof leak repair cost guide.
Repair: Damaged or Missing Shingles
The DIY-friendliest leak repair, with one caveat: only on roofs with pitch under 6/12 and where you can walk on the surface safely. For anything steeper, call a pro or use a roof anchor and harness system.
Materials needed:
- Matching shingles (architectural three-tab, or laminated, in the original color).
- Roofing nails (1-1/4 inch galvanized).
- Hammer or roofing hatchet.
- Flat pry bar.
- Tube of polyurethane roofing cement (Geocel 2300 or NPC Solar Seal 900).
- Caulking gun.
The process:
- Lift the shingle course above the damaged shingle with a flat pry bar. Work in 65 to 80 degree weather if possible. Cold shingles crack; hot shingles tear.
- Pry up the nails holding the damaged shingle and the course above it. Carefully slide the damaged shingle out.
- Slide the replacement shingle into position, aligned with the course on either side.
- Nail the replacement with four nails per shingle, in the nail line (about 5 to 6 inches above the bottom edge for a three-tab shingle).
- Lift the course above and re-nail it where you removed nails earlier.
- Apply six dabs of roofing cement under the tab edges of the replacement shingle to ensure it seals to the course below. This matters on north slopes and in cold weather where thermal sealing may not activate.
A single shingle replacement takes 20 to 40 minutes and costs $30 to $60 in materials.
Repair: Damaged Flashing
Most homeowner flashing repairs should be limited to two scenarios: re-sealing a known-good flashing piece that has a failed caulk joint, or applying a temporary flashing patch over a damaged piece until a pro can replace it. Replacing flashing properly requires lifting shingles, weaving in new pieces, and matching the existing system.
The right caulk for a flashing seam:
- Geocel 2300 ProFlex or NPC Solar Seal 900. Polyurethane or tripolymer. Bonds to metal, masonry, and asphalt shingles. 15 to 20 year service life.
- Do not use silicone. Silicone does not bond well to mineral granules and degrades under UV.
- Do not use big-box “roof patch.” Most are asphalt cement that work as temporary repair but fail in three years.
For a true flashing replacement (counter flashing pulled off, step flashing replaced piece by piece), call a roofer. Our deep guide on roof flashing repair covers the materials, the four-piece chimney system, and the IRC R905.2.8 code requirements.
Repair: Vent Pipe Boot (Cheap Fix, ~$30 in Materials)
The single most homeowner-friendly leak repair. Plumbing vent stacks are the cylindrical pipes sticking out of the roof. They are sealed with a metal flange and a rubber EPDM collar. The collar cracks at 10 to 15 years. Replacing it is straightforward.
Two repair options:
Option A: Full boot replacement.
- Pry up the shingles directly above and on the sides of the flange.
- Pull the nails holding the flange down.
- Lift the failed flange off the vent stack.
- Slide the new flange down over the stack and seat it on the deck.
- Re-nail the flange. Apply roofing cement under the lifted shingles and re-seat them over the new flange.
- Seal the top edge of the flange to the stack with polyurethane sealant.
Time: 60 to 90 minutes. Cost: $15 to $35 in materials.
Option B: Retrofit collar.
- Buy a Perma-Boot, Oatey Master Flash, or Lifetime Tool retrofit collar matched to your vent stack diameter.
- Slide the retrofit sleeve down over the existing failed boot.
- Tighten the two stainless clamps according to the manufacturer instructions.
- Apply polyurethane sealant at the top edge where the collar meets the stack.
Time: 20 to 30 minutes. Cost: $25 to $45 in materials. No shingle disturbance required. This is the better choice for most homeowners.
Repair: Valley Leak (Often Requires a Professional)
Valleys are where two roof planes meet. They carry concentrated water volume and represent some of the trickiest repairs on a residential roof. A 1,000-square-foot roof can route 200 to 300 gallons through a single valley during a heavy storm.
Valley leak repair scope depends on valley type:
- Open metal valley: If the metal is corroded or punctured, the whole valley metal usually needs replacement. That means lifting shingles 12 to 18 inches back from the valley centerline on both sides, replacing the metal, and re-seating shingles with proper exposure.
- Closed-cut valley: The shingles need to be lifted and the underlying ice and water shield inspected. If the membrane has failed, a full strip and rebuild of the valley is required.
- Woven valley: Almost always requires partial strip and rebuild.
Valley repair pricing runs $600 to $2,400 depending on length and condition. This is not a DIY project for almost any homeowner. The exception is a very short valley (under 6 feet) on a low-slope porch roof where the failed component is obvious and accessible. Even then, call a roofer for a quote before committing your weekend.
Repair: Chimney Flashing (The 4-Piece System Explained)
Chimney flashing is a four-component system. When any one of the four fails, the chimney leaks. Understanding the system explains why DIY chimney flashing repair almost never holds.
| Component | Function | Common Failure |
|---|---|---|
| Base flashing (apron) | Bent metal at the downslope side of chimney | Rust, separation from chimney |
| Step flashing | L-shaped pieces between each shingle course and chimney side | Bent, missing, or caulked over |
| Counter flashing | Metal cap that comes down from chimney face over step flashing | Pulled out of mortar joint, missing reglet cut |
| Cricket (saddle) | Small ridge upslope of chimney that diverts water | Absent or undersized (required by IRC R903.2.1 if chimney is wider than 30 inches) |
A homeowner can replace a missing dab of sealant on counter flashing as a six-month patch. Full repair requires cutting a reglet (slot) into the mortar joint, inserting new counter flashing with lead wedges, sealing with polyurethane, and likely weaving in new step flashing pieces. That is a $500 to $1,800 professional job and worth every dollar.
Tools You Need (and OSHA Safety Considerations)
For any DIY roof leak repair, basic tool list:
- Flat pry bar (24 inch).
- Roofing hammer or 16 oz claw hammer.
- Utility knife with hook blades.
- Caulk gun.
- Tin snips (for cutting metal flashing).
- Cordless drill or impact driver.
- Tape measure.
Safety gear that is genuinely non-negotiable:
- Roof anchor ($30 to $80) installed into a rafter through the decking, sealed properly afterward.
- Harness ($60 to $150) full-body, ANSI Z359 compliant.
- Lifeline and rope grab ($60 to $120).
- Soft-soled shoes (running shoes with rubber soles work better than work boots on shingles).
OSHA 1926.501 requires fall protection above six feet of working height for employers. The agency does not regulate homeowners on their own roofs, but the physics of a fall do not care about your employment status. Falls are the leading cause of construction fatalities for a reason.
Materials That Work (Henry, Karnak, GeoCel – Brand-Specific)
The repair-aisle products at big-box stores often underperform what working roofers buy from supply houses. The professional materials that actually deliver:
| Product | Best Use | Approximate Cost | Service Life |
|---|---|---|---|
| Henry 208R wet patch | Emergency stop on wet surface | $15 to $25 per gallon | 1 to 3 years (temporary) |
| Henry 587 plastic roof cement | Sealing flashing seams on dry surface | $25 to $35 per gallon | 5 to 10 years |
| Karnak 19 ultra rubberized | Permanent flashing and seam repair | $35 to $55 per gallon | 10 to 15 years |
| Geocel 2300 ProFlex | Flashing sealant, all weather | $8 to $12 per tube | 15 to 20 years |
| NPC Solar Seal 900 | Premium tripolymer sealant | $12 to $18 per tube | 20+ years |
| Grace Ice and Water Shield | Self-adhered membrane | $80 to $130 per roll | 30+ years (when covered) |
Three rules from working roofers:
- Wet patch (Henry 208R) is a temporary fix. Use it in a rainstorm, replace with a proper repair within six months.
- Polyurethane and tripolymer caulks outlast silicone on roofs. Silicone is the wrong product for asphalt.
- Self-adhered membrane is underused by DIYers. A strip of Grace Ice and Water Shield around a vent or valley turns a future leak into a non-issue for 25 years.
When to STOP and Call a Pro
Clear signals that the job is past the DIY line:
- Roof pitch above 6/12 (about 27 degrees). Walking is unsafe without a harness system most homeowners do not own.
- Two-story or taller installation. Falls from height kill.
- The leak source is at a chimney, skylight, or wall transition (step flashing or counter flashing required).
- The roof is tile, slate, or metal. Specialized fasteners, lifting techniques, and replacement materials.
- You can see daylight through the decking from the attic. That is a structural-decking problem, not just a roof problem.
- The decking under the leak is spongy. Rot has set in and decking replacement is part of the repair.
- Multiple active leaks. Systemic failure, not point repair.
- The roof is over 18 years old and showing widespread granule loss or curling. You are likely past repair territory.
For the cost picture on the next step up, see our new roof cost guide and replacement cost calculator.
Verifying Your Fix Actually Worked (the Garden Hose Test)
After any repair, you need to know the fix worked before the next storm tests it for you. The garden hose test is the standard pro verification.
The method:
- Wait 24 hours after the repair so any sealants have set.
- Position a helper inside the attic or the room below the repair area with a flashlight.
- Start hosing the roof 4 to 6 feet downslope of the repair for 10 minutes. No drip? Good.
- Move uphill 2 feet and hose for another 10 minutes.
- Continue moving uphill until you hose directly over the repair area for 15 minutes.
- If no water appears, hose the repair area for another 15 minutes from the upslope side.
- If no water appears at any stage, the fix is verified.
If water appears at any stage, you have either missed a second leak source or the repair did not fully seal. Inspect, repair again, and retest.
Common Mistakes That Make Leaks Worse
Working roofers see the same DIY mistakes repeatedly. The most expensive ones to undo:
- Caulking over the wet ceiling spot instead of finding the entry. Water keeps coming in, just somewhere else. Now you have two interior repairs.
- Using silicone caulk on flashing. Silicone fails on asphalt within 18 to 36 months and leaves a residue that almost nothing else bonds to. The next repair costs more because the residue has to come off first.
- Pressure washing the leak area to “clean it” before applying sealant. Pressure forces water under shingles, strips granules, and voids the manufacturer warranty (GAF, Owens Corning, and CertainTeed all have language to this effect).
- Applying tar over a wet surface and walking away. The asphalt cement does not bond to wet asphalt. Three months later the patch lifts and the leak returns, larger.
- Re-using a cracked vent boot with extra caulk around the rubber. The crack is the failure. Caulk on EPDM rubber bonds poorly. Replace the boot or install a retrofit collar.
- Driving roofing nails through the tarp into the deck. Every penetration is a future leak. Use furring strips at the perimeter, never face-nail the field.
- Skipping the garden hose test. Hoping the next rain confirms the fix is a way to discover the same leak in front of guests at Thanksgiving.
The honest rule: if you find yourself reaching for caulk as the primary repair material on anything other than a known-good flashing seam, stop. You are about to make the next repair more expensive.
Weather Windows for Roof Leak Repair
Temperature and humidity matter for sealant cure, shingle handling, and worker safety. The right working windows:
| Material/Task | Ideal Temperature | Acceptable Range | Avoid |
|---|---|---|---|
| Lifting and re-seating shingles | 65 to 80 F | 50 to 90 F | Below 40 F (cracks) or above 95 F (tears) |
| Polyurethane sealant cure | 50 to 90 F | 40 to 100 F | Below 40 F (very slow cure) |
| Asphalt cement application | 60 to 90 F | 50 to 100 F | Below 45 F (will not bond) |
| Shingle thermal sealing (self-adhesion) | 70+ F for 24 hours | 60+ F sustained | Winter installs need manual sealing dabs |
| Worker comfort and safety | 55 to 85 F, low wind | 40 to 95 F | Wet decking, ice, winds over 25 mph |
The practical implication: schedule planned repairs for spring and fall when conditions are mild. Emergency repairs in winter or summer extremes are doable but require extra care and may need supplemental sealing in spring once temperatures normalize.
Documenting Repair for Insurance
Even if you handled the repair yourself, document for the next owner, the next claim, and the warranty record:
- Timestamped photos before, during, and after the repair.
- Photos of any storm damage that triggered the leak.
- Receipts for materials, in a folder by date.
- Notes on what was replaced versus sealed.
- For pro repairs, a written scope of work and a one-year workmanship warranty in writing.
If the leak was caused by a storm and you may file a claim, do not start permanent repairs until the adjuster has documented the damage. Emergency tarp is fine and expected. Permanent shingle replacement before the adjuster sees it can hurt your claim. The walkthrough on filing an insurance claim for roof damage covers what the carrier expects and what an insurance adjuster looks for during inspection.
FAQs
How do I find a roof leak when there is no visible damage?
Use the garden hose test. Start downslope of the wet ceiling spot and work uphill in 2 to 3 foot increments, hosing each zone for 10 minutes while a helper watches from the attic. The moment they see water, you have the source. This works for almost every leak that does not show obvious damage from the ground.
Can I fix a roof leak in the rain?
You can apply Henry 208R wet patch or install an emergency tarp in the rain. A permanent repair requires dry conditions for sealants to bond and shingles to seat. Tarp first, repair when the roof dries out (24 to 48 hours after rain stops).
How long does roof sealant take to dry?
Polyurethane sealants (Geocel 2300, NPC Solar Seal 900) skin in 1 to 2 hours and fully cure in 24 to 48 hours. Asphalt cement (Henry 587, Karnak 19) skins faster but may stay tacky for days. Wait 24 hours minimum before garden hose testing a repair.
What is the best caulk for a roof leak?
Polyurethane sealants for general flashing work. Geocel 2300 ProFlex and NPC Solar Seal 900 are the working pro choices. Tripolymer products like NPC Solar Seal 900 last longer (20+ years) but cost a bit more per tube. Skip silicone for asphalt shingle roofs.
Why does my roof leak only in heavy rain?
Three common causes: a small breach that only routes enough water to drip during high-volume flow, a flashing gap that wind-driven rain pushes water through, or an ice dam pattern (winter only) where snow melt backs up under shingles. The hose test on a dry day, with high-volume flow, usually reproduces the leak.
Can I just put roofing tar over a leak?
Roofing tar (asphalt cement) is a short-term patch, not a repair. It cracks under UV and temperature cycling within two to four years. Pro roofers use it to seal seams under flashing, never as the primary repair material exposed to weather.
How much does it cost to have a pro fix a small roof leak?
Small leaks (single missing shingle, vent boot, minor flashing seam) typically run $200 to $600 for a pro repair in 2026. Anything involving step flashing, chimney work, valley work, or skylights jumps to $500 to $2,500. See our roof leak repair cost guide for the breakdown by source.