
By The Roofing Brief Team. Last reviewed: October 2026.
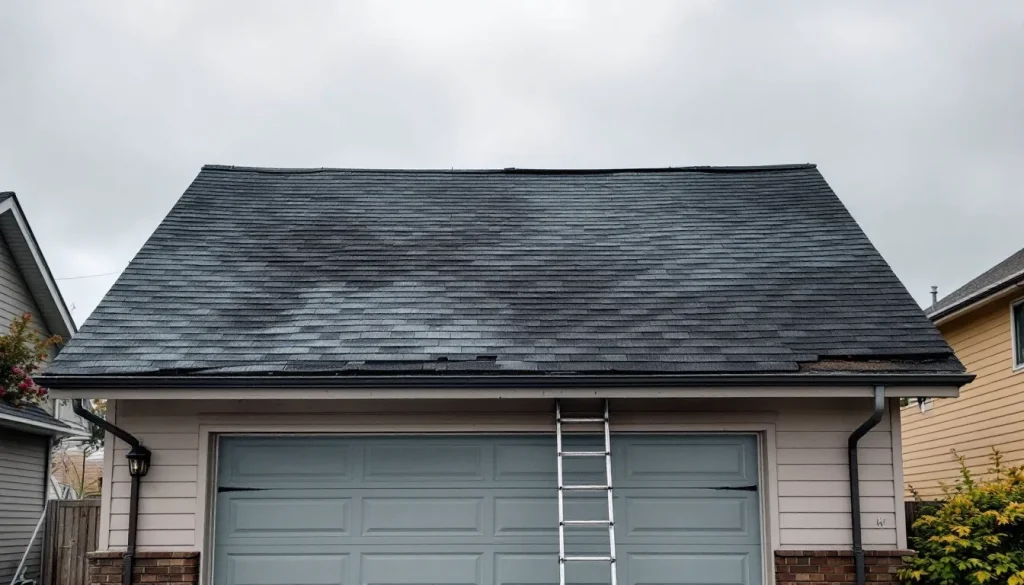
To fix a sagging garage roof, first identify which of five structural failures caused the sag, then match the repair to it: sister rotted rafters, add rafter ties, install an engineered ridge beam, or rebuild a failed wall connection. Reshingling or jacking the sag flat does not fix any of them. The five causes are rafter rot from a long-term roof leak, undersized framing that finally caught up to the load, snow load above design capacity, ridge beam failure from poor original construction, and a failed top plate connection. Localized rafter rot is the DIY case: sistering 3 to 5 rafters costs about $250 to $500 in materials. A ridge beam failure on a detached garage needs a structural engineer and is planned here at $4,000 to $15,000. Before you put a single bottle jack under a sagging roof, run the 30-minute diagnosis in Steps 1 and 2. If ceiling stains led you here, see our guide to water stains on a ceiling.
The short version
- Sag is a symptom. The five real causes: rafter rot, undersized framing, snow overload, ridge beam failure, top plate connection failure.
- Don’t jack a sagging roof without diagnosing the cause first. You can make rotten framing worse or shift load onto a failing wall.
- Sister rafters (DIY): $250 to $500 in materials for 3 to 5 rafters; $800 to $2,000 if a contractor does it.
- Ridge beam replacement or reinforcement (contractor): $4,000 to $15,000 depending on access and span.
- Top plate failure on attached garages often means the garage is pulling away from the house. Engineer-only.
- Any sag visible from the driveway (1 inch or more) is past the point where waiting is reasonable.
- Call a structural engineer if: sag exceeds 2 inches, ridge has dropped, cracks at wall-to-roof junctions, or any sign of foundation movement. HomeGuide puts a structural engineer roof inspection at $150 to $600.
The short answer: identify the failure mode first
A sagging garage roof gets fixed by treating the structural cause, not by jacking up the sag and replacing shingles. Each of the five failure modes has one sign that separates it from the others. The cost column is our editorial planning range; sourced national benchmarks from HomeAdvisor and HomeGuide are in the cost section.
| Failure mode | Visible signs | DIY fix possible? | Planning range (editorial) |
|---|---|---|---|
| Rafter rot (local) | Sag in 1 to 3 rafter bays, water staining on sheathing, soft spots | Yes | $800 to $2,000 |
| Undersized rafters (whole roof) | Even sag across whole span, no visible rot, sheathing intact | Sometimes | $1,500 to $5,000 |
| Snow overload (recent) | Sag appeared after heavy snow, no rot, possible rafter splits | Sometimes | $1,200 to $4,500 |
| Ridge beam failure | Ridge has dropped, both slopes pulled in toward center, walls bowing out | No | $4,000 to $15,000 |
| Top plate failure | Wall pulling away from roof, gap visible at fascia, more common on attached garages | No | $5,000 to $25,000 |
Decision table: DIY, contractor or engineer
| If you find this | Do this | Who |
|---|---|---|
| Sag under 1 inch, stable for 12+ months, no rot or splits | Mark the sag with a string line and re-measure each spring and after heavy snow | Owner |
| Rot in 1 to 5 rafters, sag under 2 inches, ridge straight | Fix the leak, then sister the rotted rafters (walkthrough below) | DIY with framing experience, or a carpenter |
| Even sag, no rot, no rafter ties in the lower third of the attic | Add rafter ties or ceiling joists; get the size and nailing checked against IRC Section R802 | Carpenter; engineer if span over 24 ft |
| Rafter deflection beyond L/180 (0.67 in over a 10 ft span) | Treat the framing as overloaded; size sisters or a ridge beam from the span tables | Engineer |
| Sag over 2 inches, dropped ridge, or walls out of plumb | Stop; keep vehicles out until assessed | Structural engineer |
| Gap at the house wall on an attached garage | Check the foundation and the ledger or top plate connection first | Structural engineer |
If you can see daylight between the top of the wall and the bottom of the fascia, or the sag tops 2 inches and runs evenly across the whole roof with the ridge dropping, stop and call a structural engineer. The DIY path applies only to localized rot or limited snow damage on a roof whose original framing was correctly sized for its span and ground snow load.
For broader context on garage roof problems, see our garage roof overview.
Step 1: Diagnose from inside the garage
Get inside the garage (if attached, the side facing the house; if detached, anywhere with attic access). Bring a flashlight, a 4 ft level, and a chalk or pencil. Don’t go on the roof yet.
Look for water damage
- Sheathing should be uniformly gray-brown. Black staining, white mineral deposits, or dark blotches indicate prior leaks.
- Soft spots on sheathing (push with a screwdriver handle, not the tip) mean the OSB or plywood has rotted.
- Rafters with dark stains running down their faces have wet history. Use a Phillips screwdriver to test for rot: if the tip pushes in more than 1/4 inch with hand pressure, the rafter is compromised.
Check rafter dimensions
- Measure rafter depth (the vertical dimension) and spacing (16-inch or 24-inch on-center). Older detached garages often have 2×6 or even 2×4 rafters at 24-inch on-center.
- Measure the horizontal span each rafter covers: on a 24 ft wide gable garage, each rafter spans about 12 ft horizontally from wall to ridge.
- Compare size, spacing and span to the rafter span tables in IRC 2021 Section R802.4.1, or enter them in the American Wood Council span calculator for joists and rafters with your local ground snow load.
- Count rafters in each bay between bracing or walls.
Look for splits and cracks
Hold the flashlight along each rafter and look for splits running parallel to the grain within 2 ft of the ridge or the top plate, where bending and bearing stresses peak. A split on the bottom (tension) edge means the rafter has exceeded its bending capacity, usually from snow overload, and it needs a full-length sister, not a patch.
Check the ridge
Stretch a mason’s line along the ridge from gable to gable and measure the gap at mid-length. Under 1/4 inch with both slopes dished points to rafter or sheathing problems; a ridge that has dropped 1 inch or more in the middle compared with the ends points to ridge beam failure or rafters spreading the walls.
Check the walls
Use the 4 ft level on the inside of each wall. Walls that bow outward (top tilted out) mean the rafters are no longer holding the walls together. This is a load-path failure. Walls that bow inward mean the original framing didn’t have rafter ties and is being squeezed by the roof load.
Step 2: Diagnose from outside (if safe)
If the sag is visible from outside, document the geometry:
- Stretch a string from one gable end to the other along the ridge. Measure the maximum sag in inches.
- Same for the eave line on each side.
- Photograph each elevation. Sag patterns help diagnose cause.
For scale, IRC Table R301.7 limits design deflection to L/180 for rafters steeper than 3:12 with no finished ceiling attached (0.67 inch over a 10 ft span) and L/240 for members carrying a gypsum ceiling (0.5 inch over 10 ft). A permanent sag larger than those numbers means the framing has moved past what the code designs for.
Do not go on the roof if the sag exceeds 2 inches or if you see cracked or missing shingles in the sag zone. Use a tall ladder or rent a lift to inspect from the eave. For more, see our 30-point inspection checklist guide.
For roof safety basics see our roof safety guide.
Common failure mode 1: rafter rot from long-term leak
Rafter rot is the most common DIY-fixable cause. A leak at a vent boot, a step flashing joint or a valley drips down one rafter for years; once a screwdriver sinks more than 1/4 inch into that rafter, it has lost bending strength and the bay above sags.
Fix: sister rafters
A sister is a new full-length rafter fastened face-to-face to the rotted one so the new member carries the load. Size it to match the original depth or one size deeper (a 2×6 original, 5-1/2 in deep, gets a 2×8 sister, 7-1/4 in deep), and run it from the top plate to the ridge board.
- Fix the leak first. A sister soaked by the same leak rots too. See our how to fix a roof leak guide.
- Support the sagging area with a temporary 2×4 or 2×6 post jacked up from the garage floor with a screw jack or hydraulic bottle jack. Lift slowly, 1/8 inch every few hours over 24 to 48 hours. Never try to lift a sag back to flat in one motion; you risk cracking sheathing or shingles.
- Cut the sister from 2x lumber at least as deep as the original. Copy the plumb cut at the ridge board and the birdsmouth at the top plate from the old rafter; IRC R802.3 requires the ridge board to be at least as deep as the cut end of the rafter.
- Slide the sister in next to the rotted rafter so it bears on the top plate and against the ridge.
- Fasten the sister to the original with 16d nails at 8-inch on-center, staggered top and bottom, or with 3-inch structural screws such as Simpson Strong-Drive SDWS Framing (0.160 x 3 in), which Simpson load-rates as a replacement for 16d, 10d and 8d nails. Two 2x plies are 3 inches thick, so a longer timber screw would poke through.
- Remove the temporary support slowly after fastening is complete.
Cost
- 2×8 lumber: $20 to $35 per 12 ft rafter
- Structural screws (50 pack): $25 to $40
- Jack rental (if needed): $30 to $50 per day
- Total for sistering 3 to 5 rotted rafters in a 2-car detached garage: $250 to $500 in materials
- Contractor cost: $800 to $2,000 for same work
Common failure mode 2: undersized rafters across whole roof
A garage built in 1965 with 2×4 rafters at 24-inch on-center spanning 18 ft will eventually sag. Not because anything is rotten, but because the original framing was undersized for the actual load over decades of seasonal cycling.
Fix options
Three options, ranked by cost:
Option A: Add rafter ties or ceiling joists. Ties that resist outward thrust belong in the lower third of the attic height; per IRC Section R802, where ceiling joists or rafter ties sit higher than that, the ridge must be designed as a beam. Collar ties near the ridge resist uplift and do not stop the walls spreading. Cost: $400 to $1,000 DIY.
Option B: Sister every rafter with a deeper rafter. Adds bending capacity across the whole roof. Cost: $1,500 to $3,500 DIY, $3,500 to $7,500 contractor (see our questions to ask guide).
Option C: Add a structural ridge beam. Transforms the framing from rafters-meeting-at-ridge-board (which requires the walls to resist outward thrust) to rafters-bearing-on-ridge-beam (which transfers load vertically to posts at the gable ends). It is the only option that removes thrust from the walls, and it requires engineer design. Cost: $3,000 to $10,000 contractor; HomeGuide prices support beam installation at $100 to $400 per foot.
For a sagging undersized-framing garage you plan to keep for 20+ years, Option C is the permanent answer. For a garage slated for replacement within 5 years, Option A at $400 to $1,000 may buy enough time.
Common failure mode 3: snow overload
If the sag appeared after a heavy snow season and there’s no rot, the roof likely carried more than its design snow load. Look up your site’s ground snow load in the ASCE Hazard Tool and compare it with the load your rafter size and spacing are rated for in the IRC R802.4.1 tables. Overloaded rafters can keep a permanent set (bending that doesn’t fully recover) and show splits on the bottom edge.
Diagnostic
- Look for splits along the bottom edge of each rafter (tension face).
- Look at the metal connectors at the top plate. Hurricane ties stretched or pulled away from the plate indicate uplift or overload.
- Measure deflection. Anything over 1/2 inch per 10 ft of span exceeds the L/240 limit in IRC Table R301.7 and is structural.
Fix
For mild snow overload with no splits, sistering the affected rafters works. For splits or repeated overload events, have the framing re-engineered. If the ASCE Hazard Tool ground snow load at your address exceeds what your rafter size and spacing are tabulated for, sistering alone will not close the gap; an engineered ridge beam or deeper rafters will.
Common failure mode 4: ridge beam failure
A ridge beam (the structural beam at the peak that rafters bear onto) can fail by bending, splitting, or pulling out of its end supports. The visible signs are dramatic: the ridge drops in the middle, both slopes pull in toward the center, and the walls may bow outward as a result.
This is not DIY territory. Ridge beam failure usually means the beam was undersized, the posts at the gable ends are inadequate, or both, and on roofs flatter than 3:12 IRC R802.3 requires ridge beams to be designed as beams from the start. The repair needs an engineer’s beam size and typically replaces the beam with a deeper LVL or steel beam, or adds a second beam beside the existing one.
Cost: $4,000 to $15,000 depending on access (can the beam come in through a gable end opening, or does the roof need to come off?), beam span, and material chosen.
Common failure mode 5: top plate connection failure (attached garages)
This is the most expensive diagnosis, planned here at $5,000 to $25,000. An attached garage can pull away from the house where its roof meets the main house wall: either the connecting wall’s top plate loses its grip on the house framing, or the garage rafters lose their connection to the top plate.
Visible signs
- Gap visible between the garage roof and the house wall
- Cracked stucco or split siding at the connection
- Garage door is no longer square in its opening
- Daylight visible at the soffit corner where the garage meets the house
Call a structural engineer immediately. The cost to fix is $5,000 to $25,000 depending on the extent and the underlying cause (sometimes it’s a foundation movement problem masquerading as a roof problem).
When to call a structural engineer
Call before doing any repair work if any of the following apply:
- Sag exceeds 2 inches over any 10 ft span
- The ridge has dropped (not just the field sagging, the actual peak is lower)
- Walls are bowing outward or inward
- Cracks at corners where roof meets wall
- Any sign of foundation movement (cracked slab, settling, gaps at base of walls)
- Garage is attached and pulling away from the house
- Original framing was undersized and you want a permanent fix
- You’re considering converting the garage to living space (this triggers different code requirements)
HomeGuide’s structural engineer cost guide (December 2025) puts a structural roof inspection at $150 to $600, a load-bearing wall or beam calculation at $250 to $1,000, and engineering design plans at $500 to $3,000. Ask the engineer for a stamped repair detail that names the member size, fastener schedule and connector model, because most building departments will ask for it at permit. That fee is small next to a redone repair or an insurance claim denial.
What a sagging garage roof repair costs: sourced benchmarks
| Item | Cost | Source |
|---|---|---|
| Fix a sagging roof (national typical) | $750 to $3,000 | HomeAdvisor roof repair cost guide, updated June 19, 2026 |
| Roof truss repair | $500 to $5,000 | HomeAdvisor, June 2026 |
| Structural engineer roof inspection | $150 to $600 | HomeGuide, December 2025 |
| Beam calculation | $250 to $1,000 | HomeGuide, December 2025 |
| Engineering design plans and drawings | $500 to $3,000 | HomeGuide, December 2025 |
| Structural roof repair after an engineer finds problems | $3,000 to $6,000 | HomeGuide, December 2025 |
| Support beam installation | $100 to $400 per foot | HomeGuide, December 2025 |
Worked example: a new 24 ft ridge beam at HomeGuide’s $100 to $400 per foot is $2,400 to $9,600, and adding $500 to $3,000 for engineering plans brings it to $2,900 to $12,600, which sits inside the $4,000 to $15,000 planning range above once posts, footings and roof access are added.
DIY repair: sister rafter walkthrough (most common case)
This sequence assumes localized rot in 3 to 5 rafters, a leak that is already fixed, and a sag under 2 inches.
Materials needed
- 2×8 or 2×10 PT lumber, 12 ft lengths (1 per rotted rafter)
- Structural screws, 3 in long (Simpson SDWS Framing 0.160 x 3 in or equivalent), 25 to 30 per rafter; check the coating against Simpson’s corrosion guidance when the sister is pressure-treated
- Hurricane ties (Simpson H2.5A, 18 gauge), 1 per sister to attach to top plate
- Construction adhesive (Liquid Nails Heavy Duty or PL Premium)
- Temporary shoring: 2×6 posts, screw jacks or hydraulic bottle jacks, 2×6 pads at top and bottom
Sequence
- Identify each rotted rafter. Mark with chalk inside the garage.
- Set up temporary shoring under the sag zone: 2×6 posts with 2×6 pads top and bottom, standing on the slab within 2 ft of the worst sag. Tighten the screw jacks until they take light pressure without lifting.
- Over 24 to 48 hours, slowly tighten the jacks to reduce sag. 1/8 inch every 4 to 6 hours. Stop if you hear cracking from above.
- Stop lifting once the string line shows the sag under 1/4 inch or when the sheathing starts to creak, then cut the first sister to match the existing rafter angles.
- Apply a 3/8-inch bead of construction adhesive to the face of the existing rafter that will mate to the sister.
- Slide the sister in next to the original. Press it flush.
- Drive structural screws at 8-inch on-center, alternating top and bottom edge of the rafter.
- Add a hurricane tie connecting the sister to the top plate.
- Repeat for each rotted rafter.
- Leave shoring in place for 48 hours after the last fastener is driven.
- Remove shoring slowly.
What to do about the sheathing above
If the sheathing in the sag area is also soft, cut out the bad section back to the nearest rafter centers and replace it with panels of the same thickness (typically 7/16 in OSB or 1/2 in plywood on older garages), which means lifting the shingles over it. Schedule the structural repair with that shingle work so the roof is opened once.
Insurance coverage for sagging garage roofs
A standard HO-3 homeowners policy covers sudden damage from named perils such as wind, hail and a falling tree; it excludes gradual sag from wear, rot, undersized framing or faulty original construction. Weight of ice, snow or sleet is a named peril on many policies, so check whether yours lists it before assuming a snow-season sag is excluded.
If you have damage from a specific storm event:
- Document with photos before any temporary shoring
- Notify the carrier within the deadline in your policy’s Duties After Loss section
- Get a roofer or engineer to write the storm-cause finding
- Carrier sends adjuster; you can have a public adjuster represent you for a percentage
If the sag is gradual and from age, it’s on you. Plan the repair as a maintenance expense, not an insurance claim.
Don’t do these things
- Don’t jack a sagging roof in one motion. Slow, incremental, over 24 to 48 hours.
- Don’t put new shingles over a sagging roof. The sag stays under the new shingles, and you’ve wasted the cost of the shingles.
- Don’t add a heavier roof material to a sagging roof. Tile or slate over a sagging asphalt shingle roof guarantees collapse.
- Don’t ignore a sag that’s slowly getting worse. Sags accelerate as load shifts to fewer load paths.
- Don’t try to DIY a ridge beam fix. Engineer required.
- Don’t shore up a sag and call it fixed. Shoring is temporary support during repair, not a fix.
FAQ
How serious is a 1 inch sag in my garage roof?
Worth investigating but not necessarily urgent. A 1 inch sag over a 20 ft span could be original construction tolerance, mild wood creep, or early-stage failure. Get into the attic, inspect the rafters for rot, splits, and connections. If you find rot or splits, schedule repair. If everything looks sound and the sag has been stable for years, monitor it.
Can I fix a sagging garage roof myself?
Yes for localized rafter rot or mild snow overload with no other failure signs. The sister rafter repair is well within DIY range for someone with framing experience. No for ridge beam failure, top plate failure, undersized framing across the whole roof, or any sag over 2 inches. Those need engineer-designed repairs.
What does it cost to fix a sagging garage roof?
HomeAdvisor (June 2026) puts a typical sagging roof fix at $750 to $3,000. By failure mode: $250 to $500 in DIY materials for sistering 3 to 5 rafters with localized rot, $800 to $2,000 for a contractor to do the same, $1,500 to $5,000 for whole-roof sistering, $4,000 to $15,000 for ridge beam repair or replacement, and $5,000 to $25,000 for top plate connection failure on attached garages.
Will my insurance pay for a sagging garage roof repair?
Only if the sag is from a specific, recent, covered peril (wind, hail, tree fall, and on many policies the weight of ice, snow or sleet). Gradual sag from age, rot, or undersized framing is not covered. Document storm-caused damage immediately with photos before doing any temporary shoring.
How long can I safely leave a sagging garage roof before fixing it?
Stable mild sag (under 1 inch, not progressing): months to a year, with monitoring. Any progressing sag, sag over 2 inches, ridge dropping, walls bowing, or signs of foundation movement: don’t park your car in there until it’s diagnosed by an engineer. Garages do collapse, especially under snow load.
Bottom line
A sagging garage roof is fixed by identifying the structural cause first, then matching the repair to the failure mode. Localized rafter rot from a long-term leak is the most common DIY-fixable case: sister the rotted rafters after fixing the leak, $250 to $500 in materials, weekend project. Undersized framing across the whole roof, ridge beam failure, and top plate connection failure all require structural engineering. The diagnostic sequence (inside-the-garage rafter inspection, rot check, ridge sight, wall plumb check) takes 30 minutes and saves you from doing the wrong repair. Call a structural engineer if sag exceeds 2 inches, the ridge has dropped, walls are bowing, or you see any sign of foundation movement. A $150 to $600 engineer roof inspection (HomeGuide, December 2025) is small insurance against a $15,000 wrong-repair mistake or, worse, a structural collapse.