Kickout flashing is the small bent metal piece installed where a roof eave meets a vertical wall, redirecting water away from the wall and into the gutter. Most homes built before 2005 are missing kickout flashing entirely, which causes wall sheathing rot, sidewall stains, and gutter overflow. In 2026, retrofit cost is $75 to $300 per location, or $35 to $90 for the kickout piece itself plus 1 to 3 hours of labor. The 2009 International Residential Code first required kickout flashing (R903.2.1), but many jurisdictions did not adopt the 2009 code until 2012 to 2015, leaving a 10 to 15 year gap of new-construction homes without it. Here is everything you need to know about kickout flashing identification, retrofit, and brand options.
The short version
- Kickout flashing costs $75 to $300 per location to retrofit in 2026 (one location per sidewall-eave intersection).
- Required by IRC R903.2.1 since the 2009 code cycle, but most homes built before 2010 to 2015 are missing it.
- Without it, water running down the wall side of the roof flows straight into the wall sheathing instead of into the gutter.
- The damage cascade: wall stains in year 1, sheathing rot in years 2 to 4, structural damage requiring siding tear-off in years 5 to 8.
- Retrofit is possible without removing field shingles by cutting back the existing step flashing, sliding the kickout in, and re-sealing.
- Brand options range from generic 3 by 5 inch bent aluminum ($8 to $15) to factory-formed J’D OUT kickouts ($25 to $50) to custom copper ($75 to $150).
Short answer: what kickout flashing costs and where it goes
Kickout flashing is installed at the bottom of any sidewall step flashing run, where the roof eave meets the wall. Every house has this configuration somewhere: at every gable-end dormer, at every step-down where a single-story portion meets a two-story portion, at every porch roof that ties into a sidewall.
Retrofit pricing in 2026:
- Material: $8 to $50 per piece for stock or factory-formed kickouts. Custom-bent copper or painted aluminum runs $35 to $150.
- Labor: 1 to 3 hours per location depending on whether the siding has to be cut back. $75 to $250 per location at typical labor rates.
- Total installed: $75 to $300 per kickout location for a retrofit, less if bundled with a full roof replacement ($25 to $75 per location as part of the larger scope).
On a typical 2,400 sq ft home with one dormer and one porch tie-in, you have 2 to 4 kickout locations. Retrofit cost for the whole home is typically $300 to $1,200.
What kickout flashing does
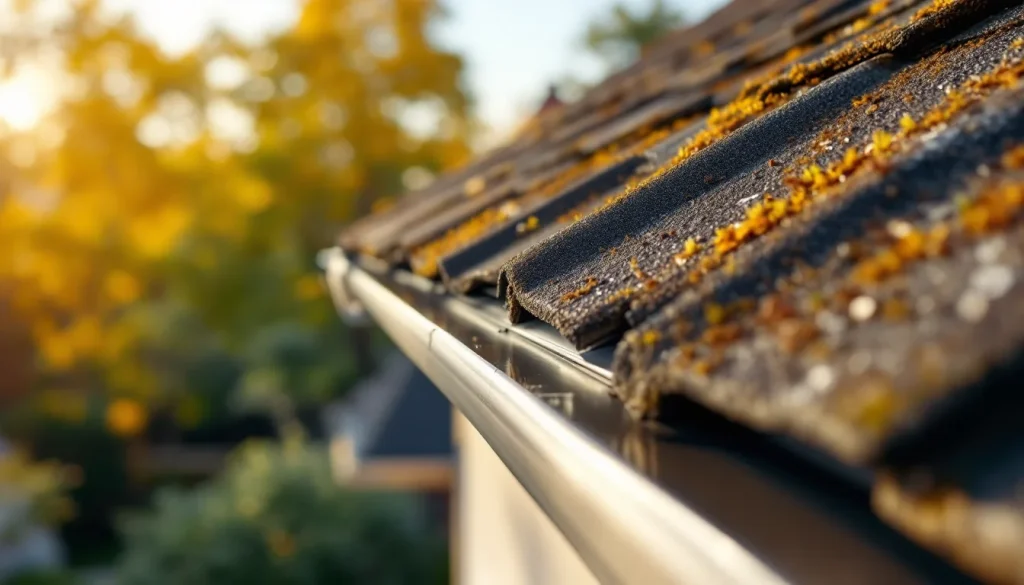
To understand the kickout, you need to understand step flashing first. Where a roof eave runs into a vertical sidewall (a dormer side, an L-shape sidewall, a chimney side), the standard step flashing is a series of L-shaped metal pieces tucked between each course of shingles and lapped up the wall. Each piece deflects water away from the wall and onto the next course of shingles below.
The problem: at the very bottom of the step flashing run, the last piece of step flashing dumps water onto the eave shingles. Without a kickout, that water then flows down the wall side of the roof toward the gutter. But the gutter ends a few inches short of the wall (it has to, because the wall is there), so the water flows past the gutter end and lands on the wall siding below the roof line.
A kickout flashing is the piece that intercepts that water at the eave and “kicks” it outward, away from the wall, into the gutter. It is shaped like a small open scoop: a vertical leg against the wall, a sloped trough that diverts water, and an exit pour that aims into the gutter.
Why pre-2005 homes are missing it
Kickout flashing has existed as a roofing detail since at least the 1950s, but it was not a code requirement. Pre-2009 code (and pre-2012 to 2015 in most jurisdictions that adopted the 2009 IRC late), kickout was a “good practice” detail that quality roofers installed and budget roofers skipped.
Three factors made kickout skipping common in pre-2005 homes:
- Tract builder cost-cutting. A kickout adds $25 to $75 in labor and material per location. On a 200-home subdivision with 3 kickout locations per home, that is $15,000 to $45,000 across the project. Budget builders skipped it.
- Siding-first construction. Many homes were built with the siding already installed before the roof, and the roofer could not get the kickout behind the siding without cutting it. The shortcut was to skip the kickout and run a bead of caulk at the wall-eave intersection instead.
- Lack of inspector awareness. Code officials before 2009 had no specific rule to enforce, and the failure mode (rotting wall sheathing inside the wall cavity) is invisible from the outside for the first several years.
IRC R903.2.1 code adoption timeline
The 2009 IRC added Section R903.2.1, requiring kickout flashing at all roof-to-wall intersections at the lower edge of the roof.
Adoption was state-by-state and is still incomplete in some rural jurisdictions:
| State | IRC 2009 adopted | Kickout flashing required |
|---|---|---|
| California | 2010 (statewide) | Yes, all new construction since 2010 |
| Florida | 2010 (FBC 2010) | Yes, all new construction since 2010 |
| Texas | 2012 (varies by jurisdiction) | Yes in major metros since 2012 |
| New York | 2010 (statewide) | Yes since 2010 |
| Illinois | 2012 (Chicago earlier) | Yes since 2012 |
| Pennsylvania | 2011 (statewide UCC) | Yes since 2011 |
| Ohio | 2013 (residential code) | Yes since 2013 |
| Georgia | 2014 | Yes since 2014 |
| Rural southern states (varies) | 2012-2018 | Required but enforcement varies |
If your home was built before 2010 anywhere in the country, assume you do not have kickout flashing and inspect the sidewall-eave intersections for the telltale signs below. If your home was built between 2010 and 2018 in a state that adopted code late, also inspect; enforcement was uneven for the first few years post-adoption.
Signs you are missing kickout flashing
The damage from missing kickout is progressive and follows a predictable pattern. Look for these signs at every sidewall-eave intersection:
- Dark vertical stain running down the siding starting from the eave line. Caused by water sheeting down the wall instead of being deflected.
- Paint peeling or bubbling on the siding directly below the eave, especially in a 6 to 12 inch wide band.
- Siding warping or buckling in the same band, indicating that the underlying sheathing is wet.
- Soft spots in the wall sheathing when you press on the siding. The OSB or plywood behind has rotted.
- Black mold or mildew visible at the wall-eave joint or on the soffit return below.
- Gutter overflow at the corner where the gutter meets the wall, even in moderate rain. Water hits the wall, runs down, and overshoots the gutter end.
- Water stains on the interior wall below the roof line. By the time this appears, the damage is significant.
The wall damage cascade if missing
The failure timeline for a missing kickout, on a typical sidewall-eave intersection in a 30+ inch annual rainfall climate:
| Year | What is happening | Visible signs | Repair cost if caught now |
|---|---|---|---|
| 1-2 | Water repeatedly hits siding, paint starts breaking down | Vertical stain, faint paint discoloration | $75-$300 (kickout retrofit only) |
| 3-4 | Water penetrates siding gaps, reaches sheathing | Paint peeling, siding warping | $300-$1,200 (kickout + siding panel replacement) |
| 5-6 | Sheathing rots, mold colonizes wall cavity | Soft spots in wall, mold smell, possible interior stains | $1,500-$5,000 (kickout + sheathing + insulation + drywall) |
| 7-8 | Framing studs rot, structural integrity compromised | Sagging fascia, visible bowing, interior wall damage | $5,000-$15,000+ (structural repair, siding tear-off) |
The math: the kickout retrofit at year 1 to 2 costs less than the deductible on most homeowner insurance policies. The structural repair at year 7 to 8 is often not covered by insurance because it is classified as “long-term water damage from a maintenance failure.” Catch this early.
Retrofit installation process
Retrofitting a kickout into an existing roof is one of the more involved flashing retrofits because the kickout has to slide behind the existing step flashing, siding, and house wrap. The standard retrofit:
- Identify the location. The kickout goes at the bottom-most piece of the step flashing run, where the roof eave intersects the wall.
- Cut back the siding. Remove or cut back the siding panel that sits over the kickout location, plus 4 to 6 inches above. Cedar siding can usually be unfastened and slid up; vinyl can be released from the J-channel; fiber cement is cut.
- Cut back the existing step flashing. The bottom 4 to 6 inches of step flashing has to be removed so the kickout can slide behind the next-higher step flashing piece.
- Remove the eave shingle below the wall. Pull the bottom-most field shingle at the eave to expose the deck.
- Apply a strip of ice and water shield wrapping around the corner where the wall meets the eave. This is critical: the kickout is the visible piece, but the ice and water shield is the underlying waterproof layer.
- Slide the kickout in. The kickout’s vertical leg goes up the wall behind the next step flashing piece. The exit pour aims into the gutter.
- Nail the kickout to the deck with 1-1/4 inch coil nails on the roof-facing leg.
- Reinstall the field shingle over the kickout’s roof-facing leg.
- Reinstall the step flashing pieces above the kickout, lapping over its vertical leg.
- Reinstall the siding with proper flashing-tape or caulk seal at the perimeter.
- Verify the kickout aims into the gutter end and not past it.
This is a 1 to 3 hour job per location for an experienced roofer. A DIY install is possible if you are comfortable on a ladder and have basic flashing/siding skills, but the consequences of getting it wrong (water trapped behind the new kickout, faster rot than before) are significant.
DIY vs pro retrofit
Kickout retrofit is at the borderline of DIY feasibility. Arguments for DIY:
- Material cost is low ($25 to $75 per location).
- Work is at ladder height, not full roof height.
- Tools required are basic (tin snips, hammer, caulk gun, utility knife).
Arguments against DIY:
- You have to cut back siding, which is its own skill set. Fiber cement requires a special blade; vinyl can break in cold weather.
- The kickout has to integrate with the existing step flashing, ice and water shield, and house wrap. Getting any layer wrong creates a worse leak than before.
- Most homes need 2 to 4 locations done, and a pro can do them all in a few hours with a higher quality result.
If you are not already comfortable with sidewall flashing and siding work, hire a roofer. If you do go DIY, do one location first, watch it through a full rainy season, and confirm no leaks before doing the others.
Brand and product options
| Product | Material | Size | Use case | Retail (2026) |
|---|---|---|---|---|
| Generic bent aluminum | Mill-finish aluminum | 3 x 4 x 5 in | Cheap retrofit, paint to match | $8-$15 |
| Generic bent steel (galvanized) | Galvanized steel | 3 x 4 x 5 in | Older steel-flashing systems | $10-$18 |
| J’D OUT kickout (Quality Edge) | Pre-painted aluminum, AAMA 2604 paint | 4 x 5 x 6 in | Color-matched, factory-formed, code-compliant | $25-$50 |
| DryFlekt kickout | Polypropylene plastic | 4 x 5 x 6 in | Color-matched, no rust, easier retrofit | $18-$30 |
| EZ-Out kickout | Polypropylene plastic | 4 x 5 x 6 in | Quick retrofit, no metal cutting | $15-$28 |
| Custom-bent painted steel | 24 ga painted steel, AAMA 2604 | Sized to match | High-end build, color match | $45-$95 |
| Custom copper | 16 oz copper | Sized to match | Premium homes, copper-flashed roofs | $75-$150 |
The J’D OUT factory-formed kickout (Quality Edge) is the industry workhorse for retrofits because it comes pre-painted to match common siding colors, is sized correctly for the typical sidewall-eave intersection, and has the AAMA 2604 paint warranty (10+ years against fade). The plastic kickouts (DryFlekt, EZ-Out) are cheaper and easier to install but do not match the longevity of metal in high-sun exposures.
Insurance and warranty implications
Missing kickout flashing creates two insurance complications:
Homeowner insurance. Water damage from a missing kickout is typically classified as a “maintenance failure” or “long-term seepage,” both of which are excluded from standard homeowner policies. The repair to the wall, sheathing, insulation, and interior drywall is the homeowner’s cost. This is why early detection matters: a $200 kickout retrofit prevents a $5,000 to $15,000 uninsured repair.
Roof warranty. If you have a manufacturer system warranty (GAF Golden Pledge, OC Platinum, CertainTeed 4-Star) and your installer skipped the kickout at a sidewall-eave intersection, the warranty does not cover the resulting wall damage (which is not the roof’s problem) but it also might not cover the leak in the field shingles around the failed area (which the manufacturer can argue was a foreseeable consequence of the missing kickout). Spec the kickout in the contract for any new roof or replacement.
Cost per location
| Scenario | Material | Labor | Total per location |
|---|---|---|---|
| Retrofit, vinyl siding, single kickout | $15-$50 | $75-$150 | $90-$200 |
| Retrofit, fiber cement siding, single kickout | $15-$50 | $150-$250 | $165-$300 |
| Retrofit, cedar siding, single kickout | $15-$50 | $100-$200 | $115-$250 |
| Retrofit, stucco siding, single kickout | $25-$95 | $250-$500 | $275-$600 |
| Retrofit, brick veneer, single kickout | $25-$95 | $200-$400 | $225-$500 |
| Install during new roof / roof replacement | $15-$50 | $10-$30 (incremental) | $25-$80 |
| Install during new construction | $15-$50 | $10-$20 (incremental) | $25-$70 |
Stucco is the most expensive retrofit because cutting back stucco requires patching with new stucco that has to be color-matched and tied into the wall mesh. Brick veneer is expensive because the kickout has to thread between the brick course and the wall sheathing. Vinyl and cedar are the cheapest retrofits because the siding can be unfastened and re-set.
Common installation mistakes
- Kickout too low. The kickout must extend above the height of the last step flashing piece so water flows into the kickout’s trough, not over the top. Common mistake: installer sets the kickout at the eave shingle line instead of 4 to 6 inches up.
- Kickout aimed at the wrong spot. The exit pour must aim into the gutter, not past it. A kickout that overshoots the gutter dumps water onto the ground next to the foundation.
- No ice and water shield behind it. The kickout is the visible piece; the membrane behind it is the actual waterproof layer. Skipping the ice and water shield in the retrofit means water gets behind the kickout into the wall.
- Caulk instead of flashing tape. Caulk at the kickout-siding joint fails in 3 to 5 years. Use butyl flashing tape (3M 8067, Grace Vycor) for a permanent seal.
- Reusing the old step flashing. The bent and corroded old flashing should be replaced when the kickout is retrofit. New step flashing is cheap and the labor is already happening.
- Painting the kickout the wrong color. The kickout shows below the eave. Use a color-matched factory-painted product (J’D OUT) or paint with AAMA 2604/2605 rated exterior paint, not generic spray paint.
Kickout flashing in the broader roof system
Kickout flashing is part of the broader roof flashing system that includes step flashing, counter-flashing, drip edge, and valley flashing. Each protects a specific water-exposure zone, and like ridge cap, ice and water shield, and starter shingles, they are detail components that turn a stack of shingles into a watertight system. For a complete walk-through of how the flashing pieces interact, read our guides on roof flashing and roof flashing repair.
Frequently asked questions
How do I know if I have kickout flashing?
Look at the bottom of every sidewall-eave intersection (where the roof meets a vertical wall at the eave). You should see a small bent metal piece, typically 4 by 5 inches, mounted at the corner with one side against the wall, one side on the roof, and an open scoop pointing into the gutter end. If you see only step flashing running down and ending at the eave shingles, you are missing the kickout.
Can I install kickout flashing myself?
Yes, if you have basic siding and flashing skills. The retrofit requires cutting back siding, cutting back step flashing, sliding the kickout in, and re-sealing. Most homeowners hire a roofer because the consequences of a bad install are significant.
How much does it cost to retrofit kickout flashing on a typical home?
A 2,400 sq ft home typically has 2 to 4 kickout locations. Retrofit cost is $75 to $300 per location, putting the whole-home retrofit between $300 and $1,200 in 2026 pricing. Bundled with a new roof, the cost is much lower ($25 to $80 per location).
Does insurance cover damage from missing kickout flashing?
Typically no. Water damage from a missing flashing detail is classified as “maintenance failure” or “long-term seepage” and is excluded from standard homeowner policies. This is why early detection and retrofit are worth the cost.
What is the difference between kickout flashing and step flashing?
Step flashing is the series of L-shaped pieces tucked between each shingle course up the wall side of a roof, deflecting water away from the wall. Kickout flashing is the single piece at the bottom of the step flashing run that “kicks” the water away from the wall and into the gutter. The two work together.
When did kickout flashing become code?
The 2009 International Residential Code added Section R903.2.1 requiring kickout flashing at all roof-to-wall intersections at the lower edge of the roof. State and local adoption ranged from 2010 to 2015 for most jurisdictions, and some rural areas adopted as late as 2018.
Will my new roof install include kickout flashing?
A reputable roofer will install it. A budget roofer may skip it to save labor. Spec it in the contract: “Install kickout flashing at all sidewall-eave intersections per IRC R903.2.1, with J’D OUT or equivalent color-matched factory-formed product.” See our guide on choosing a roofing contractor for contract checklists.