Learning how to build a porch roof comes down to four decisions made in the right order: pick the roof style (gable, shed, or hip), set a minimum pitch the chosen roofing material can drain, design the connection to the existing house (ledger board for shed style, valley-tied rafters for gable), and size the rafters and beams for the actual span and snow load in your jurisdiction. Get those four right and the rest of the build, sheathing, underlayment, shingles or metal, flashing into the wall, is mechanical. Get any one of them wrong and you end up with a roof that leaks at the wall, sags within five years, or fails inspection because the framing was undersized. The math is not optional. Below is the build sequence pros use, the load calculations DIYers most often skip, and the code-compliant lateral bracing details that separate a porch roof from a future insurance claim.
The short version
- Shed-style porch roofs are the easier DIY build. Gable-style looks better but requires a ridge and valley tie-in to the existing roof.
- Minimum pitch: 3:12 for asphalt shingles, 1:12 for standing-seam metal, 2:12 for exposed-fastener corrugated metal.
- The ledger board attaching the porch to the house is the most-failed detail. Use through-bolts or ledger screws into rim joist, not nails into siding.
- Rafter sizing is span and load specific. A 12 ft porch with 30 psf snow load typically needs 2×8 rafters at 16-inch on-center; check your IRC Table R802.5.1 before buying lumber.
- Step flashing into siding plus a kick-out at the eave is non-negotiable. Continuous flashing causes wall rot within 3 to 5 years.
- Most jurisdictions require a permit and a stamped engineer drawing for any roof structure over 200 square feet attached to an existing house.
- Budget: $15 to $35 per square foot DIY for materials, $35 to $75 per square foot turnkey from a contractor.
The short answer: shed or gable, and why it matters
A porch roof is either a shed roof (single sloped plane running away from the house) or a gable roof (two sloped planes meeting at a ridge perpendicular or parallel to the house). The choice drives every downstream decision: pitch, framing, attachment, drainage, and cost.
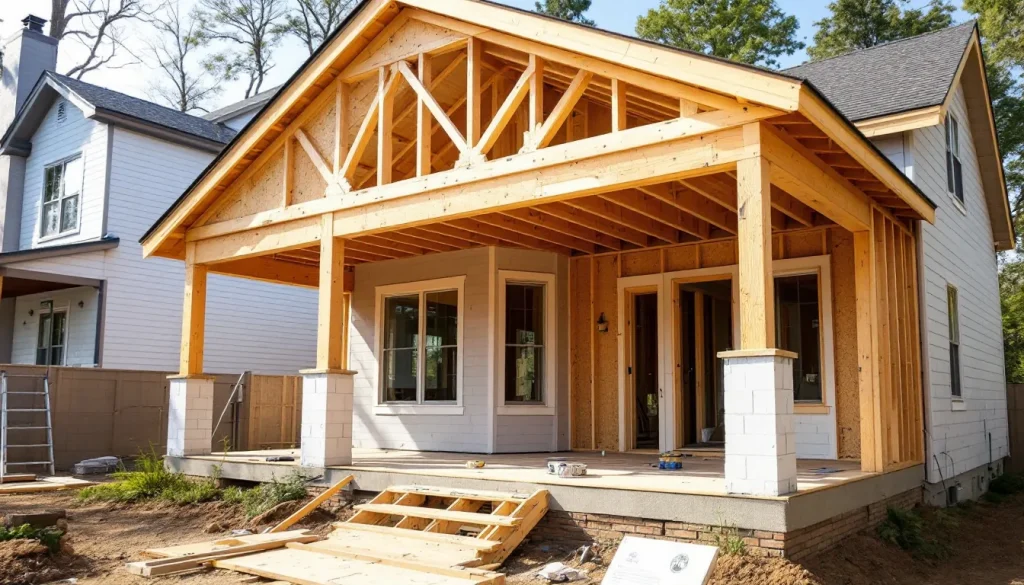
Shed-style porch roofs are the standard DIY build. The framing is a row of parallel rafters running from a ledger board on the house out to a header beam supported by porch posts. There is one slope, one plane of sheathing, one straightforward flashing detail at the wall, and no valley to weatherproof. A competent DIYer with a helper can frame and dry-in a 10 by 14 ft shed-style porch roof in a weekend.
Gable-style porch roofs look like a small house roof attached to the front of the main house. The ridge usually runs perpendicular to the wall, and the two slopes drain to either side. Framing is harder (you need a ridge board, common rafters on both sides, and a valley where the porch roof meets the main roof if the ridges are parallel). Aesthetics are better. Cost is higher. The valley tie-in is where most failures originate.
If this is a first build, default to shed style. Read our porch roof types overview for the visual comparison.
Minimum pitch by roofing material
The roof material dictates the minimum allowable pitch. Going below the minimum guarantees water intrusion regardless of how good the install is.
| Roofing material | Minimum pitch | Recommended pitch | Notes |
|---|---|---|---|
| Asphalt shingles (standard) | 4:12 | 5:12+ | 2:12 to 4:12 allowed with double underlayment per IRC R905.1.1 |
| Standing-seam metal | 1:12 | 3:12+ | True low-slope capability when seams are properly sealed |
| Corrugated/exposed-fastener metal | 2:12 | 3:12+ | Fastener gaskets fail faster on shallow slopes |
| Rolled asphalt (mineral surface) | 1:12 | 2:12+ | Cheapest option, 7 to 10 year lifespan |
| EPDM rubber membrane | 0.25:12 | 0.5:12+ | True low-slope/flat capability |
| Cedar shake/shingle | 4:12 | 5:12+ | Premium aesthetic, requires good ventilation |
For shed-style porches under existing eaves, the pitch is constrained at the top by how much vertical headroom you have between the ledger and the existing soffit. A 12 ft porch depth at 3:12 needs 36 inches of vertical drop, which is more headroom than many one-story houses have. This is the most common reason DIYers pick standing-seam metal: it lets you run 1:12 or 2:12 pitch and still drain reliably.
Step 1: Footings and posts
A porch roof needs vertical support at the outboard edge. That means posts on footings. Code requires footings below frost depth (which varies from 12 inches in Houston to 48 inches in Minneapolis, check your local IRC adoption). Pour concrete piers 12 inches in diameter minimum, or use precast Bigfoot footings with 6×6 posts on metal post bases.
Post spacing depends on the beam carrying the rafters. A 4×10 beam can typically span 10 ft between posts under typical residential porch loads. A 6×10 or doubled 2×10 can span 12 to 14 ft. Going further requires either an LVL beam or steel.
Set the posts plumb, brace them temporarily with diagonal 2x4s, and check for square against the house. Diagonal measurements (corner to corner) should match within 1/4 inch over a 12 ft layout.
Step 2: The ledger board (the failure-prone detail)
The ledger board is the horizontal 2x board lag-bolted or through-bolted to the house, carrying the inboard end of the porch rafters. This is where 80% of porch roof failures originate. The two failure modes are mechanical pullout (the ledger detaches from the house) and water intrusion (water gets behind the ledger and rots the rim joist).
Mechanical attachment requirements
- Attach to the rim joist of the house framing, not to siding alone. Locate the rim joist by drilling exploratory 1/4-inch holes from inside if you cannot identify it from outside.
- Use 1/2-inch lag screws (minimum 5 inches embedment into rim joist) or through-bolts with washers on both sides, spaced every 16 inches.
- For a 12 ft ledger with 30 psf snow load, IRC Table R507.9.1.3 specifies the bolt spacing. Reference your local code adoption.
- Never attach a structural ledger to brick veneer alone. The veneer is non-structural.
Waterproofing the ledger
- Strip the siding back at least 12 inches above the planned ledger height.
- Install a continuous self-adhering flashing tape (such as Grace Vycor or 3M All Weather Flashing) over the WRB (housewrap) where the ledger will sit.
- Use ledger flashing (Z-flashing or kick-out flashing) above the ledger to direct water out and over.
- Reinstall siding lapped over the top edge of the flashing.
- Leave a small drainage gap (1/4 inch) between the back of the ledger and the WRB using SureBuilt washers or composite spacers. This is the modern detail that prevents trapped moisture.
Step 3: Sizing the rafters and beams
Rafter and beam sizes are a function of span, spacing, lumber species/grade, and roof load (dead load plus live load plus snow load). Do not guess. Pull up the IRC Table R802.5.1 (or your jurisdiction’s amended version) and read the actual allowable span.
For quick reference, here are typical residential porch roof rafter sizes for No. 2 Southern Pine at 16-inch on-center spacing:
| Rafter span (horizontal) | 20 psf snow load | 30 psf snow load | 50 psf snow load |
|---|---|---|---|
| 8 ft | 2×6 | 2×6 | 2×8 |
| 10 ft | 2×6 | 2×8 | 2×10 |
| 12 ft | 2×8 | 2×8 | 2×10 |
| 14 ft | 2×10 | 2×10 | 2×12 |
| 16 ft | 2×10 | 2×12 | LVL or engineered |
The numbers shift if you switch to Douglas Fir-Larch (slightly stronger), spruce-pine-fir (weaker), or change spacing to 24-inch on-center (allowable span drops about 15%). Free span calculators from the American Wood Council (AWC.org) confirm the table values.
For the outboard beam, doubled 2×10 or solid 4×10 handles a 10 to 12 ft post-to-post span under typical residential loads. Beyond 12 ft, talk to an engineer or spec an LVL.
Step 4: Cutting and setting rafters (shed style)
Each rafter needs two cuts: a plumb cut at the ledger end (matching the pitch) and a birdsmouth notch at the beam end where it sits on the outboard header. The birdsmouth removes no more than 1/4 of the rafter depth per IRC R802.7.1.
To calculate the rafter length, use the rise-over-run from your chosen pitch. A 3:12 pitch porch with a 10 ft horizontal run rises 30 inches. The rafter length (hypotenuse) is the square root of (120 squared plus 30 squared), or about 124 inches plus your overhang.
Cut one rafter as a template. Test-fit it. Verify the plumb cut sits flush against the ledger and the birdsmouth seats fully on the beam. If everything fits, use it as the pattern for the rest. Set rafters at 16-inch on-center, sistered with hurricane ties (Simpson H2.5A or equivalent) to both the ledger and the beam.
Lateral bracing (the code requirement nobody talks about)
Per IRC R802.8, rafters need lateral bracing to prevent rotation under load. On a porch roof, this is typically blocking between rafters at the beam line, plus diagonal bracing from the corner posts back to the house. Without lateral bracing, the structure can rack sideways under wind load. Inspectors flag this every time.
Step 5: Sheathing, underlayment, and roofing
Once the rafters are set and braced, sheathe with 1/2-inch or 5/8-inch CDX plywood or OSB. Stagger the sheets, leave 1/8-inch gaps at edges, and nail to APA pattern (8d nails at 6 inches edge, 12 inches field).
Install drip edge at the eaves, then synthetic underlayment (such as GAF Tiger Paw or Owens Corning ProArmor), then drip edge at the rake. Use ice and water shield at the eaves in any freeze-climate jurisdiction and the entire deck if the porch is low-slope (under 4:12 for shingles).
Roofing installation follows the manufacturer instructions for your chosen material. For shingles, install starter strip, then 6-nail pattern through the field, then manufacturer ridge cap shingles. For metal panels, follow the panel manufacturer’s clip or screw pattern; corrugated panels need closure strips at eaves and ridges.
Step 6: Flashing the wall connection
The roof-to-wall junction is where a porch roof leaks if the flashing is wrong. The detail uses step flashing (see our step flashing guide) (individual L-shaped pieces interleaved with each course of shingles), counter-flashing (or siding lapped over the step flashing top), and a kick-out flashing at the bottom corner where the porch roof eave meets the wall.
The kick-out is the small triangular flashing piece that diverts water away from the wall at the eave corner. Skip it and water runs down the wall behind the siding, rotting the rim joist within 3 to 5 years. Pre-formed kick-outs are available from DryFlekt, Quickflash, and most steel coil suppliers.
For broader context on every roof-to-wall and penetration flashing detail, see our roof flashing guide.
Common DIY mistakes that fail inspection (or fail in year three)
- Nailing the ledger to siding alone. Lag bolts must reach the rim joist or framed structural member.
- No flashing tape behind the ledger. Wood-to-wood contact with no membrane traps moisture and rots the rim joist.
- Undersized rafters. “2×6 looks fine” is not a snow load calculation.
- Continuous wall flashing instead of step flashing. Continuous flashing channels water along the wall instead of out. Always step flash.
- No kick-out at the eave. Guaranteed wall rot.
- Pitch below the roofing material’s minimum. A 2:12 shingle roof leaks within one storm.
- No lateral bracing. Inspector callback or wind-event failure.
- No permit. Insurance will not pay on uninspected structural work.
Permits, code, and when to call an engineer
Most jurisdictions require a building permit for any new roof structure over 200 square feet, any structure attached to the existing house, or any structure with vertical posts on footings. A 10 by 14 ft porch (140 square feet) attached to the house typically still requires a permit because it modifies the existing structure.
An engineer’s stamp is usually required when the porch roof attaches to a wall that is also a shearwall (most exterior walls), when the span exceeds prescriptive code tables, when ground snow load is over 50 psf, or when high-wind zones (140 mph design wind speed and above) apply. The cost of a stamped engineer’s drawing for a small porch is typically $400 to $900 and saves rework if the inspector pushes back.
DIY budget vs contractor pricing
A 10 by 14 ft (140 sf) shed-style porch roof with standard architectural shingles in 2026:
| Line item | DIY cost | Contractor turnkey |
|---|---|---|
| Footings (4 concrete piers) | $120 | $600 |
| Posts (4x 6×6 PT, 10 ft) | $220 | included |
| Beam (doubled 2×10 PT) | $180 | included |
| Ledger + flashing tape | $110 | included |
| Rafters (10x 2×8 PT) | $420 | included |
| Sheathing (5 sheets 1/2 CDX) | $280 | included |
| Underlayment, drip edge, ice/water | $160 | included |
| Architectural shingles (1.5 sq) | $210 | included |
| Step flashing, kick-out, ridge cap | $140 | included |
| Hurricane ties, fasteners, misc | $180 | included |
| Permit and engineer drawing (if required) | $300 to $900 | included |
| Total | $2,020 to $3,120 | $5,500 to $9,500 |
Contractor turnkey for a small porch is typically $40 to $70 per square foot, including engineering, permits, framing, roofing, and flashing. Premium materials (cedar shake, standing-seam copper, custom trim) push the high end higher.
FAQ
Do I need a permit to build a porch roof?
Almost always. Any roof structure attached to your house that exceeds 200 square feet, sits on footings, or modifies the existing roofline triggers a permit in most U.S. jurisdictions. Permitless work voids most homeowner insurance for any damage tied to the structure.
Can I attach a porch roof to vinyl or fiber-cement siding?
Not structurally. The ledger must lag-bolt or through-bolt into the rim joist or studs of the house framing, not siding. Strip the siding back where the ledger will sit, attach to framing, flash properly, and reinstall siding lapped over the top of the flashing.
What’s the minimum pitch if I want to use shingles?
4:12 is the standard minimum for asphalt shingles per IRC R905.2.2. You can go to 2:12 with double underlayment and ice/water shield over the full deck, but most contractors avoid it because the leak risk is real. If your headroom forces a lower pitch, switch to standing-seam metal (1:12 minimum).
How long does it take a DIYer to build a porch roof?
A 10 by 14 ft shed-style porch roof, footings to shingles, is typically a 3 to 5 day project for a competent DIYer with a helper. Add 2 to 3 days for a gable-style build because of the additional ridge and valley framing.
Do I need an engineer’s stamp on the drawings?
Often yes. Most jurisdictions require an engineer’s stamp when the porch attaches to a shearwall, when ground snow load is over 50 psf, when design wind speed is over 140 mph, or when the rafter span exceeds prescriptive IRC tables. Cost is $400 to $900 and saves rework. Ask your building department before designing.
Bottom line
A porch roof is a small structural project with a few decisions that drive everything: shed or gable, what pitch, how to attach to the house, and how to size the framing for your load. The most-failed detail is the ledger-to-house connection (waterproofed and lag-bolted to the rim joist, never nailed to siding), followed by the wall flashing (step flashing plus kick-out, never continuous flashing). Pull a permit, get the engineer’s stamp if your jurisdiction requires it, and use the IRC span tables for rafters and beams. DIY materials run $2,000 to $3,500 for a 140 sf porch. Contractor turnkey is $5,500 to $9,500 for the same footprint. The framing inspection is your friend, not your enemy: it catches the things that fail in year three.