
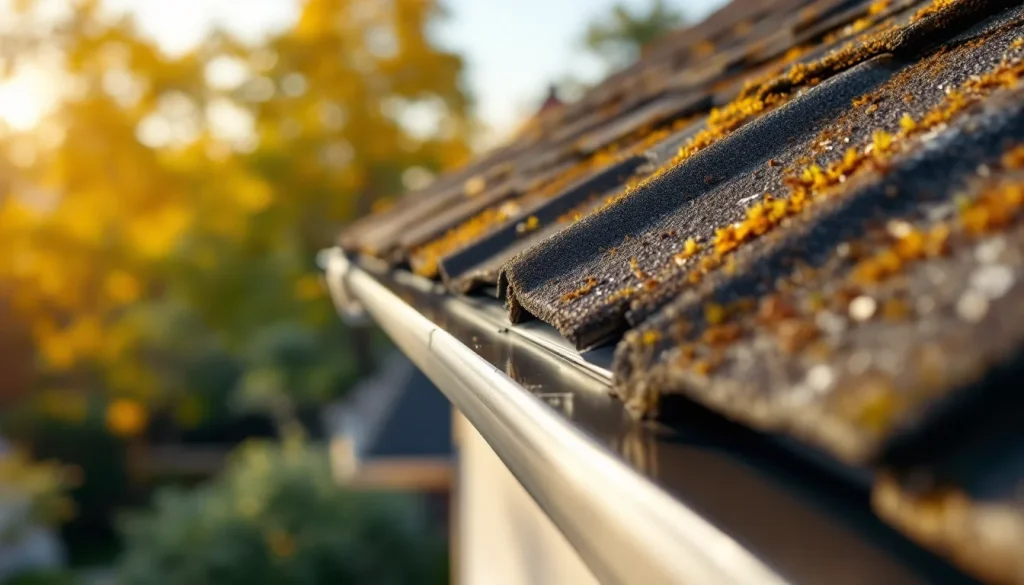
Kickout flashing is the small bent metal piece installed where a roof eave meets a vertical wall, redirecting water away from the wall and into the gutter. Without it, water running down the sidewall flashing can run behind the siding, rot the sheathing, stain the wall and overflow the gutter end. The IRC text in R903.2.1, as printed in the 2021 Seattle Residential Code, Chapter 9, reads: “A flashing shall be installed to divert the water away from where the eave of a sloped roof intersects a vertical sidewall.” Our editorial planning range for a retrofit is $75 to $300 per location.
Reviewed by The Roofing Brief Team. Last reviewed: October 2026.
The short version
- Editorial planning range: $75 to $300 per location to retrofit (one location per sidewall-eave intersection), not a published price list.
- IRC R903.2.1 requires a flashing that diverts water away from where a sloped roof eave meets a vertical sidewall; confirm which IRC edition your jurisdiction enforces.
- Without it, water running down the wall side of the roof can flow behind the siding instead of into the gutter.
- Damage can progress from wall stains to sheathing rot and, over years, to tear-off of the siding; the table below is an illustrative sequence, not a measured timeline.
- Retrofit means cutting back the existing step flashing, sliding the kickout in and re-sealing.
- Options run from site-bent aluminum to factory-formed TPO pieces such as DryFlekt (14.5 by 6 by 6 inches, 7 colors) to custom copper.
Short answer: what kickout flashing costs and where it goes
Kickout flashing is installed at the bottom of any sidewall step flashing run, where the roof eave meets the wall. Every house has this configuration somewhere: at every gable-end dormer, at every step-down where a single-story portion meets a two-story portion, at every porch roof that ties into a sidewall.
These are editorial planning ranges, not a published price list, so get two local quotes:
- Material: $8 to $50 per piece for stock or factory-formed kickouts, and $35 to $150 for custom-bent copper or painted metal.
- Labor: 1 to 3 hours per location depending on whether the siding has to be cut back, or $75 to $250 per location.
- Total installed: $75 to $300 per location for a retrofit, and $25 to $75 per location when bundled with a full roof replacement.
A 2,400 sq ft home with one dormer and one porch tie-in has 2 to 4 kickout locations, so a whole-home retrofit lands at $300 to $1,200 on those ranges.
| If your home has… | Then |
|---|---|
| A sidewall that ends at an eave and no diverter | Add a kickout at that location, with the bottom step flashing piece lapped over it |
| A new roof planned within 1 to 2 years | Bundle the kickout into the replacement ($25 to $75 per location on our planning range) |
| Stained or peeling siding right below an eave | Probe the sheathing before ordering parts, because rot changes the job from $75 to $300 to a wall repair |
| Stucco or brick veneer at the sidewall | Expect the higher labor tier in the cost table below |
What kickout flashing does
Step flashing comes first. Where a roof eave runs into a vertical sidewall (a dormer side, an L-shape sidewall, a chimney side), the step flashing is a series of L-shaped pieces lapped between shingle courses. The ARMA Residential Asphalt Roofing Manual (2014) specifies units at least 10 inches long and 2 inches wider than the shingle exposure (10 by 7 inches for a 5 inch exposure), bent to 5 inches on the deck and 5 inches up the wall, with siding brought down at least 2 inches over the vertical leg. Our guide on how to roof a dormer shows where the kickout fits in that sequence.
At the very bottom of the run, the last piece of step flashing dumps water onto the eave shingles. The gutter ends short of the wall, so without a kickout that water can run past the gutter end and down behind the siding.
A kickout flashing intercepts that water at the eave and turns it outward into the gutter. It is shaped like a small open scoop: a vertical leg against the wall, a sloped trough that diverts water, and an exit pour that aims into the gutter.
Why pre-2005 homes are missing it
Older sidewall-eave details often have a plain step flashing run that ends at the eave shingles. We could not find a published count of how many pre-2005 homes lack a kickout, so treat the reasons below as editorial explanations rather than survey results.
- Cost-cutting. A kickout is one more piece to cut, fit and seal at every sidewall-eave intersection.
- Siding-first construction. Where siding went up before the roof, the roofer could not slide a kickout behind it without cutting the siding, and a bead of caulk at the wall-eave intersection was the shortcut.
- Hidden failure. Rotting sheathing inside the wall cavity is invisible from outside for years, so the omission is rarely caught.
IRC R903.2.1 code adoption timeline
IRC R903.2.1 (Locations), as printed in the 2021 Seattle Residential Code, Chapter 9, reads: “Flashings shall be installed at wall and roof intersections, wherever there is a change in roof slope or direction and around roof openings. A flashing shall be installed to divert the water away from where the eave of a sloped roof intersects a vertical sidewall. Where flashing is of metal, the metal shall be corrosion resistant with a thickness of not less than 0.019 inch (0.5 mm) (No. 26 galvanized sheet).”
We could not confirm from a primary source which IRC edition first added the diverter sentence, and state adoption dates differ, so this page no longer lists a state-by-state timeline. Use the table to decide what to check.
| If your home was built… | Then |
|---|---|
| Before your jurisdiction adopted the current IRC language | Assume the kickout may be missing and inspect every sidewall-eave intersection |
| Under a recent code | Still inspect, because a code requirement does not guarantee the installer or inspector caught every location |
| Unsure of the adopted edition | Ask the building department which IRC edition and amendments apply to your address |
Signs you are missing kickout flashing
The damage from missing kickout is progressive and follows a predictable pattern. Look for these signs at every sidewall-eave intersection:
- Dark vertical stain running down the siding starting from the eave line. Caused by water sheeting down the wall instead of being deflected.
- Paint peeling or bubbling on the siding directly below the eave, especially in a 6 to 12 inch wide band.
- Siding warping or buckling in the same band, indicating that the underlying sheathing is wet.
- Soft spots in the wall sheathing when you press on the siding. The OSB or plywood behind has rotted.
- Black mold or mildew visible at the wall-eave joint or on the soffit return below.
- Gutter overflow at the corner where the gutter meets the wall, even in moderate rain. Water hits the wall, runs down, and overshoots the gutter end.
- Water stains on the interior wall below the roof line. By the time this appears, the damage is significant.
The wall damage cascade if missing
This table is an illustrative sequence of how a missing kickout can progress, not a measured timeline; the speed depends on rainfall, siding type and roof size.
| Stage | What is happening | Visible signs | What the fix involves |
|---|---|---|---|
| Early | Water repeatedly hits siding and paint starts breaking down | Vertical stain, faint paint discoloration | Kickout retrofit only |
| Middle | Water penetrates siding gaps and reaches sheathing | Paint peeling, siding warping | Kickout plus siding panel replacement |
| Advanced | Sheathing rots and mold colonizes the wall cavity | Soft spots in the wall, mold smell, possible interior stains | Kickout plus sheathing, insulation and drywall |
| Severe | Framing studs rot | Sagging fascia, visible bowing, interior wall damage | Structural repair and siding tear-off |
The kickout retrofit costs the least at the early stage, and repair costs climb at each later stage. Check your own homeowner policy for exclusions on long-term seepage before you assume a late-stage repair would be covered.
Retrofit installation process
Retrofitting a kickout into an existing roof is one of the more involved flashing retrofits because the kickout has to slide behind the existing step flashing, siding, and house wrap. The standard retrofit:
- Identify the location. The kickout goes at the bottom-most piece of the step flashing run, where the roof eave intersects the wall.
- Cut back the siding. Remove or cut back the siding panel that sits over the kickout location, plus 4 to 6 inches above. Cedar siding can usually be unfastened and slid up; vinyl can be released from the J-channel; fiber cement is cut.
- Cut back the existing step flashing. The bottom 4 to 6 inches of step flashing has to be removed so the kickout can slide behind the next-higher step flashing piece.
- Remove the eave shingle below the wall. Pull the bottom-most field shingle at the eave to expose the deck.
- Apply a strip of ice and water shield wrapping around the corner where the wall meets the eave. This is critical: the kickout is the visible piece, but the ice and water shield is the underlying waterproof layer. The ARMA manual carries underlayment up the sidewall 3 to 4 inches.
- Slide the kickout in. The kickout’s vertical leg goes up the wall behind the next step flashing piece. The exit pour aims into the gutter.
- Nail the kickout to the deck through its roof-facing leg with corrosion-resistant roofing nails, following the maker’s instructions. Per ARMA, do not nail the vertical flange to the wall framing, because differential movement between wall and roof can buckle shingles or break sealant.
- Reinstall the field shingle over the kickout’s roof-facing leg.
- Reinstall the step flashing pieces above the kickout, lapping over its vertical leg.
- Reinstall the siding with proper flashing-tape or caulk seal at the perimeter.
- Verify the kickout aims into the gutter end and not past it.
On our planning range this is a 1 to 3 hour job per location for an experienced roofer. A DIY install is possible if you are comfortable on a ladder and have basic flashing/siding skills, but the consequences of getting it wrong (water trapped behind the new kickout, faster rot than before) are significant.
DIY vs pro retrofit
Kickout retrofit is at the borderline of DIY feasibility. Arguments for DIY:
- Material cost is low ($8 to $50 per piece on our planning range).
- Work is at ladder height, not full roof height.
- Tools required are basic (tin snips, hammer, caulk gun, utility knife).
Arguments against DIY:
- You have to cut back siding, which is its own skill set. Fiber cement requires a special blade; vinyl can break in cold weather.
- The kickout has to integrate with the existing step flashing, ice and water shield, and house wrap. Getting any layer wrong creates a worse leak than before.
- Most homes need 2 to 4 locations done, and a pro can do them all in a few hours with a higher quality result.
If you are not already comfortable with sidewall flashing and siding work, hire a roofer. If you do go DIY, do one location first, watch it through a full rainy season, and confirm no leaks before doing the others.
Brand and product options
| Product | Material | Size | Use case | Price |
|---|---|---|---|---|
| Site-bent aluminum | Mill-finish aluminum | Cut to fit | Cheap retrofit, paint to match | Editorial range $8 to $15 |
| Site-bent galvanized steel | Galvanized steel | Cut to fit | Older steel-flashing systems | Editorial range $10 to $18 |
| DryFlekt kick-out diverter | Thermoplastic polyolefin (TPO) | 14.5 in long by 6 in high by 6 in wide | 7 standard colors, works with lap siding, stone, brick and stucco | Not published; sold through distributors |
| Custom-bent painted steel | Painted steel | Sized to match | High-end build, color match | Editorial range $45 to $95 |
| Custom copper | 16 oz copper | Sized to match | Premium homes, copper-flashed roofs | Editorial range $75 to $150 |
The DryFlekt page describes a non-corrosive, UV-resistant TPO diverter that is self-positioning for multiple roof pitches, so it will not rust the way site-bent steel can. Metal pieces match metal step flashing and can be painted; if you choose a plastic piece, check the maker’s sun-exposure guidance for your wall.
Insurance and warranty implications
Missing kickout flashing creates two complications:
Homeowner insurance. Many policies exclude long-term seepage and damage from poor maintenance or workmanship, so the wall, sheathing, insulation and interior drywall repair may fall to the homeowner. Read your policy exclusions and ask your agent; the retrofit at the early stage is the cheaper way to avoid that exposure.
Roof warranty. A manufacturer system warranty may not cover wall damage from a missing kickout, because the wall is not part of the roof system. Read the warranty text for your system (such as GAF Golden Pledge, Owens Corning Platinum or CertainTeed 4-Star) for workmanship and flashing conditions, and write the kickout into the contract for any new roof or replacement.
Cost per location
These are editorial planning ranges built around the labor tiers below, not a published price list; get two local quotes.
| Scenario | Material | Labor | Total per location |
|---|---|---|---|
| Retrofit, vinyl siding, single kickout | $15-$50 | $75-$150 | $90-$200 |
| Retrofit, fiber cement siding, single kickout | $15-$50 | $150-$250 | $165-$300 |
| Retrofit, cedar siding, single kickout | $15-$50 | $100-$200 | $115-$250 |
| Retrofit, stucco siding, single kickout | $25-$95 | $250-$500 | $275-$600 |
| Retrofit, brick veneer, single kickout | $25-$95 | $200-$400 | $225-$500 |
| Install during new roof / roof replacement | $15-$50 | $10-$30 (incremental) | $25-$80 |
| Install during new construction | $15-$50 | $10-$20 (incremental) | $25-$70 |
Stucco costs the most to retrofit because cutting it back means patching with color-matched stucco tied into the wall mesh. Brick veneer costs more because the kickout has to thread between the brick course and the sheathing. Vinyl and cedar cost the least because the siding can be unfastened and re-set.
Common installation mistakes
- Kickout too low. The kickout must extend above the height of the last step flashing piece so water flows into the kickout’s trough, not over the top. Common mistake: the installer sets the kickout at the eave shingle line instead of above the last step flashing piece.
- Kickout aimed at the wrong spot. The exit pour must aim into the gutter, not past it. A kickout that overshoots the gutter dumps water onto the ground next to the foundation.
- No ice and water shield behind it. The kickout is the visible piece; the membrane behind it is the actual waterproof layer. Skipping the ice and water shield in the retrofit means water gets behind the kickout into the wall.
- Caulk instead of flashing tape. Caulk at the kickout-siding joint is the weaker seal. Use a butyl or self-adhered flashing tape rated for exterior use.
- Reusing the old step flashing. The bent and corroded old flashing should be replaced when the kickout is retrofit. New step flashing units should be at least 10 inches long, per the ARMA manual, and the labor is already happening.
- Painting the kickout the wrong color. The kickout shows below the eave. Use a color-matched factory-finished product or a paint system the maker approves for the metal, not generic spray paint.
Kickout flashing in the broader roof system
Kickout flashing is part of the broader roof flashing system that includes step flashing, counter-flashing, drip edge, and valley flashing. Each protects a specific water-exposure zone, and like ridge cap, ice and water shield, and starter shingles, they are detail components that turn a stack of shingles into a watertight system. For a complete walk-through of how the flashing pieces interact, read our guides on roof flashing and roof flashing repair.
Frequently asked questions
How do I know if I have kickout flashing?
Look at the bottom of every sidewall-eave intersection, where the roof meets a vertical wall at the eave. You should see a small bent piece against the wall and on the roof, with an open scoop pointing into the gutter end. If the step flashing simply ends at the eave shingles, the kickout is missing.
Can I install kickout flashing myself?
Yes, if you have basic siding and flashing skills. The retrofit means cutting back siding, cutting back step flashing, sliding the kickout in and re-sealing. Many homeowners hire a roofer because a bad install can trap water behind the new piece.
How much does it cost to retrofit kickout flashing on a typical home?
Our editorial planning range is $75 to $300 per location, so $300 to $1,200 for a home with 2 to 4 locations. That is not a published price list, so get two local quotes. Bundled with a new roof, the incremental cost per location is lower.
Does insurance cover damage from missing kickout flashing?
Often not. Many homeowner policies exclude long-term seepage and damage from poor maintenance or workmanship, so read the exclusions in your own policy and ask your agent before you rely on coverage.
What is the difference between kickout flashing and step flashing?
Step flashing is the series of L-shaped pieces lapped between shingle courses up the wall side of a roof. The ARMA manual specifies units at least 10 inches long, bent to 5 inches on the deck and 5 inches up the wall. Kickout flashing is the single piece at the bottom of that run that turns the water into the gutter.
When did kickout flashing become code?
The IRC text in R903.2.1 requires a flashing that diverts water away from where the eave of a sloped roof intersects a vertical sidewall. We could not confirm which IRC edition first added that sentence, so check which edition your jurisdiction enforces with the building department.
Will my new roof install include kickout flashing?
Only if it is in the contract. Write it in: install kickout flashing at all sidewall-eave intersections per IRC R903.2.1, using a factory-formed product or a custom-bent metal piece. See our guide on choosing a roofing contractor for contract checklists.