The roof square footage calculator method every estimator uses is mechanical, deterministic, and reproducible by any homeowner who can measure a footprint and read a pitch off the gable end. The formula is footprint area multiplied by a pitch multiplier, plus geometry add-ons for dormers, hips, and complex roof shapes. This guide walks through the math from scratch with the standard pitch multiplier table, then runs a worked example on a 2,400 square foot two-story house with a 7/12 pitch and two dormers, the kind of math a roofing salesperson runs in their head while standing in the driveway.
The base formula
Roof surface area = Footprint area x Pitch multiplier
The footprint is the building’s outline as seen from above, in square feet. The pitch multiplier converts that flat footprint into actual sloped surface area by accounting for the rise of the roof. A 1/12 pitch is nearly flat, so the multiplier is close to 1.0. A 12/12 pitch (45 degrees) increases the surface area by 41%, so the multiplier is 1.414. Every pitch in between has a fixed multiplier derived from the Pythagorean theorem: multiplier equals the square root of (1 + (rise/12)^2).
The standard pitch multiplier table
The values most estimators have memorized:
- 1/12 pitch: multiplier 1.003
- 2/12 pitch: 1.014
- 3/12 pitch: 1.031
- 4/12 pitch: 1.054
- 5/12 pitch: 1.083
- 6/12 pitch: 1.118
- 7/12 pitch: 1.158
- 8/12 pitch: 1.202
- 9/12 pitch: 1.250
- 10/12 pitch: 1.302
- 11/12 pitch: 1.357
- 12/12 pitch: 1.414
The 4/12 and 6/12 multipliers (1.054 and 1.118) cover most ranch homes and ranch-style suburban builds nationally. The 7/12 to 9/12 range covers the typical two-story colonial. Anything 10/12 or steeper is a steep-pitch surcharge job (additional labor cost) on the contractor’s side. See our roof pitch chart for the visual reference and our how to calculate roof pitch guide for the measurement procedure on the gable end.
How to measure the footprint
The footprint is the building outline at the eave line, not the foundation. Overhangs (typically 12 to 24 inches past the wall plane) count as roof area because the roof material covers them.
On a simple rectangular ranch: measure length and width with a 100-foot tape from one corner to the next, at the eave line (so include the overhang). Multiply length by width. That is the footprint in square feet.
On an L-shape, T-shape, or more complex outline: break the footprint into rectangles. Measure each rectangle separately. Sum the areas. The math does not care how many rectangles you use as long as their union covers the entire roof footprint and they do not overlap.
For a homeowner who cannot get to the eave line with a tape, two alternatives work. The first is to use the gross living area from the assessor’s record (a 2,000 square foot one-story home roughly has a 2,000 square foot footprint plus overhangs). The second is to use Google Earth Pro or a similar satellite tool with the polygon measurement function. Both methods are within 5% of the true footprint in most cases. Our how to measure a roof guide covers the full procedure.
How to read the pitch
Pitch is expressed as rise-over-run with a 12-inch run as the standard. A 6/12 pitch rises 6 inches for every 12 inches of horizontal distance. The fastest way to read pitch from the ground:
Stand at the gable end of the house. Hold a 24-inch level horizontally against the rake board (the trim along the gable slope). Place a tape measure vertically from the level down to the rake, measured at 12 inches out from where the level touches. The vertical measurement at the 12-inch mark is the rise. Read in inches.
From a smartphone, the iOS Measure app and similar Android tools have an angle function that reads slope directly. Slope in degrees converts to pitch using: pitch = 12 x tan(degrees). A 26.6-degree slope is roughly 6/12. A 33.7-degree slope is 8/12. A 45-degree slope is 12/12.
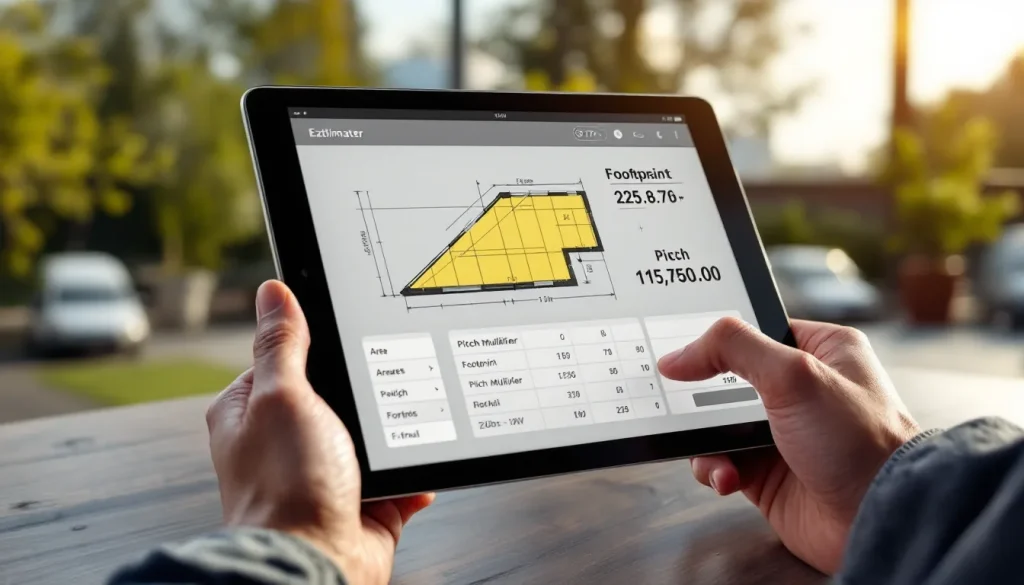
Worked example: 2,400 sq ft two-story colonial
House specs: 30 feet wide, 40 feet deep, two-story colonial with a simple gable roof, 7/12 pitch, 18-inch eave overhangs and 12-inch rake overhangs. Two front dormers, each 8 feet wide x 6 feet deep at the same 7/12 pitch.
Step 1: Footprint with overhangs
Building footprint: 30 ft x 40 ft = 1,200 sq ft. Adding the 18-inch eave overhang on both long sides extends the length by 3 feet total: 30 ft + 1.5 ft + 1.5 ft = 33 ft. Adding the 12-inch rake overhang on both ends extends the depth by 2 feet total: 40 ft + 1 ft + 1 ft = 42 ft. Roof footprint at the drip line: 33 ft x 42 ft = 1,386 sq ft.
Step 2: Apply the 7/12 pitch multiplier
1,386 sq ft x 1.158 = 1,605 sq ft of main roof surface.
Step 3: Add the dormers
Each dormer footprint is 8 ft x 6 ft = 48 sq ft. With the same 7/12 pitch on the dormer face: 48 x 1.158 = 56 sq ft per dormer. Two dormers add 112 sq ft of dormer roof surface, but they also subtract a small amount of main roof area where they intersect (typically about 8 sq ft per dormer for a tied-in dormer). Net addition: 112 – 16 = 96 sq ft of additional roof surface from the dormers.
Step 4: Total roof surface
1,605 sq ft (main) + 96 sq ft (dormers, net) = 1,701 sq ft of roof surface.
Step 5: Convert to squares and add waste
1 roofing square = 100 square feet. 1,701 sq ft = 17.01 squares. Industry standard waste factor for asphalt shingles on a simple gable with dormers is 10% to 12%. At 11% waste: 17.01 x 1.11 = 18.88 squares of shingles to order. Round up to 19 squares.
At 3 bundles per square (standard architectural shingle), 19 squares = 57 bundles. At a wholesale cost of $45 per bundle: $2,565 in shingle material alone. Plus underlayment (typically 1.5 to 2 squares of synthetic underlayment per roof square, so 19 to 25 squares of underlayment), ice and water shield, drip edge, ridge cap, vent boots, and fasteners.
Geometry add-ons for complex roofs
Hip roofs
A simple hip roof has the same total surface area as a gable roof of the same footprint and pitch. The four slopes meet at hip lines instead of gable ends, but the math is identical: footprint x pitch multiplier. Where hips matter is in the hip and ridge cap material count. A hip roof has more linear feet of hip ridge than a gable roof has of gable ridge, increasing the hip and ridge cap order by 30% to 60%.
Complex hip and valley combinations
For a roof with multiple intersecting hips and valleys (cross-hip, Dutch hip, mansard), the footprint method still works. Break the footprint into rectangles that match each roof segment, apply the pitch multiplier to each rectangle, and sum. Where one roof segment has a different pitch from another (a porch at 4/12 attached to a main roof at 8/12), use the appropriate multiplier for each segment separately.
Steep dormers and gables on a low-pitch main
Old farmhouses and Victorian conversions often have steeply-pitched dormer or gable elements on lower-pitched main roof bodies. Calculate each surface separately at its own pitch multiplier. A 12/12 dormer face on a 4/12 main roof body uses 1.414 for the dormer footprint and 1.054 for the rest of the footprint.
Mansard roofs
Mansard roofs have a steep lower slope (typically 60 to 80 degrees, or roughly 21/12 to 70/12 in pitch terms) and a shallow upper deck (often 1/12 to 2/12). Each is calculated separately. The lower mansard surface uses the vertical dimension as run plus the depth as run to define the area, since the multiplier table only goes to 12/12 cleanly.
Waste factor by complexity
Waste factor adds to the material order to account for cuts, starter strip, hip and ridge cap, and the inevitable damage during installation.
- Simple gable, no penetrations beyond basic vents: 10% waste
- Gable with 2 to 4 penetrations or one dormer: 11% to 12%
- Hip roof with no complications: 12% to 14%
- Cross-hip or complex hip-and-valley: 15% to 18%
- Cut-up roof with multiple dormers, skylights, and irregular shapes: 18% to 25%
A roofer who orders the same waste factor regardless of complexity will run short on cut-up roofs and over-order on simple ones. A roofer who customizes the waste factor to the roof complexity hits material orders within 1 bundle nearly every time.
Why estimators round up, not down
The 11% to 18% waste factor is not an arbitrary number. It is the sum of several real consumption categories that the homeowner does not see when looking at a finished roof. Starter strip consumes about 1.5% of the field shingle area (or it is bought as a separate starter product). Hip and ridge cap consumes 3% to 6% depending on the linear feet of hips and ridges. Cut starter at rakes consumes 1% to 2%. Field cuts at valleys, dormers, and roof transitions consume 2% to 4%. Damaged shingles from handling, weather, or installation defects consume 1% to 3%. Add these together and the realistic field waste is 8% to 16% before accounting for hip and ridge as a separate SKU.
An estimator who orders exactly the calculated area plus a flat 10% will run short on a complex roof and need a second material delivery (with delivery fees, time delay, and potential color batch mismatch on the second order). An estimator who orders 18% to 25% on a complex roof either has accurate counts on the geometry or has built a buffer that protects the schedule. Returning unused bundles is far cheaper than a second delivery, so the math tilts toward over-ordering for complex jobs.
How to spot a mismatched bid using just the math
Homeowners can use the pitch multiplier method to spot bids that are off the underlying geometry by more than the legitimate waste factor band. Here is the test: compute your roof surface using the formula, multiply by 1.12 (mid-range waste), divide by 100 to get squares. Compare that to the squares listed on each bid. Bids that list squares within 1 of your calculated number are working from the same geometry you are. Bids that list 30% to 40% more squares are either pricing a more complex layout you missed (look for dormer, hip, or valley count) or padding the material side.
The conversation that follows is short. Ask the contractor: how many squares did your measurement report show, and which service did you use? Contractors using EagleView or Hover can pull the report PDF and walk you through plane by plane. Contractors who measured by tape can show you the field notes. Contractors who guessed (yes, this happens, especially in markets with many small operators) will deflect. The deflection is the answer you need.
What this math is good for, and what it is not
The pitch multiplier method gives a homeowner a number they can compare against contractor quotes to within 3% to 5% accuracy. That is enough to know whether a contractor is quoting on the right amount of material. A contractor who quotes 25 squares on a roof the homeowner has calculated at 19 squares is either expecting much higher waste or padding the bid.
The method does not replace a professional measurement for the actual material order. Modern contractors use satellite measurement services (EagleView, Hover, RoofR) that produce a measurement report from aerial imagery with greater detail on every roof plane, ridge length, valley length, and penetration count. Reports cost $25 to $90 per roof and produce a 1% to 2% accurate measurement that the contractor uses for the actual material order. See our how to calculate roof square footage guide for the satellite measurement workflow comparison.
Quick-reference cheat sheet
The compressed version of the entire method, for the homeowner who wants to do the math standing in the driveway with a notepad:
- Measure the building footprint at the drip line in feet (length x width for a rectangle, sum of rectangles for an L or T shape).
- Read the pitch off the gable end with a 24-inch level and tape, or with a smartphone angle app.
- Look up the pitch multiplier in the table (1.054 for 4/12, 1.118 for 6/12, 1.202 for 8/12, 1.302 for 10/12, 1.414 for 12/12).
- Multiply footprint by pitch multiplier to get base roof surface in square feet.
- Add dormer surfaces if present (each dormer footprint x its own pitch multiplier, then subtract about 8 sq ft per dormer for the intersection).
- Divide by 100 to convert to squares.
- Multiply by 1.10 to 1.18 for waste factor based on complexity.
- Round up to the nearest whole square.
That sequence runs in five minutes once you have the measurements. The output is accurate within 3% to 5% on most homes and is the right input for any cost comparison conversation with a contractor.
Working backwards from a quote
The reverse exercise also works. If a contractor’s quote lists 24 squares for your roof and your calculation produces 19 squares, ask why. The five-square gap is a 25% difference. Either the contractor’s measurement report sees something your tape measure missed (a steeper pitch than you thought, additional roof planes hidden from your viewing angle, larger overhangs than measured), or the quote is padding the material side. The conversation is a fair one to have, and reputable contractors answer it readily by pulling up the measurement report on their tablet.
For the homeowner working an estimate, the pitch multiplier method is the right tool. It is fast, transparent, and accurate enough to spot bids that are way off the underlying geometry. Pair it with the roof replacement cost calculator for the dollar conversion, the average cost to replace roof guide for regional pricing, and the best roofing companies filter for the contractor selection framework. Together, those four tools turn a $20,000 reroof from a guess into a quantified decision.