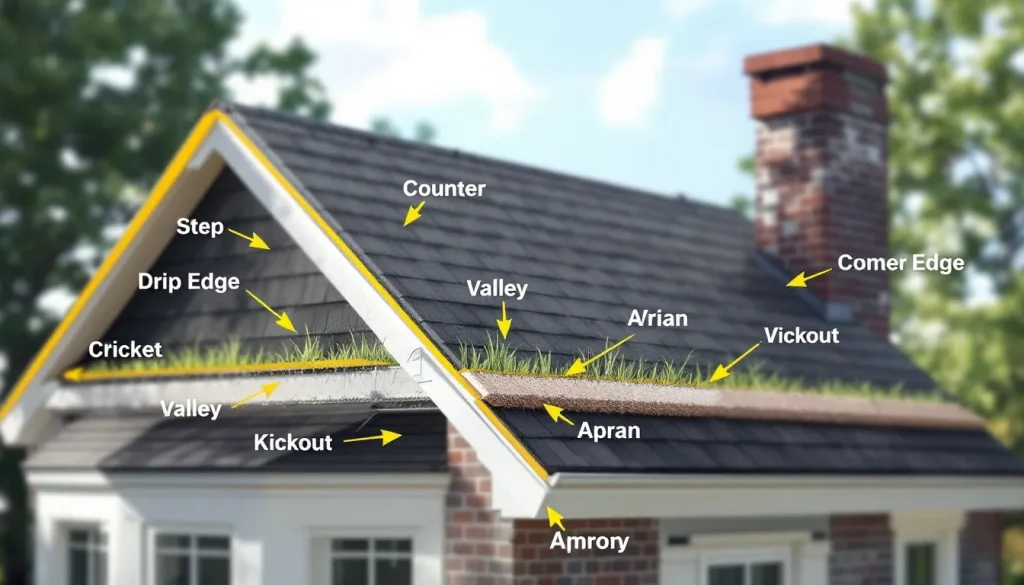
What is flashing (see our flashing on a house (broader scope)) on a roof: flashing is the bent sheet metal (or sometimes membrane) installed at every roof transition, intersection, and penetration to direct water back onto the roof surface instead of behind, under, or into the building envelope. There are eight standard flashing types on a typical residential roof: step flashing, counter flashing, valley flashing, drip edge, kickout flashing, apron (head) flashing, vent pipe flashing, and chimney flashing. Each one solves a different geometry problem. About 80% of roof leaks happen at flashings, not in the field of the roof, because flashings are where water has to be redirected against gravity or around an obstruction. Shingles handle the easy part (water running down a sloped plane). Flashings handle the hard part (water at edges, at penetrations, and at vertical walls).
The short version
- Roof flashing is bent sheet metal that seals water out where the roof changes plane or meets something vertical.
- Eight standard types: step, counter, valley, drip edge, kickout, apron, vent pipe, and chimney.
- Material: 26 gauge G-90 galvanized or 0.032 in aluminum is the residential baseline. Copper 16 oz and stainless 304/316 are premium.
- Roughly 80% of roof leaks originate at flashings, not in the shingle field.
- IRC R905.2.8 mandates flashing at all wall junctions, valleys, penetrations, and edges on asphalt shingle roofs.
- Most flashings outlast the shingles when installed correctly; spec metal that matches the substrate lifespan.
What flashing actually does
Roof shingles, tiles, metal panels, and membrane all handle water running down a flat sloped plane. They fail at transitions: where the roof plane changes direction (valleys, hips), where the roof meets a vertical surface (walls, chimneys, dormers), where something penetrates the plane (vent pipes, skylights, fans), and where the plane ends (eaves, rakes). At every one of those transitions, water either needs to be redirected back onto the field shingles or sealed out of the building entirely.
Flashing solves the geometry in metal. The metal forms a watertight surface that bridges the transition. Each piece is shaped, lapped, and integrated with the surrounding roofing material so water sheds onto the next layer below. Done right, the system is mostly sealant-free; the metal geometry handles the seal. Done wrong, sealant becomes the seal and the leak shows up the day the sealant cracks (typically 7 to 10 years on caulk, longer on butyl tape).
For the broader install picture and material spec, the roof flashing guide covers the cluster overview.
The 8 types of roof flashing
The eight standard types each solve a different transition problem. Below are the eight in the order they typically appear on a residential roof from eave to ridge.
1. Drip edge
Drip edge is L-shaped flashing installed along the eaves and rakes (the edges of the roof). It directs water off the roof edge into the gutter and away from the fascia. IRC R905.2.8.5 mandates drip edge on all asphalt shingle roofs since the 2012 code cycle. Type D (eave) has a flange that extends 1.5 to 2 inches up the deck and a kicked-out lip that turns water into the gutter. Type C (rake) has a shorter flange and goes on sloped edges where there’s no gutter. For the full install and material spec, see our drip edge guide and drip edge installation detail.
2. Valley flashing
Valley flashing handles the channel where two roof planes meet at an inside angle. Water concentrates in valleys, so the flashing is wider and heavier than other types. The three valley styles are open valley (W-valley metal exposed, shingles trimmed back), closed-cut valley (shingles laced across, one side trimmed), and woven valley (shingles laced across both sides). Open valleys with W-valley metal flashing last longest and shed best. See our valley flashing detail guide.
3. Step flashing
Step flashing is one piece of L-flashing per shingle course at sidewall transitions: where a sloped roof meets a vertical wall (chimney sides, dormer sides, second-story walls above a porch). Standard size is 4 in x 4 in x 7 in. Each piece overlaps the one below by 2 inches and is woven into the shingle course immediately above it. For the install detail, see our step flashing installation guide.
4. Counter flashing
Counter flashing covers the top edge of step flashing where it meets a vertical surface (chimney, wall, parapet). On masonry, it tucks into a reglet cut into the brick or stucco and is sealed with sealant inside the reglet. On wood-sided walls, the siding itself becomes counter flashing. Without it, the wall leg of step flashing is exposed to direct water and UV. See our counter flashing guide.
5. Apron flashing (head flashing)
Apron flashing covers the downhill side of chimneys, dormers, and skylights where the roof meets a horizontal headwall. It’s a continuous L-piece, not stepped, with a 4-inch wall leg and a 6-inch roof leg. Counter flashing covers the wall leg on top. See our apron flashing install guide.
6. Kickout flashing
Kickout flashing is the special bottom piece of a step flashing run. It has a 90-degree bend at the lower edge that turns water into the gutter rather than off the bottom of the wall-to-roof junction and behind the siding. The absence of a kickout is the single most common cause of hidden wall rot on multi-story homes. IRC R905.2.8.5 requires it. See our kickout flashing guide.
7. Vent pipe flashing
Vent pipe flashing is the boot or collar that seals around plumbing stacks and other round roof penetrations. Standard residential pipe boots are EPDM rubber over an aluminum or lead base plate. The boot lifespan (typically 10 to 15 years for EPDM, 20 to 25 for lead) is shorter than the shingle lifespan, which is why pipe boots are the #1 source of leaks in middle-aged roofs. See our roof vent pipe boot guide and Perma-Boot vent repair.
8. Chimney flashing
Chimney flashing is the system around the chimney, not a single piece. A masonry chimney needs apron flashing on the downhill side, step flashing on the two sides, headwall flashing or a cricket on the uphill side, and counter flashing covering everything on the chimney face. The full system is the trickiest residential flashing detail, which is why chimneys are the #2 source of residential roof leaks. See our chimney flashing leak repair and chimney cricket install guides.
The 8 types at a glance
| Flashing type | Where it goes | What it stops | Typical material | Lifespan |
|---|---|---|---|---|
| Drip edge | Eaves and rakes | Water tracking back under the shingle edge onto the fascia | 26 ga galvanized, 0.025 in aluminum | 30 to 50 yr |
| Valley flashing | Where two roof planes meet at an inside angle | Concentrated channel runoff | 26 to 24 ga galvanized, 0.027 in aluminum | 30 to 50 yr |
| Step flashing | Sloped roof meeting a vertical wall | Sidewall water intrusion | 26 ga galvanized, 0.025 in aluminum | 30 to 60 yr |
| Counter flashing | Top of step flashing at masonry walls | Water above the step flashing wall leg | 26 ga galvanized, 0.025 in aluminum, copper 16 oz | 30 to 60 yr |
| Apron flashing | Downhill side of chimney, dormer, skylight | Headwall runoff onto field shingles | 26 ga galvanized, 0.025 in aluminum | 30 to 50 yr |
| Kickout flashing | Bottom of step flashing run, at eave | Water down behind the siding | 26 ga galvanized, 0.025 in aluminum | 30 to 50 yr |
| Vent pipe flashing | Around plumbing stacks and round penetrations | Water around the pipe | EPDM/aluminum, lead, silicone | 10 to 30 yr |
| Chimney flashing system | Around the full chimney | Water at the chimney perimeter | Mix of step, apron, counter, cricket | 30 to 60 yr |
Sizing chart by flashing type
| Flashing type | Wall/back leg | Roof/front leg | Length | Notes |
|---|---|---|---|---|
| Drip edge (Type D, eave) | 1.5 to 2 in deck flange | 1 to 1.5 in face | 10 ft 6 in stock | Kicked-out lip to gutter |
| Drip edge (Type C, rake) | 1 in deck flange | 1 in face | 10 ft 6 in stock | Sloped edge use only |
| Valley flashing (W) | n/a (center crimp) | n/a (24 in wide) | 10 ft 6 in stock | 24 in wide minimum |
| Step flashing | 4 in | 4 in | 7 in (one per course) | 4 x 4 x 7 standard |
| Counter flashing | 1 in reglet bend, 3 to 5 in face | n/a | 10 ft 6 in stock | Cover step flashing wall leg by 1 to 2 in |
| Apron flashing | 4 in wall leg | 6 in roof leg | Chimney width + 8 in on each side | Continuous, not stepped |
| Kickout flashing | 4 in wall leg | 4 in roof leg + 90-degree kickout | 4 in tall typical | One per wall-roof junction at eave |
| Vent pipe boot | n/a | 4 in base plate radius | n/a | Sized to pipe OD (typically 1.5, 2, 3, 4 in) |
Material comparison
| Material | Spec | Lifespan | Best for | Avoid for |
|---|---|---|---|---|
| Galvanized steel | G-90, 26 ga | 30 to 40 yr | Standard residential, inland, asphalt shingle | Coastal (within 1 mi of saltwater); contact with copper or pressure-treated lumber |
| Galvanized steel | G-60, 28 ga | 15 to 20 yr | Outbuildings, sheds, temp work | Permanent residential install |
| Aluminum | 3003-H14, 0.025 to 0.032 in | 40 to 60 yr | Coastal, standard residential, stucco | Contact with copper, pressure-treated lumber, or concrete |
| Painted aluminum (Kynar 500) | 0.025 to 0.032 in | 40 to 60 yr | Visible installations | Field-cut edges (paint loss) |
| Copper | 16 oz cold-rolled | 80 to 100+ yr | Premium residential, slate, cedar shake | Above painted siding (will stain); contact with aluminum or steel |
| Stainless steel | 304 inland, 316 coastal, 26 ga | 80+ yr | Coastal, premium | Cost-sensitive jobs; field bending without proper brake |
| Lead-coated copper | 16 oz | 80 to 100+ yr | Heritage, no-staining premium | Cost |
| Lead | 2.5 lb per sf | 50 to 100 yr | Vent pipe boots, some flashing details | Restricted in some jurisdictions; environmental rules tightening |
For residential standard work, 26 gauge G-90 galvanized or 0.025 to 0.032 in aluminum is the right answer for everything but vent pipe boots. Coastal and premium jobs jump to 304/316 stainless or 16 oz copper. The math on lifespan vs material cost: a residential roof has roughly 60 to 150 linear feet of total flashing run. Spending an extra $200 to $500 on copper or stainless instead of galvanized adds 30 to 50 years of life to the most leak-prone part of the roof.
Install sequence (5 steps): how flashings layer on a roof
- Step 1: Drip edge at eaves first, before underlayment. Eave drip edge goes on first, nailed every 12 inches into the deck. Then underlayment runs over the deck flange of the drip edge (this is the order specified in IRC R905.2.8.5: drip edge under underlayment at eaves). Drip edge at rakes goes on after underlayment, so the underlayment runs under the rake drip edge flange.
- Step 2: Ice and water shield at vulnerable areas. Ice and water shield runs along eaves (at least 24 inches inside the warm-wall line), in valleys (18 inches each side of the valley centerline minimum), around penetrations (6 to 12 inches all around), and at sidewall junctions (running up the wall 6 inches and onto the deck 24 inches). This is the secondary defense behind every flashing.
- Step 3: Valley flashing or valley underlayment over the deck, under shingles. Open-valley W-metal goes on top of ice and water shield. Closed-cut or woven valleys may use only ice and water shield underneath. Either way, the valley layer is installed before field shingles start.
- Step 4: Field shingles, with step flashing and apron flashing integrated course by course. Starting at the eave, each shingle course goes on. At sidewall transitions, one step flashing piece per course (woven). At downhill sides of chimneys and dormers, apron flashing slips under the shingles directly above it. At every roof penetration (vent pipe, fan), the pipe boot slips under the shingles above and over the shingles below. Each step is the integration moment for one flashing detail.
- Step 5: Counter flashing, ridge, and finish details last. Counter flashing goes on after the field is done, covering all the step flashing wall legs at masonry walls. Ridge vent and ridge cap shingles close the top. Any remaining sealant at counter flashing reglets and pipe boot collars goes on last.
Common failure modes by type
- Drip edge: installed in the wrong order (over the underlayment at the eave instead of under), or nailed too high so it doesn’t kick water into the gutter.
- Valley flashing: nailed in the center of a W-valley (creating leak path), or skipped entirely with shingles laced across without underlayment.
- Step flashing: continuous strip used instead of stepped; no kickout at the bottom; nailed through the wall leg.
- Counter flashing: surface-mounted with sealant only instead of reglet-cut; sealant aged out; not lapping the step flashing wall leg.
- Apron flashing: too short (less than 6-inch roof leg); wall leg not covered by counter flashing.
- Kickout flashing: absent entirely; biggest cause of hidden wall rot on multi-story homes.
- Vent pipe boots: EPDM cracked at the 10 to 15 year mark; not flashed under shingles above and over shingles below.
- Chimney flashing: no cricket on the uphill side of wide chimneys; mortar reglet dried out; counter flashing surface-mounted with caulk.
For diagnosing which one is causing your leak, see our roof leak repair and how to fix a roof leak guides.
Cost
Flashing material cost is a small fraction of total roof cost. On a typical 2,400 sf reroof in 2026, total flashing material runs $400 to $1,200 depending on metal (galvanized or aluminum at the low end, copper at the high end). Labor for flashing is built into the per-square shingle install price; the per-flashing-piece labor cost rarely gets broken out.
- Drip edge: $1.50 to $3.00 per linear foot installed.
- Valley flashing (W-metal): $4 to $8 per linear foot installed.
- Step flashing: $35 to $75 material per chimney side or dormer side.
- Counter flashing: $3 to $6 per linear foot installed (more for reglet cut).
- Apron flashing: $40 to $80 per chimney face.
- Kickout flashing: $25 to $50 per piece, installed.
- Vent pipe boot replacement: $150 to $400 each, including labor and access.
- Full chimney flashing replacement on existing roof: $800 to $2,500.
The cost-to-fail ratio justifies spending more on flashing material than crews typically do. A $40 step flashing pack protects $5,000 to $20,000 of wall framing. A $200 copper counter flashing on a chimney outlasts the next two roofs. Trade the savings, spec the metal up.
Code references
IRC R905.2.8 is the controlling code section for flashing on asphalt shingle roofs. Subsections specify: R905.2.8.2 (valley flashing), R905.2.8.3 (sidewall flashing, requiring step flashing), R905.2.8.4 (drip edge), R905.2.8.5 (kickout flashing required at termination of step flashing runs since the 2018 IRC cycle). The 2024 IRC update tightened drip edge and kickout requirements and added explicit language about counter flashing at masonry walls. NRCA Roofing Manual: Steep-Slope Roofing details the recommended residential flashing standard, which exceeds IRC minimums in most categories.
Frequently asked questions
What is roof flashing made of?
Most residential roof flashing is 26 gauge galvanized steel (G-90 coating) or 0.025 to 0.032 inch aluminum. Premium installations use copper (16 oz) or stainless steel (304 inland, 316 coastal). Vent pipe boots use EPDM rubber over an aluminum or lead base, sometimes silicone or molded plastic.
Where is flashing used on a roof?
At every transition: eaves and rakes (drip edge), valleys (valley flashing), wall junctions (step + counter flashing), downhill sides of chimneys and dormers (apron flashing), bottom of wall junctions at the eave (kickout flashing), roof penetrations (vent pipe boots), and around chimneys (chimney flashing system).
What are the 8 types of roof flashing?
Drip edge, valley flashing, step flashing, counter flashing, apron flashing, kickout flashing, vent pipe flashing, and chimney flashing. Each handles a different transition geometry. About 80% of roof leaks happen at one of these eight, not in the shingle field.
How long does roof flashing last?
Galvanized 30 to 40 years. Aluminum 40 to 60 years. Copper 80 to 100+ years. Stainless 304/316 80+ years. Vent pipe boots are the exception: EPDM boots typically fail at 10 to 15 years even on otherwise healthy roofs.
Do I need to replace flashing when I get a new roof?
Yes for most pieces. Step flashing, drip edge, valley flashing, kickout flashing, and apron flashing should all be replaced during a reroof. Counter flashing on masonry can sometimes be reused if it’s in good condition and the reglet is intact. Vent pipe boots should always be replaced. Most reroof contracts that skip flashing replacement are cutting corners.
Why does flashing leak more than the rest of the roof?
Because flashing is where water has to change direction, get pushed back against gravity, or get sealed around an obstruction. Shingles handle the easy part (water on a flat sloped plane). Flashing handles the hard part. Installation defects, aging sealants, and material corrosion all show up at flashings first.
Bottom line
Roof flashing is the metal that handles every transition on the roof: edges, valleys, walls, penetrations, and chimneys. Eight standard types cover the residential cases. Spec 26 gauge galvanized or 0.025 in aluminum at minimum, copper or stainless for premium. Install in the right order: drip edge at eaves first, then underlayment, then ice and water shield at vulnerable areas, then valley metal, then field shingles with step flashing and apron flashing integrated course by course, then counter flashing and ridge details last. Get the flashing right and the shingles get to do their easy job for 25 to 30 years.