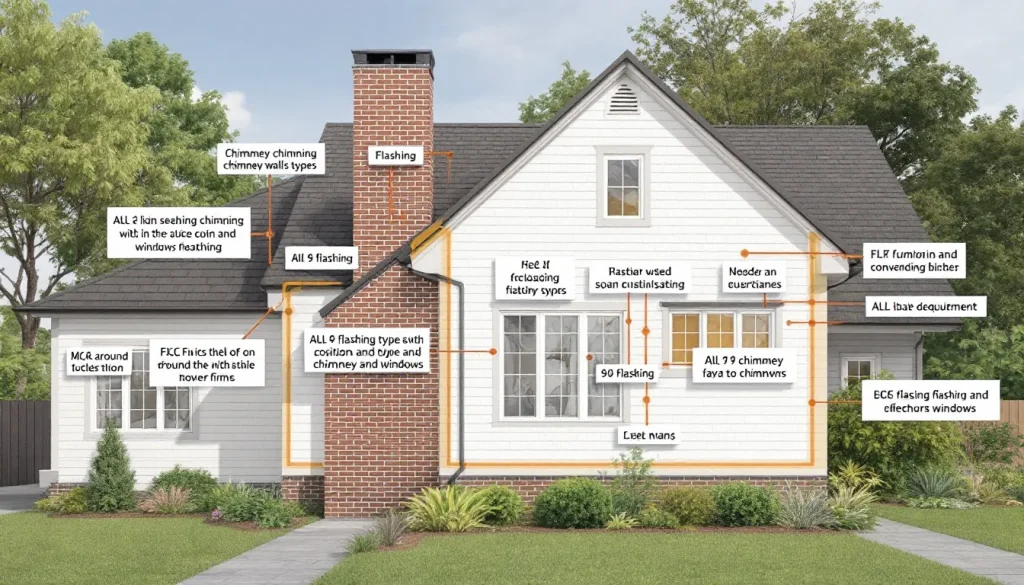
What is flashing on a house is sheet metal (or, in cheap installs, rubberized membrane) that seals the seams where two surfaces meet so water cannot find its way inside. Roofs do not leak in the middle of a shingle field. They leak at transitions: where the roof meets a wall, where a chimney punches through the deck, where a vent pipe pokes out, where a valley channels two slopes together, where a window header butts up against siding. Every one of those transitions gets a piece of bent metal sized and bent for that specific geometry, and that piece of metal is called flashing. On a typical residential house there are nine distinct types of flashing doing nine different jobs. Miss one or install it wrong and you get a leak, often years before the shingles themselves have any business failing.
The short version
- Flashing is sheet metal that seals transitions where two surfaces meet on a house exterior.
- The 9 types: step, counter, valley, drip edge, kickout, apron, vent (pipe boot), chimney, and window/door head flashing.
- Standard step flashing is 4×4-inch bent at 90 degrees. Heavy-snow regions use 5×7-inch.
- Galvanized steel is 24 to 30 gauge. Copper, aluminum, and lead-coated copper are upgrades.
- Apron flashing needs a 6-inch leg minimum up the wall, 4-inch out onto the roof.
- Counter flashing is reglet-mounted into mortar joints, never face-nailed into brick.
- The number-one residential leak source is failed flashing, not failed shingles.
What flashing actually does and why every house needs it
A shingle field by itself is remarkably watertight. Asphalt, metal, tile, slate, any of them, can shed rain on a uniform slope for decades. The trouble starts the moment that uniform slope is interrupted. A chimney bursts up through the deck. A wall rises off the roof at a 90-degree angle. Two roof planes meet in a valley. The roof terminates at an eave or a rake. At every one of those interruptions, water that was happily sliding downhill now has to make a decision: continue down the roof, or follow the new vertical surface back into the house. Flashing forces that decision. It directs water away from the seam and back onto the shingle field, where it can keep moving toward the gutter.
The principle is dead simple but the execution is where most leaks come from. Flashing has to be lapped correctly, sequenced correctly with the shingles and underlayment, sealed at the right edges (and not sealed at others, because water needs an exit), and installed in the right material gauge for the climate and the substrate it touches. Get the sequence wrong and water finds its way underneath the metal instead of being deflected by it. That is why the bulk of residential leaks trace back to flashing, not to the shingle field itself. The shingles get blamed because they are what the homeowner can see. The actual culprit is usually six inches behind a piece of bent metal that was installed in the wrong order or out of the wrong material. For a roof-only treatment of the same topic see our what is flashing on a roof primer; this guide widens the scope to include window and door head flashing as well as the roof penetrations.
The 9 types of flashing on a residential house
Every house has some subset of these nine types depending on its geometry. A simple gable with no chimney and no dormers might only need three or four (drip edge, valley, vent boot, window head). A complex roof with chimneys, dormers, skylights, and a roof-to-wall transition will hit all nine. Here is what each one does and where it goes.
1. Step flashing
Step flashing is the small L-shaped piece of metal woven into the shingle courses along any roof-to-wall transition: a dormer cheek, a roof-to-second-story wall, the sides of a chimney. Each piece is bent at a 90-degree angle and sized so one leg lays on the roof under the next shingle course and the other leg runs up the wall behind the siding. Standard residential step flashing is 4 inches by 4 inches bent into two 2-inch legs, with the leg under the shingle slightly longer than the leg up the wall. Heavy-snow markets and high-end installs step up to 5 inches by 7 inches for more lap area. Material is typically 24 to 26 gauge galvanized steel, 0.019 to 0.024 inch aluminum, or 16-ounce copper on architectural projects. The cardinal rule is that step flashing is woven into the shingle courses one piece per course, never run as a continuous L-channel along the wall. Continuous flashing is faster to install and a guaranteed leak. Our step flashing installation guide walks through the woven sequence shingle by shingle.
2. Counter flashing
Counter flashing is the second layer that sits over the top of step flashing on masonry walls and chimneys. The step flashing handles the roof side. Counter flashing handles the wall side, covering the vertical legs of the step pieces and tucking into a sawn or ground groove in the mortar joint (called a reglet) so water running down the brick or stone is kicked back out onto the step flashing instead of behind it. Counter flashing is never face-nailed into brick. The fastener holes become leaks. It either tucks into a reglet sealed with polyurethane or oil-base sealant, or it gets fabricated as a surface-mount with a hemmed top edge sealed against the masonry. On stucco walls the counter flashing is buried behind the stucco itself. For the detail and the most common installer mistakes see our counter flashing guide.
3. Valley flashing
Valley flashing lines the V where two roof planes meet. The valley is the highest-volume water channel on the roof, so it gets the most aggressive flashing detail. Three install methods exist: open valley with a visible metal pan (24 to 28 inches wide, 24-gauge galvanized or aluminum), closed-cut valley with shingles cut to a chalk line over a hidden metal liner, and woven valley where shingles from both planes interlock without metal underneath. Open metal valleys move water the fastest and shed debris the best. Closed-cut is the most common spec in 2026 production roofing. Woven valleys are largely out of favor because the woven seam traps debris and the lack of metal makes flashing repairs harder when the time comes. Whatever the surface treatment, ice and water shield (a self-adhered bituminous membrane) goes down first, full-width down the centerline of the valley, before any metal. See our valley flashing detail guide for the full layered build.
4. Drip edge
Drip edge is the L-shaped or T-shaped metal that runs along the eaves and the rakes of the roof, tucked under the shingles at the eave and over the underlayment at the rake. It does two jobs: it stops water from wicking back under the shingle edge into the fascia, and it gives the shingles a stiff edge to overhang so the runoff drops cleanly into the gutter instead of running down the fascia board. Most building codes (IRC R905.2.8.5 since 2012) require drip edge on all new asphalt shingle installs. Standard sizes are D-style (3 inches wide with a 1.5-inch hem) for eaves and T-style for rakes. Material is typically 26-gauge galvanized, aluminum, or copper. Drip edge at the eave goes under the ice and water shield. Drip edge at the rake goes over the underlayment. Get that sequence reversed and the rake leaks every storm. Full sequencing in our drip edge installation detail piece, and a higher-level overview in drip edge.
5. Kickout flashing
Kickout flashing is a small angled piece of metal installed at the very bottom of a roof-to-wall transition, where the last course of step flashing terminates above the gutter. Its job is to kick water out away from the wall and into the gutter instead of letting it run down behind the siding. Without a kickout, the bottom corner of the roof-to-wall junction becomes a water funnel pointed directly at the wall sheathing. The result is rotten sheathing, peeling paint, and mold inside the wall cavity, often discovered years later when the siding is pulled. Kickouts are now required by IRC R905.2.8.3 on all asphalt shingle roofs adjacent to siding. Pre-formed kickouts are available from DryFlekt, ProtectoWrap, and the major flashing suppliers; many roofers also bend them on-site from coil stock. The detail and the diagnostic for missing kickouts is in our kickout flashing guide.
6. Apron flashing
Apron flashing (also called front-wall flashing) is the long continuous L-piece that runs along the bottom edge of a chimney, dormer, or any horizontal roof-to-wall transition (as opposed to the up-slope sides, which get step flashing). The horizontal leg runs out onto the roof under the shingle course directly below the chimney. The vertical leg runs up the wall (or chimney face) and gets covered by counter flashing. Minimum dimensions: 6-inch leg up the wall, 4-inch leg out onto the roof for residential, 8 inch by 6 inch for commercial. The corners where the apron meets the step flashing are the highest-failure point on the entire chimney, and they need to be soldered (copper), folded and sealed (galvanized), or wrapped with a self-adhered patch underneath. Our apron flashing install detail covers the corner geometry.
7. Vent pipe flashing
Vent pipe flashing is the cone or boot that seals the gap where a plumbing vent stack or attic ventilator pipe punches through the roof deck. Two construction styles dominate: a lead base with a flexible neoprene collar molded over the pipe (the classic), or an all-plastic ABS base with an EPDM rubber collar (Oatey Master Flash and similar). Lead bases last 50-plus years but the rubber collar typically degrades and cracks at the 10-to-15 year mark, well before the shingles are due. That mismatch is the number-one residential leak source on roofs under 20 years old. Replacement is cheap (the part is $30 to $80) but the labor to do it right means lifting the shingle course above and resequencing the flange under it. See our roof vent pipe boot guide for product comparisons and our vent pipe flashing replacement guide for cost and DIY notes.
8. Chimney flashing
Chimney flashing is a four-part system, not a single piece: apron at the bottom, step flashing up both sides woven into the shingle courses, counter flashing reglet-mounted into the chimney mortar on all four faces, and a cricket (a small framed peak) on the uphill side of any chimney wider than 30 inches per IRC R1003.20. The four parts have to be sequenced correctly, the corners have to be either soldered or hand-bent and sealed, and the counter flashing has to engage into the masonry. A chimney done in three parts instead of four (skipping the cricket) will dam up debris on the uphill side, hold standing water against the brick, and eventually rot the deck behind the chimney. A chimney done in two parts (skipping step flashing entirely and just face-nailing a continuous L-channel to the brick) will leak within a few seasons. The full four-part build is documented in our chimney flashing installation detail piece. The diagnostic for leaks is in chimney flashing leak repair.
9. Window and door head flashing
Window and door head flashing is the L or Z-shaped metal piece installed above every window and door opening on the siding side of the wall (not the interior). The horizontal leg sits on top of the window or door head trim. The vertical leg runs up behind the housewrap and the siding course above. Its job is to catch any water that gets past the siding and drain it back out over the top of the window or door instead of allowing it to soak into the rough opening. Code (IRC R703.4) requires head flashing above every exterior opening that is not under a porch roof or other permanent overhang. Material is typically 0.019-inch aluminum or 26-gauge galvanized, with a 4-inch vertical leg minimum. The single most common mistake is reverse-lapping the housewrap so the wrap runs over the top of the flashing leg instead of under it. That mistake turns the flashing from a deflector into a funnel pointing into the wall cavity.
Material and gauge: what to actually spec
The metal itself matters as much as the geometry. Standard residential flashing in North America is 26-gauge galvanized steel for general use, 24-gauge for chimneys and high-exposure details. Aluminum (0.019 to 0.027 inch) is acceptable for valleys and drip edge but should not touch pressure-treated lumber or copper because of galvanic corrosion. Copper (16-ounce minimum, 20-ounce for chimneys) is the long-life upgrade and is standard on slate, tile, and architectural shingle projects where the underlying roof will outlive a galvanized flashing. Lead-coated copper is used on saltwater coastal exposures and around copper roofing where appearance and longevity both matter. Stainless steel (Type 304 or 316) shows up on commercial and institutional work but rarely on residential.
Gauge matters because flashing has to hold its shape under thermal cycling, snow load, and foot traffic. Thinner gauge dents in the boot print of every roofer who walks the roof and eventually fatigues at the bends. Heavier gauge costs more in material but holds up for the life of the roof. The cheap call is 30-gauge or even lighter on a builder-grade install; the proper call on anything you intend to live with for 25 years is 26-gauge minimum, 24-gauge on chimneys and valleys. Our overview of roof flashing material grades goes deeper on each option.
The most common flashing mistakes (and what they cost)
Five mistakes account for the vast majority of flashing-driven leaks. First, continuous step flashing along a roof-to-wall transition instead of woven pieces, which guarantees a leak at every shingle joint. Second, face-nailed counter flashing on brick chimneys, where every nail hole becomes a slow leak. Third, missing kickout flashing at the bottom of a roof-to-wall transition, which funnels years of runoff into the wall cavity. Fourth, reverse-lapped window head flashing where the housewrap goes over the flashing leg instead of under it, turning the flashing into a funnel. Fifth, vent boot collars that age out 10 years before the shingles, leaving 5 to 10 years of slow ceiling leaks unless they get proactively replaced.
The cost to fix any of these after the fact runs from manageable to brutal depending on how long the leak ran. A failed vent boot caught in the first season is a $200 fix. The same boot leaking for three years (which is typical) means a $200 fix on the roof plus $1,500 to $4,000 of drywall, insulation, and paint repair inside. A missed kickout at a roof-to-wall transition discovered after the wall sheathing has rotted means siding off, sheathing replaced, housewrap redone, and siding back on, which is rarely under $5,000. Compare that to the original install cost of a kickout flashing piece, which is around $25 in material and 10 minutes of labor. For the diagnostic playbook on tracing a leak back to which flashing failed, see our how to fix a roof leak guide and the broader roof flashing repair piece. For the underlayment that sits underneath every flashing detail and provides the second line of defense, see ice and water shield and our ice dam protection membrane code brief.
Bottom line
Flashing is the part of your house that does the actual waterproofing. The shingles, siding, and brick are the part that shed the bulk of the water. The seams between them are where leaks happen, and the seams are sealed by nine distinct pieces of bent metal, each sized and sequenced for its own geometry. When a roof leaks on a house under 20 years old, the cause is almost always one of those nine pieces installed wrong, omitted entirely, or aged out faster than the roof around it. Knowing which one is which makes the difference between a $200 fix and a $5,000 reconstruction.