The water stain on ceiling roof leak you are looking at is almost never directly below the leak entry point. Water travels horizontally along the underside of the roof deck and along framing members (rafters, trusses, joists) for surprising distances before it finds a low spot and drips onto the drywall. A leak entering at a chimney or a roof vent on the south slope can stain a ceiling in the north hallway 15 feet away. The diagnosis sequence is: get into the attic, follow the stain backward up the framing to find the dry-side entry point, then look at the underside of the roof deck on a sunny day for daylight or wet wood. Once you have the entry point, the fix is straightforward: chimney flashing, vent boot, valley, or shingle repair. The ceiling stain itself is cosmetic and easy to seal once the leak is stopped.
The short version
- Water travels along framing before it drops. The ceiling stain is rarely directly below the leak point.
- Diagnosis path: attic inspection, trace the stain backward up the wood grain to the dry-side entry, look for daylight or wet wood on the deck underside.
- Top 6 leak sources: flashing failures (chimney, skylight, vent stack), valleys, ice dams, nail pops, missing or damaged shingles, ridge cap.
- The water test: garden hose at the suspected entry, dry attic, helper inside watching for the drip. Methodical from low to high.
- Repair cost: $300 to $1,500 for most leak fixes. Skylight or chimney flashing typically $500 to $1,500.
- Once leak is stopped, ceiling stain seals with Kilz or BIN primer then matched paint. About $30 to $80 in materials.
What it actually is
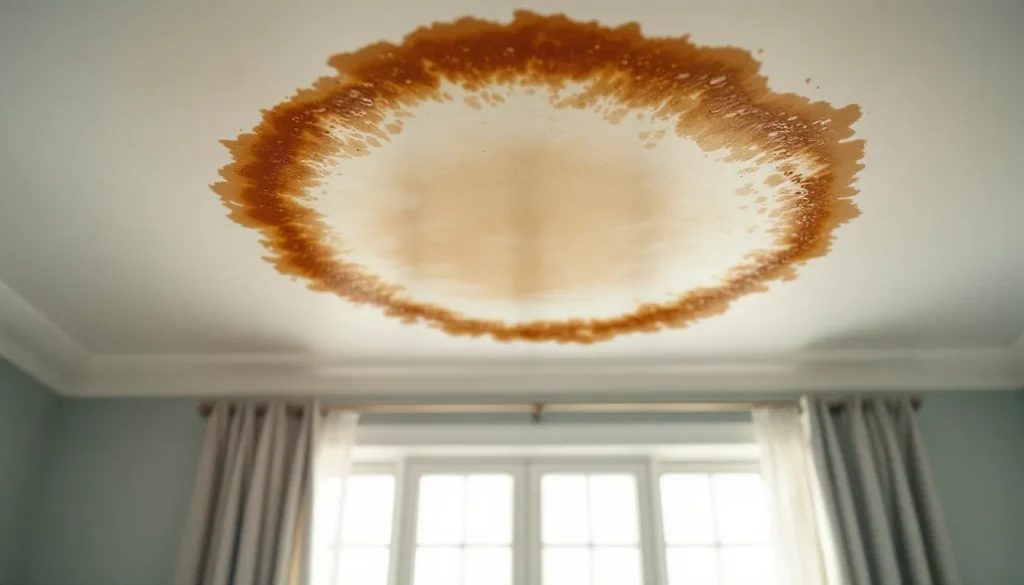
A water stain on a ceiling means water made it through three barriers: the roofing material (shingle, metal, tile), the underlayment, and the roof deck. Then it ran along the underside of the deck, along a rafter, or along an HVAC duct, until it found a path through the insulation and the ceiling drywall. The brown ring on the drywall is the result of minerals and tannins in the water dissolving the drywall paper sizing and pulling brown coloration to the surface as it dries.
The first thing every roofer says when they see a ceiling stain: do not assume the leak is overhead. Water can travel 10, 15, even 20 feet from entry to drip point. The horizontal travel is what makes leak diagnosis hard.
How to tell which case you have
Two stains can look identical but have completely different causes. Sort yours into one of these categories before climbing the ladder.
- Stain appears after a heavy rain, dries between events. Active roof leak. Repair urgent.
- Stain appears after every shower, regardless of weather. Plumbing leak, not roof. Check the bathroom above.
- Stain appears in winter only, never in summer. Ice dam or condensation. See ice dam section below.
- Stain appears in summer only, gets worse with humidity. Condensation from poor attic ventilation. See attic ventilation.
- Stain is large, soft, and growing slowly with no recent rain. Long-running slow leak with accumulated saturation. Possible decking rot. See rotted roof decking.
- Stain appears suddenly during a hard rain, with active dripping. Major leak. Tarp now.
The attic inspection: how to trace the leak backward
The attic is where you find the leak source. The ceiling drywall is where the leak announces itself. They are usually not in the same place.
Equipment
- Bright flashlight (1000+ lumens) or headlamp
- Old clothes (insulation is brutal on skin)
- Knee boards or a piece of plywood to span ceiling joists
- Camera or phone for photos
- Moisture meter (helpful but optional)
The procedure
- Find the stain from below. Note its location precisely (e.g. 4 feet east, 6 feet north of the bathroom door).
- Get into the attic and locate that ceiling spot. Standard ceiling joist spacing is 16 or 24 inches on center. Use a tape measure.
- Look directly above the stain. Is there a wet rafter, wet decking, wet insulation? If yes, great, the leak is close.
- If no obvious wetness directly above, look uphill. Water flows downhill. Trace each rafter and the underside of the deck upward toward the ridge. Look for water trails (darker stained wood), salts (white powdery deposits from dried water), or active dampness.
- Follow the trail to its origin. The origin is the leak entry point, which is on the roof above that exact spot.
- Mark it. Drive a screw through the deck from below at the suspected entry point so you can find it on the roof side. (Optional but helpful.)
If you cannot find any wet wood in the attic, the leak is either too small to be tracking visibly, has dried between events, or is following an HVAC duct or pipe penetration in a way that bypasses the framing you can see. The hose test below will solve most of these.
The sunny day test
On a bright day, get into the attic with the lights off. Wait for your eyes to adjust. Then look at the underside of the roof deck. Any pinhole of daylight is a leak path. Common locations: around nails sticking down through the deck (nail pops, missed shingle nails), around vent stack boots, around chimney flashing, along valleys.
The catch: not every pinhole is a leak. Some are old, sealed at the shingle level, and just transmitting light. But every active leak shows up as a daylight point. Mark each one and check it on the roof side.
The hose test: methodical from low to high
If attic inspection did not reveal the source, the hose test usually does. Two people, one on the roof with the hose, one in the attic with a flashlight.
Critical rule: always start at the bottom
Water runs downhill. If you spray the ridge first, water hits everything below it, and you cannot tell where the entry point is. Start at the bottom edge (eave) and work upward.
The procedure
- Helper in the attic with phone, ready to call. Position with eyes on the suspected leak path.
- Spray the lowest course of shingles for 5 to 10 minutes. Use a garden hose at normal pressure, not a power nozzle. Aim at the slope, not under it.
- Wait for the call. If a drip appears in the attic, you have found the zone. Stop, mark, and isolate further.
- If no drip, move up 2 to 3 feet. Spray that course for 5 to 10 minutes. Repeat.
- Pay extra attention at flashings. Chimney, skylights, vent stacks, valleys, dormers. Most leaks are at flashing transitions, not in the field of shingles.
- Continue methodically up to the ridge. If the leak never showed up under hose test, the leak likely needs wind-driven rain to manifest. That is harder to test.
Most roof leaks are found in the first 30 to 90 minutes of methodical hose testing. The discipline is to actually go slow and work from low to high, instead of randomly spraying everywhere.
The 6 most common roof leak sources, ranked
1. Flashing failures (40% of leaks)
The flashing is the metal trim that transitions between the roof and any vertical surface or penetration. Chimneys, skylights, walls, vent stacks. Flashing fails because caulk dries out, step flashing was installed wrong, or counter-flashing was never installed. The fix depends on the location:
- Chimney leak. Usually step flashing or counter-flashing. See chimney flashing leak repair.
- Skylight leak. Usually the head flashing or curb seal. See skylight leak repair.
- Vent stack leak. Boot seal. See roof vent pipe boot guide.
- Wall flashing. Step or kick-out flashing missing or rusted. See roof flashing repair.
2. Valley leaks (15%)
Valleys are where two slopes meet at a low angle. They concentrate water flow. If the valley liner (metal or peel-and-stick membrane) was poorly installed or has been punctured by a fallen branch, it leaks. Open metal valleys can rust through after 20+ years. Closed (woven shingle) valleys can fail at the seam.
3. Ice dams (10%)
In cold climates, snow melts on a warm roof, runs down to the cold eave, and refreezes. The ice ridge backs up subsequent meltwater, which works its way under the shingles (which are designed to shed water flowing downhill, not pooling against the bottom edge). The water then enters at the eave and shows up as a stain on the ceiling near the exterior wall. Symptoms: stain appears in late winter, near the exterior wall, after periods of snow followed by sun.
4. Missing or damaged shingles (10%)
Wind, hail, falling branches, or simple age can damage individual shingles. The exposed underlayment is water-resistant but not waterproof and will fail under sustained exposure. Look for missing tabs, lifted shingles, or impact dimples. See shingles blowing off roof.
5. Nail pops (10%)
A popped nail creates a tiny entry point at the nail location. Wind-driven rain can enter. Multiple nail pops in a small area can create a localized leak. See nail pops on shingles.
6. Ridge cap failure (5%)
Ridge cap shingles get the most UV and wind (for the full data set, see our the 2026 Severe Weather Roof Damage Report) exposure. They are the first to fail on an aging roof. Sealant strip failure on the ridge lets wind-driven rain enter at the peak, which can stain a ceiling anywhere along the ridge line.
The remaining 10% is split between exotic causes: HVAC condensate drain leak in the attic that mimics a roof leak, gutter overflow soaking the fascia and tracking back to the deck, sidewall siding leak that drops onto the ceiling rather than the wall, or condensation from poor attic ventilation pooling on cold surfaces.
Cost to fix by leak type
| Leak source | Typical repair cost |
|---|---|
| Vent stack boot replacement | $200-450 |
| Step flashing repair at wall or chimney | $400-1,200 |
| Chimney counter-flashing | $600-1,800 |
| Skylight curb reseal | $300-800 |
| Skylight replacement | $1,500-3,500 |
| Valley repair (open metal) | $800-2,500 |
| Valley replacement | $1,500-4,500 |
| Nail pop fix (a few) | $200-500 |
| Missing shingle replacement | $250-600 |
| Ridge cap replacement (full ridge) | $400-1,200 |
| Ice dam mitigation (one-time) | $300-800 steam removal |
| Ice dam prevention (heat cable) | $400-1,500 |
| Decking repair if water-damaged | $500-2,500 per section |
The takeaway: most leak repairs are under $1,500. The expensive case is when the leak ran for months or years and rotted the decking. That can push total cost into the $3,000 to $8,000 range. See roof repair cost guide.
What to do right now if water is actively dripping
- Put a bucket under the drip. Obvious but critical.
- If the ceiling drywall is bulging, puncture it with a screwdriver in the center of the bulge. Counterintuitive, but a controlled hole drains the trapped water into a bucket and prevents the bulge from collapsing all at once across the room. The hole is easy to patch later.
- Move furniture, electronics, and rugs out of the drip zone. Water damage to wood floors and electronics is often worse than the ceiling damage.
- Photograph everything for insurance. Even if you do not end up filing, you want the documentation.
- Call a roofer for emergency tarp if the rain is ongoing. $200 to $600 for a same-day tarp.
- Once rain stops, start the diagnosis path above.
Sealing the ceiling stain after the leak is fixed
Do not paint over a water stain with regular wall paint. The mineral deposits and tannins bleed through, and you will see the stain reappear within weeks. The correct sequence:
- Confirm the leak is stopped. Wait through 2 to 3 heavy rains before touching the ceiling. Verify dry.
- If drywall is sagging or crumbling, cut it out. Replace with a matched patch. Re-tape and mud.
- If drywall is intact and dry, apply stain-blocking primer. Kilz Original (oil-based) or Zinsser BIN (shellac-based) are the standards. Two coats over the stain area.
- Repaint with matched ceiling paint. Match the existing color. Bring a chip to the paint store if needed.
Total materials cost is usually $30 to $80. A pro to do the full ceiling patch and repaint runs $200 to $500 depending on size.
Ice dams: the winter-only leak
If the stain appears only in winter and only after snow accumulation followed by sun, you have an ice dam. The root cause is heat loss from the attic warming the roof. Snow melts on the warm field, refreezes at the cold eave, water backs up.
The short-term fix is steam removal of the ice dam ($300 to $800 emergency call). The medium-term fix is calcium chloride pucks placed in the dam to melt channels through it (DIY, $30 in materials). The long-term fix is two things: improve attic insulation so the roof field stays cold, and improve attic ventilation so any melt that does happen runs off before refreezing. Both are covered in attic ventilation.
When the stain is actually condensation, not a leak
If the stain appears in summer with no rain, or in winter with no snow, the moisture is condensation from the underside of the roof deck. This happens when warm humid air from the house enters the attic, hits the cold underside of the deck, and condenses as water droplets. The droplets eventually saturate insulation and stain the ceiling.
The most common cause: bathroom or kitchen exhaust fans vented into the attic instead of through the roof. Code requires exhaust to vent fully outside. Many older homes never got it right. The fix is rerouting the exhaust ducts through the roof with proper boots. About $200 to $500 per fan.
When to file insurance vs. pay out of pocket
Most roof leak repairs fall below typical homeowners deductibles ($1,000 to $2,500), so they are out of pocket regardless. File a claim (for the full data set, see our the 2026 State of Roofing Insurance report) when:
- The leak is from a covered peril (wind, hail, falling tree, fire).
- The total damage including drywall, flooring, contents, and roof exceeds the deductible by a meaningful margin.
- You have not filed in the past 3 years (carriers non-renew after 2+ claims in 3 years in many states).
Do not file when:
- The leak is from wear and tear (no policy covers this).
- The total damage is below or near the deductible.
- The roof is over 15 years old and the policy pays ACV. See actual cash value roof.
Common mistakes that make it worse
- Assuming the leak is directly above the stain. Almost never is.
- Climbing the roof in wet conditions to look for the leak. Fall risk. Use the attic, not the roof.
- Slathering roof cement on shingles without knowing the source. Hides the leak temporarily, makes the eventual repair harder.
- Painting the stain before fixing the leak. Stain returns. Leak continues.
- Ignoring a small stain for months. Decking rot starts within 30 to 60 days of sustained moisture.
- Filing an insurance claim before getting a roofer’s diagnosis. If the cause is wear and tear, the claim will be denied and now there is a denied claim on your record.
FAQ
How long can a leak run before causing structural damage?
Active leaks rot decking within 60 to 120 days of sustained moisture exposure. Slow leaks can run for a year or more before structural (see our sagging garage roof guide) damage. Rafters take longer than decking. By the time the framing is compromised, repair cost has doubled or tripled.
Why does my ceiling stain look bigger after I dried the leak?
Drying concentrates the mineral and tannin deposits, making the brown ring more visible. The leak is not getting worse. The stain just becomes more visible without the wet sheen masking it.
Can I just put a bucket up there and ignore it?
For one rain event, yes. For ongoing leakage, no. Every day of moisture rots more wood. The cost to fix the leak doubles if you let it run another 90 days.
Will the stain bleed through Kilz if I paint over it?
No, Kilz and BIN are specifically designed to block stain bleed-through. Two coats is the standard for a heavy stain. Regular latex primer will not work; the stain bleeds through.
Should I get the leak fixed before reroof if I am replacing soon?
If the reroof is within 60 days, no. The reroof will fix it. If reroof is 6+ months out, yes, fix the leak now to prevent further damage. The repair money is wasted, but the decking damage you prevent is real.
Bottom line
A ceiling water stain is a symptom. The leak is the disease. Find the entry point through methodical attic inspection and a low-to-high hose test before paying for any repair. Most leaks are flashing failures around chimneys, skylights, vents, or valleys. Most repairs cost $300 to $1,500. The cosmetic ceiling stain is easy once the leak is stopped: stain-blocking primer, then matched paint. The expensive case is a long-running leak that has rotted the decking; see rotted roof decking if there is structural concern. Above all, do not assume the leak is overhead. The water has likely traveled. Trace it in the attic, find the source, then fix the right thing. See also how to fix a roof leak for repair specifics.